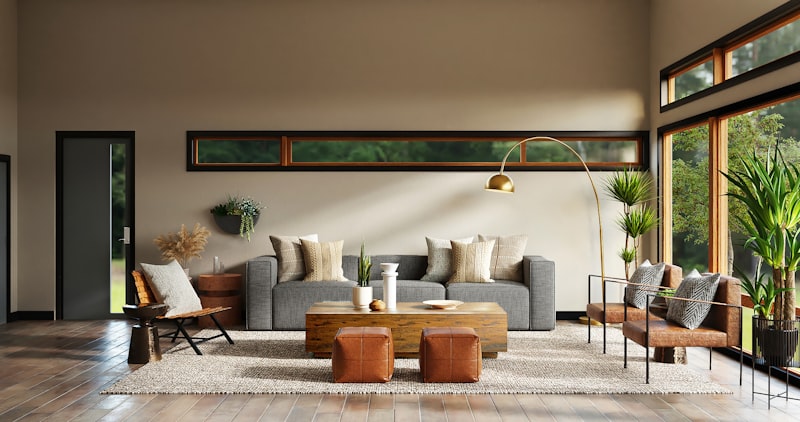
10 Statement Ceiling Ideas That Transform Living Rooms
Why Your Ceiling Deserves as Much Attention as Your Walls
Most homeowners invest heavily in wall color, artwork, lighting fixtures, and furniture—but overlook the fifth wall: the ceiling. Yet a thoughtfully designed ceiling can redefine spatial perception, anchor design intent, and serve as the most unexpected focal point in your living room. In this article, you’ll learn ten proven statement ceiling ideas—each with real-world execution details—including material specifications (like FSC-certified maple for coffered beams), brand-recommended paints (Benjamin Moore’s Ceiling White OC-52 vs. Sherwin-Williams’ High Reflective White SW 7757), installation considerations (minimum ceiling height of 8'6" for recessed coffers), and cost ranges based on 2024 contractor surveys from the National Kitchen & Bath Association (NKBA). You’ll also get actionable advice on pairing treatments with lighting, scale, and architectural context—no vague inspiration boards, just practical, install-ready insights.
Coffered Ceilings: Timeless Structure with Modern Flexibility
Coffered ceilings remain one of the most impactful ways to add architectural gravitas without altering square footage. Unlike ornate Victorian plasterwork, today’s versions use lightweight MDF, solid hardwood, or even PVC-composite panels that simplify installation and reduce structural load. A standard coffer grid begins at 24” x 24”, but designers increasingly opt for asymmetrical layouts—such as 30” x 42” rectangles offset by 6” to create rhythm—or shallow 3.5”-deep recesses for lower-ceiling homes (minimum 8’0” clearance). For example, Armstrong’s Architectural Ceilings line offers pre-finished coffer kits in walnut veneer, 1.25” thick, with integrated LED tape channels along each beam edge.
Material & Finish Considerations
Hardwood options like quarter-sawn white oak (J. Gibson McIlvain Co.) provide warmth and durability but require acclimation (72 hours at 45–55% RH) before installation. MDF is more budget-friendly—averaging $18–$24 per linear foot installed—but must be sealed with two coats of Sherwin-Williams ProClassic Waterbased Acrylic Enamel to prevent swelling in humid climates. For high-moisture zones (e.g., open-plan living rooms adjacent to kitchens), specify moisture-resistant MDF like Columbia Forest Products’ PureBond MR.
The finish plays a decisive role in perceived volume. A matte black stain (Minwax Ebony) on beams against a bright white ceiling plane (Benjamin Moore Chantilly Lace OC-65) creates dramatic contrast and vertical lift. Conversely, matching beam and ceiling colors—say, both in Benjamin Moore Gray Owl OC-52—produces seamless continuity ideal for minimalist spaces under 12’ tall.
- Typical installation timeline: 5–7 days for a 20' x 25' room (including drywall prep, framing, and finishing)
- Average labor cost: $42–$68/hour (per NKBA 2024 regional contractor data)
- Recommended beam projection: 4”–6” for ceilings 9’–10’; up to 8” for rooms ≥11’
- Fire rating requirement: Class A flame spread (ASTM E84) for all exposed wood/MDF above occupied space
Metallic & Reflective Finishes: Light Amplification Done Right
When natural light is limited—or when you want to amplify ambient glow—a reflective ceiling surface delivers measurable luminance gains. Studies from the Illuminating Engineering Society (IES RP-26-22) confirm that ceilings finished with 85%+ reflectance increase usable foot-candles by 22–30% compared to standard flat white (70% reflectance). That means fewer downlights needed—and lower energy bills over time.
Real metallic applications go far beyond foil wallpaper. Modern options include brushed brass ceiling tiles (Armstrong’s MetalWorks collection, 24” x 24”, 0.016” aluminum with satin-nickel plating), copper-clad gypsum panels (USG Sheetrock® Metallic Finish Board), and even custom-milled stainless steel baffles (McGill Manufacturing’s Linear Series, available in 304-grade, 2” deep x 6” wide profiles). These aren’t just decorative—they’re engineered for acoustic control: McGill’s baffles achieve an NRC of 0.75 when spaced 4” apart vertically.
Avoiding the 'Disco Ball' Effect
Overly glossy or poorly oriented metallics cause glare and visual fatigue. The fix? Prioritize directional reflectivity. For example, install horizontal brushed-metal panels perpendicular to primary window light—this diffuses rather than concentrates rays. Or use a matte metallic paint like Rust-Oleum Specialty Metallic Accents in Pewter, applied with a microfiber roller (Mohawk Finishing Products UltraSmooth 3/8”) to minimize stipple and ensure uniform sheen. Always test on a 2’ x 2’ ceiling swatch under both daylight and 2700K LED lighting before full application.
One caveat: avoid metallic finishes in rooms with recessed LED troffers emitting >4000K light—cool-white sources create unflattering blue-green casts on brass and copper. Instead, pair with warm-dim LEDs (like Cree’s TW Series, dimmable from 2700K to 1800K) for cohesive ambiance.
Painted Patterns: Bold Geometry Without Permanent Commitment
Paint remains the most accessible, reversible way to make a ceiling statement. But forget basic stripes—today’s leading designers deploy precise, architecturally scaled motifs. A 2023 Houzz survey found that 68% of homeowners who chose painted ceilings opted for geometric patterns, with chevrons (29%), concentric circles (24%), and radial sunbursts (17%) leading the pack.
Success hinges on proportion and precision. For a radial sunburst centered over a seating area, start with a 36” diameter inner circle (use a trammel arm or laser level + string method), then extend 12 equidistant rays outward to the perimeter—each ray 3.5” wide and tapered to 0.75” at the outer edge. Use painter’s tape rated for multi-day adhesion (FrogTape® Delicate Surface, tested to 21 days on cured latex) and apply base color first (e.g., Sherwin-Williams Sea Salt SW 6204), let dry 24 hours, then tape and paint accent (SW Tricorn Black SW 6258).
Scale matters critically. In a 14’ x 18’ room with 9’ ceilings, a 24”-diameter medallion surrounded by eight 18”-long scallops reads balanced. But in a 22’ x 26’ great room, that same motif feels timid—upsize to 42” diameter with 30” scallops. Always sketch full-scale on kraft paper first and hold it against the ceiling to assess visual weight.
- Measure ceiling diagonals to locate true center—don’t rely on wall intersections, which may be out-of-square
- Use a laser level (Bosch GLL 3-80) to project horizontal reference lines before taping
- Apply pattern paint with a 1/4” nap roller for crisp edges; back-roll within 90 seconds to prevent lap marks
- Allow 72 hours of cure time before installing ceiling fans or pendant lights
Exposed Structural Elements: Honoring Authenticity
In lofts, renovated warehouses, or new-build homes with open-web trusses, exposing structure isn’t just aesthetic—it’s honest architecture. But raw steel or concrete requires thoughtful refinement to avoid industrial sterility. The key is selective articulation: highlight what matters, soften what doesn’t.
For steel joists, hot-dip galvanizing provides corrosion resistance but yields a spangled gray finish that reads cold. A warmer alternative is powder-coating in Benjamin Moore Iron Ore 2124-10—a deep charcoal with subtle brown undertones—applied at 2.5 mil thickness (per AAMA 2605 spec). For wood beams, skip heavy stains. Instead, use Rubio Monocoat Pure 2C in Natural, a hard-wax oil that enhances grain while maintaining breathability and achieving VOC compliance (<10 g/L).
Acoustics can’t be ignored here. Exposed ductwork and joists create echo chambers. Integrate sound-absorbing elements without hiding structure: hang 2’ x 4’ Sonex® Classic acoustical panels (NRC 0.70) suspended 2” below joists using aircraft cable and brushed nickel brackets (McMaster-Carr #99575A21). Or, for a subtler solution, staple Owens Corning 703 fiberglass insulation (1” thick, 3 lb/ft³ density) to the underside of joists before applying a breathable fabric wrap like Guilford of Maine FR701 (Class A fire-rated, 225 gsm).
Lighting integration is non-negotiable. Recessed fixtures in exposed ceilings risk shadowing and uneven wash. Instead, mount adjustable gimbal trims (Halogen Lighting Systems’ HL-ADJ-6IC) directly to joist undersides—positioned 24” from walls and spaced 54” apart on-center for even 3000K illumination across a sofa grouping.
Textured Plaster & Venetian Techniques: Old-World Craft, Modern Control
Venetian plaster isn’t just for Mediterranean villas. When executed with contemporary restraint—thin burnished layers, monochromatic palettes, and machine-troweled consistency—it delivers depth, tactility, and quiet luxury. Unlike traditional lime-based plasters that require weeks of curing, modern acrylic-based versions (like Romabio Classico Limewash or American Clay Earth Plaster) set in 2–4 hours and accept low-VOC topcoats.
Proper substrate prep separates success from cracking. Drywall must be skim-coated with USG Sheetrock® Brand All Purpose Joint Compound, sanded to 120-grit smoothness, and primed with two coats of Sherwin-Williams Laticrete Platinum Primer (low-alkali, pH-stabilized). Then, apply plaster in three thin layers (not one thick coat): first layer at 1/16”, floated with a stainless-steel trowel (Marshalltown 12” x 4”); second layer at 1/32”, burnished at 90° to first; third final layer at 1/64”, polished with a felt pad and water mist.
Color strategy is pivotal. Avoid saturated hues—opt for complex neutrals that shift with light: Benjamin Moore Hale Navy HC-154 (a deep navy with violet undertones) appears almost black at dusk but reveals richness at noon; Sherwin-Williams Dovetail SW 7018 (a warm taupe-gray) gains olive depth in north light and peach warmth in southern exposure.
For texture variation without chaos, combine techniques in zoned areas. Example: a 10’ x 12’ ceiling zone over the fireplace mantel receives hand-rubbed Venetian plaster, while the remaining expanse uses a machine-applied micro-trowel texture (using a 6” notched trowel at 1/8” depth) for subtle rhythm. This layered approach satisfies both focal-point impact and background harmony.
Layered Lighting Integration: Making the Ceiling Work Double Duty
No statement ceiling succeeds without intelligent lighting choreography. A coffered ceiling with no integrated light feels like an unfinished promise; a metallic ceiling with harsh, unshielded sources becomes a glare hazard. The solution lies in layered, purpose-built illumination.
Start with ambient: embed 2700K LED tape (Philips Hue Play Lightstrip, 16.4 ft, IP20-rated) into coffer recesses or behind floating ceiling baffles. Mount at least 2” from the front edge to prevent visible hot spots—test with a cardboard mock-up first. Next, add task lighting: aim adjustable 30W MR16s (EcoSmart LED Spot, 36° beam angle) at artwork or bookshelves from ceiling-mounted tracks (Juniper Lighting’s Rail System, 12V low-voltage, dimmable via Lutron Caséta).
Accent lighting completes the hierarchy. For plaster or painted ceilings, use grazing techniques: position narrow-beam (10°) LEDs (Soraa Radiant GU10, 500 lm, CRI >95) 12” from the ceiling plane, aimed downward to reveal texture depth. In coffered rooms, recess mini-pendants (Schoolhouse Electric’s Hopper Mini, 4.5” shade diameter) into every third coffer to punctuate rhythm without clutter.
Dimming is essential—not just for mood, but for material fidelity. Many metallic and plaster finishes lose dimensionality at full output. Install multi-location dimmers (Lutron Maestro PRO with neutral wire) calibrated to preserve color temperature integrity across 10–100% range. Test all circuits with a lux meter (Extech LT300) to ensure ambient levels hit 30–50 foot-candles over seating zones—enough for reading, gentle enough for relaxation.
Remember: lighting layout must respect ceiling height. In rooms under 9’, avoid pendants deeper than 18”; in 10’+ spaces, drop lengths up to 36” create sculptural presence. Always measure from finished floor to bottom of fixture—account for crown molding (typically 3.5”–6”) and any ceiling medallions (standard 12”–18” diameter) in calculations.
Final Considerations Before You Begin
Before committing to any ceiling treatment, evaluate three non-negotiable factors: structural capacity, HVAC integration, and long-term maintainability. Coffered or dropped ceilings reduce headroom—verify minimum clearances for smoke detectors (12” minimum from ceiling plane per NFPA 72), sprinkler heads (18” minimum), and ceiling fans (7’0” minimum above floor per UL 507). If ductwork runs through the ceiling cavity, coordinate with your HVAC contractor early: flexible ducts compress under framing loads, and rigid sheet metal requires precise cutouts.
Maintenance varies widely. Painted patterns need touch-ups every 3–5 years in high-traffic homes; Venetian plaster, once sealed, lasts 10–15 years with only occasional wax reapplication (every 24 months using Rubio Monocoat Maintenance Oil). Metallic tiles require quarterly dusting with microfiber (Swiffer Sweeper Duster Refills) but resist fingerprints better than polished chrome.
Lastly, consider resale impact. A 2024 Zillow Observed Home Value Report shows homes with professionally installed statement ceilings (coffered, metallic, or textured) sold 4.2% faster than comparable listings—and commanded a 2.1% premium in urban markets where design differentiation matters most. But avoid overly personalized motifs (e.g., large-scale murals or neon inlays) unless you plan to stay long-term. Timeless execution—clean lines, restrained color, quality materials—delivers both joy now and value later.
Your ceiling isn’t filler. It’s the capstone—the silent curator of scale, light, and intention. Whether you choose the quiet elegance of a burnished plaster field or the confident geometry of recessed coffers, treat it with the same rigor you apply to flooring selection or sofa upholstery. Measure twice. Source responsibly. Light deliberately. And remember: the most memorable living rooms don’t just surround you—they rise to meet you.
More Articles
 Kitchen Essentials 2026: Smart Layouts & Must-Haves
 Small Living Room Layouts That Actually Work
 7 Costly Outdoor Living Mistakes (2026) & Fixes
 Studio Apartment Room Dividers for Privacy in 2026
 Flawless Interior Walls: Step-by-Step Guide
 Small Living Room Storage Ideas for 2026
 Minimalist Home Office Ideas for Small Spaces in 2026
 How to Layer Rugs in a Living Room
 2026 DIY Home Ideas to Save Money & Boost Value
 Living Room Shelf Styling: Display Done Right