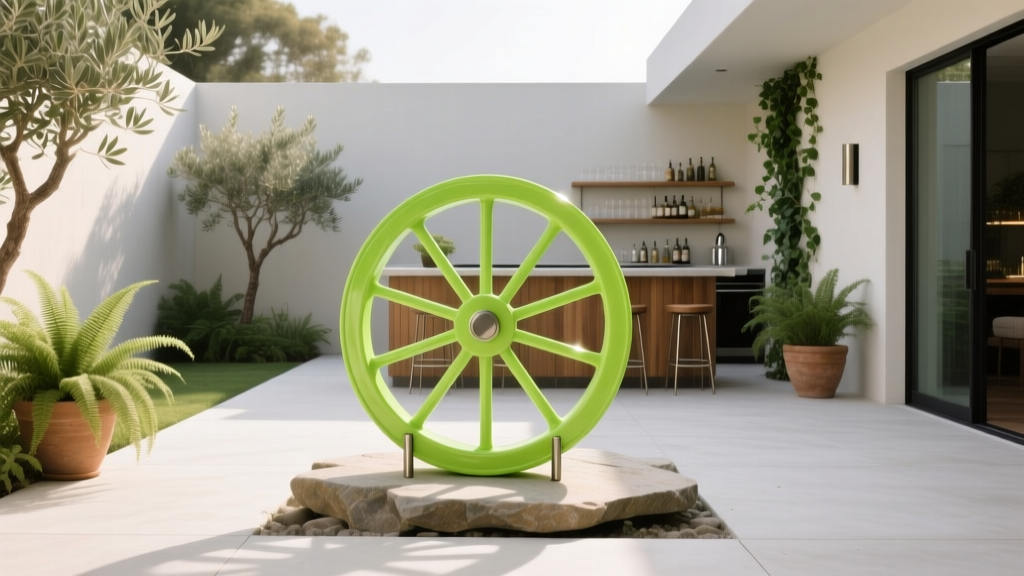
Best Outdoor Bar Lime Wheel Display - The Decor Mag
A great outdoor bar isn’t only about the bottles, glassware, or that perfect patio cocktail recipe—it’s about the experience. When friends gather on the deck or around the pool, small design details make everything feel intentional and elevated. One of the easiest upgrades with a surprisingly big impact is a lime wheel display: a fresh, colorful garnish station that instantly signals “this is a real outdoor entertaining setup.”
Beyond looking beautiful, a well-designed lime wheel display is practical. It keeps garnishes clean, accessible, and protected from heat, bugs, and wind—three realities of outdoor living that can turn a charming moment into a sticky scramble. Get the display right, and you’ll streamline hosting, reduce waste, and keep your patio bar looking magazine-worthy from golden hour to last call.
This guide covers the best outdoor bar lime wheel display options—smart containers, materials that hold up in sun and moisture, layout ideas for patios and outdoor kitchens, and plant-forward styling that complements your landscaping. Whether you’re working with a compact balcony bar cart or a full outdoor kitchen, you’ll find a design approach that fits your space, climate, and budget.
Why a Lime Wheel Display Belongs in Every Outdoor Bar Setup
In outdoor design, the best features serve multiple purposes: function, beauty, and durability. A lime wheel display checks all three.
- Visual impact: Fresh lime wheels add bright color and a “resort patio” vibe, especially against wood, stone, or stainless steel outdoor kitchen finishes.
- Faster hosting: Guests can garnish their drinks without asking for a knife or digging through the fridge.
- Better hygiene outdoors: Covered containers and dedicated tongs prevent cross-contamination (and keep insects out).
- Less waste: When limes are presented neatly and chilled, they stay fresher longer—especially in warm climates.
Best Outdoor Bar Lime Wheel Display Types (What Works Outdoors)
1) Covered Garnish Caddies (Best All-Around for Patios)
Think of these as the outdoor bar equivalent of a well-organized prep station. Look for a lidded garnish tray with removable compartments.
- Best materials: BPA-free Tritan plastic, stainless steel inserts, or polycarbonate (restaurant-grade).
- Why it works outdoors: Lids help with bugs and sun exposure; compartments keep lime wheels separate from lemons, oranges, cherries, or herbs.
- Pro tip: Choose a model that can sit over a shallow ice bed or nest into a larger tray to keep garnishes cool.
Budget range: $20–$60 for home-grade; $60–$150 for commercial-grade.
2) Glass Cloche or Dome Displays (Best for Styled Entertaining)
If your outdoor bar is part of a curated patio design—think lounge seating, layered lighting, and a cohesive color palette—a cloche-style lime wheel display looks elevated and intentional.
- Best materials: Thick glass dome with a heavy base, or acrylic dome for high-wind/pool areas.
- Design bonus: It reads like a centerpiece on a bar cart or outdoor dining table.
- Outdoor reality check: Glass can heat up in direct sun; keep it shaded and refresh limes more often.
Budget range: $25–$90.
3) Rimmed Serving Trays with Ice Bowl Inserts (Best for Hot Climates)
In high heat or full-sun patios, chilling is everything. A rimmed tray paired with a nested bowl or insert keeps lime wheels cold and crisp.
- Best materials: Powder-coated aluminum tray, marine-grade stainless steel, or teak with a sealed finish; stainless or insulated bowl insert.
- How to set it up: Fill the base tray with ice, set the garnish bowl on top, and keep a small towel nearby for condensation.
- Pairs well with: Outdoor kitchen countertops, poolside bars, and summer grilling stations.
Budget range: $30–$120.
4) Wall-Mounted or Rail-Mounted Garnish Shelf (Best for Small Patios & Balconies)
Tight on counter space? Add a slim garnish shelf near your outdoor bar or grill. It’s a space-saving move that feels custom.
- Best materials: Stainless steel, sealed hardwood (teak/ipe), or powder-coated metal.
- Placement: Mount near the drink-making zone but out of direct sun—ideally under a pergola, awning, or umbrella edge.
- Safety tip: Avoid glass here if you’re mounting on railings or near a pool.
Budget range: $40–$200 (DIY-friendly depending on materials).
Designing the Lime Wheel Station: Layouts That Feel Effortless
Your lime wheel display should live where guests naturally pause—near the ice, glassware, and mixers. The goal is a smooth “grab, pour, garnish” flow.
Ideal Outdoor Bar Layout (The 3-Zone Method)
- Cold Zone: Cooler/mini-fridge + ice bucket. Keep limes and simple syrup nearby.
- Build Zone: Cutting board, shaker, mixing glass, and spirits. This is your work surface.
- Finish Zone: Lime wheel display, herb sprigs, rimming salt/sugar, and napkins.
Where to Place the Lime Wheel Display
- Under cover: Pergola, pavilion, umbrella, or outdoor kitchen roof extension.
- Out of wind tunnels: Avoid corners where wind whips across the patio (lids help, but placement matters).
- Near a trash/recycling point: A small, lidded bin keeps the bar tidy.
Materials That Hold Up Outdoors (And Still Look Good)
Outdoor entertaining accessories should match the durability of your patio furniture and landscaping choices.
Best Materials for Outdoor Lime Displays
- Stainless steel (304 or marine-grade 316): Excellent for humid, coastal, and poolside environments.
- Tritan or polycarbonate: Clear, shatter-resistant, and great for families or pool areas.
- Teak (sealed): Warm, high-end look that complements outdoor bar cabinetry and lounge furniture.
- Powder-coated aluminum: Lightweight and weather-friendly; choose matte finishes for a modern patio style.
What to Avoid Outdoors
- Untreated wood: Warps and stains quickly with citrus moisture.
- Thin glass: Risky in high-traffic patio zones and near pools.
- Low-grade plastics: Can yellow in UV exposure and absorb odors.
Styling Your Lime Wheel Display to Match Your Outdoor Living Space
The best outdoor design feels cohesive from the landscaping to the tabletop. Use your lime wheel display to reinforce your patio’s style—coastal, modern, Mediterranean, desert, or cottage garden.
Easy Styling Ideas
- Herb accents: Add rosemary sprigs, mint tops, or Thai basil in a second compartment for a lush “garden-to-glass” vibe.
- Citrus palette: Mix lime wheels with lemon and orange slices for a sunlit, summery look.
- Textural base: Set the display on a teak board or stone tray to tie into outdoor kitchen materials.
- Lighting: Place near warm LED under-counter lighting or a rechargeable table lamp to highlight color at night.
Plant Suggestions: Grow a Garnish Garden Near the Bar
Nothing upgrades patio living like stepping outside and clipping fresh herbs. A small garnish garden also makes your outdoor bar feel integrated into the landscape design.
Best Plants for an Outdoor Bar Garnish Zone
- Mint (in containers): Vigorous grower—keep it potted so it doesn’t take over garden beds.
- Rosemary: Drought-tolerant, architectural, and aromatic; great near a grill or outdoor kitchen.
- Thyme: Low-growing and hardy; works well as a border plant in raised beds.
- Basil (seasonal): Loves warmth; pinch often for bushier growth.
- Lemongrass (warm climates): Adds height and movement, ideal for tropical patio styling.
- Citrus trees (containers in many regions): Dwarf lime or lemon in pots near a sunny wall; move indoors in cold winters.
Placement Tips for a Garnish Garden
- Keep it close: 5–15 feet from the bar is ideal—easy access without crowding guests.
- Use raised planters: Cleaner, more modern, and easier on your back.
- Add drip irrigation: Especially helpful for summer hosting season when you’re busy.
Budget range: $30–$150 for a simple herb setup; $150–$600 for raised planters + irrigation; $80–$300 for a potted dwarf citrus (varies by size/region).
Climate & Maintenance: Keeping Limes Fresh Outdoors
Outdoor kitchens and patio bars are exposed to real conditions—heat, humidity, pollen, and insects. Design your lime wheel display to handle your local climate.
Hot & Sunny Climates
- Use an insulated container or set the garnish tray over ice.
- Keep the station shaded with an umbrella, pergola slats, or a bar overhang.
- Prep smaller batches and refresh every 60–90 minutes during peak heat.
Humid, Coastal, or Poolside Areas
- Choose stainless steel (304/316) to prevent corrosion.
- Rinse and dry nightly—citrus and salt air can be tough on finishes.
- Avoid porous wood unless it’s properly sealed and maintained.
Cooler Seasons & Year-Round Outdoor Living
- Switch to a “citrus + spice” garnish set: lime wheels, orange slices, cranberries, cinnamon sticks.
- Use lidded containers to protect from falling leaves and evening moisture.
- Pair with patio heaters or a fire pit and keep the garnish station closer to the warm zone for comfortable hosting.
Common Mistakes to Avoid
- Leaving limes uncovered: Bugs and debris are inevitable outdoors. A lid is non-negotiable for a clean outdoor bar setup.
- Skipping tongs: Hands-in-the-tray is a fast way to make guests uncomfortable. Keep small stainless or bamboo tongs at the station.
- Putting the display in direct sun: Heat dulls color, dries slices, and shortens freshness.
- Overcrowding the bar top: A lime wheel display should support flow, not block it. Keep the finish zone tight and tidy.
- Using the wrong cutting surface: Citrus juices can stain; use a non-porous cutting board (HDPE or sealed composite) for outdoor prep.
- Forgetting drainage: Ice melt happens. Use a tray with a lip or keep a small absorbent bar mat under the display.
Quick Shopping & Setup Checklist (With Budget Ranges)
- Lidded garnish caddy: $20–$150
- Small bar tongs (1–2): $6–$20
- Rimmed tray or bar mat: $10–$60
- Insulated ice bucket or bowl insert: $20–$120
- Outdoor-safe cutting board (HDPE/composite): $10–$40
- Optional upgrade—bar cart (powder-coated aluminum or teak): $120–$600+
FAQ: Outdoor Bar Lime Wheel Displays
How far in advance can I slice limes for an outdoor party?
For best freshness and color, slice limes 2–4 hours ahead and refrigerate in a sealed container. Move them to your outdoor lime wheel display right before guests arrive, ideally over ice or in a chilled insert.
What’s the best way to keep lime wheels from drying out outside?
Use a lidded container, keep the display in shade, and set it over ice in hot weather. Smaller batches refreshed during the event look better than over-prepping.
Is glass or plastic better for outdoor garnish displays?
For most patios, Tritan/polycarbonate is the safest and most practical—especially near pools or on bar carts. Glass looks elevated for covered patios, but choose thicker pieces and keep them out of high-traffic zones.
How do I keep bugs away from my outdoor bar garnishes?
A tight-fitting lid is the biggest help. Also consider placing the garnish station near a fan (light airflow discourages insects), keeping surfaces clean, and avoiding sugary spills that attract pests.
What other garnishes pair well with a lime wheel display?
Add lemon wheels, orange slices, jalapeño coins, cucumber ribbons, mint, rosemary, and cocktail cherries. If you entertain year-round, rotate seasonally with cranberries, pomegranate arils, or cinnamon sticks.
Actionable Next Steps for a Better Patio Bar
To build the best outdoor bar lime wheel display, start with your entertaining style and your climate. Choose a lidded, outdoor-friendly container, place it in the finish zone near glassware, and keep it shaded. Add small upgrades—tongs, a rimmed tray, and a garnish garden planter—and your patio bar will feel more like a true outdoor living destination.
- Measure your bar top or bar cart surface and pick a lidded garnish caddy that fits without crowding.
- Set up the 3-zone layout (cold/build/finish) for smoother hosting.
- Add one raised planter of mint and rosemary near the bar for a fresh, landscaped look.
- Test your setup during a weekend afternoon to see how sun and wind affect placement.
Ready for more outdoor living upgrades—from patio furniture layouts to outdoor kitchen design and landscaping ideas? Explore more inspiration and practical guides on thedecormag.com.
More Articles
 How to Design a Drought-Tolerant Landscape - The Decor Mag
 Poolside Design and Decor Ideas - The Decor Mag
 How to Create a Bat Friendly Garden - The Decor Mag
 Best Outdoor Rocking Chair Picks - The Decor Mag
 How to Design a Moonlight Garden - The Decor Mag
 How to Design a Rooftop Terrace - The Decor Mag
 Outdoor Living Essentials on a Budget: Smart, Stylish, and Sustainable Solutions
 Outdoor Refrigerator and Ice Maker Setup - The Decor Mag
 DIY Summer Porch Makeover: Budget Refresh Under $100
 Best Outdoor Bench Options for Entryways - The Decor Mag