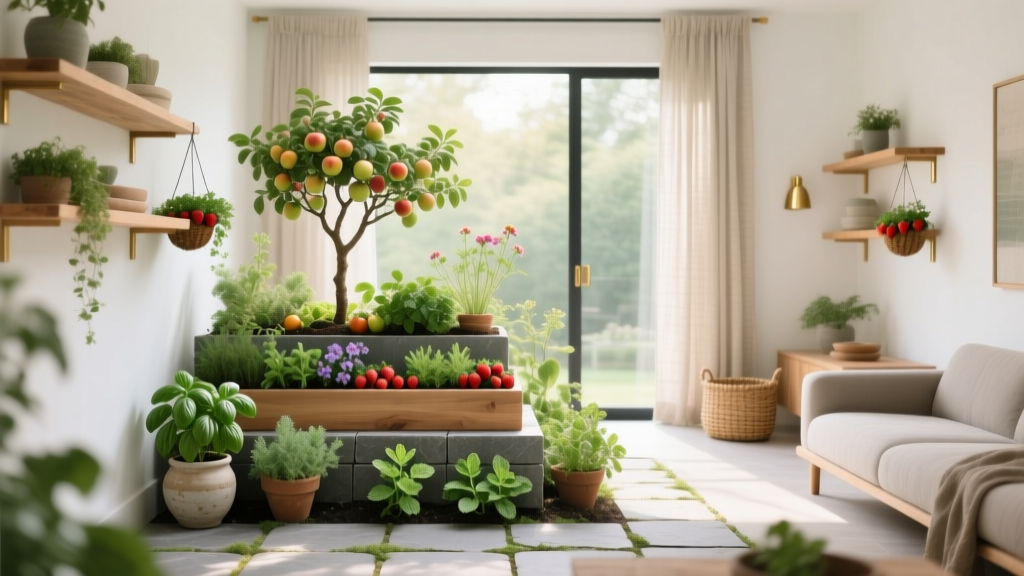
How to Design a Food Forest - The Decor Mag
A great outdoor living space does more than look beautiful—it invites you outside, feeds your senses, and supports the way you actually live. A food forest does all of that at once. Imagine stepping off your patio to pick blueberries for breakfast, snipping herbs for dinner, or enjoying shade under a fruit tree while friends gather around the fire pit. This is landscaping that works as hard as it relaxes you.
Food forests are inspired by natural woodland ecosystems, designed with layers of edible plants that cooperate rather than compete. The result is a yard that feels lush, private, and resort-like—yet can be surprisingly low-maintenance once established. For homeowners who want a more sustainable garden, more privacy, and a more rewarding backyard, a food forest is a smart upgrade that enhances patio living year-round.
Whether you’re working with a compact suburban lot, a side yard, or a generous backyard, you can design a food forest that fits your space, your style, and your climate—without turning your whole property into a farm.
What a Food Forest Is (and Why It’s Perfect for Outdoor Living)
A food forest is a type of edible landscaping that mimics a forest structure. Instead of a single garden bed or a row of fruit trees, it blends productive plants into a layered landscape that also functions as an outdoor design feature—framing views, creating shade, softening hardscape edges, and improving privacy around decks and patios.
The classic food forest layers
- Canopy layer: Larger fruit or nut trees (in small yards, use dwarf varieties)
- Understory layer: Smaller fruit trees or large shrubs
- Shrub layer: Berries and flowering edible shrubs
- Herb layer: Culinary herbs, pollinator plants, medicinal herbs
- Groundcover layer: Living mulch, erosion control, weed suppression
- Root layer: Edible roots and bulbs
- Vine layer: Vertical edibles on trellises, pergolas, fences
Design-wise, this layering creates depth and softness—exactly what many patios and outdoor rooms need to feel cozy and complete.
Start with a Site Plan: Sun, Water, Soil, and Lifestyle
The best food forest designs begin the same way professional landscape design does: with how you use the space. Your outdoor dining area, grilling station, lounge seating, and play zones should guide where the edible plantings go—so the forest supports your lifestyle instead of complicating it.
Step 1: Map the sun and shade
- Full sun (6–8+ hours): Most fruit trees, berries, grapes, herbs like rosemary and thyme
- Partial sun (4–6 hours): Currants, gooseberries, many leafy greens, some herbs
- Shade (under mature trees): Mint (in containers), woodland strawberries, sorrel
Step 2: Watch drainage and water flow
Walk your yard during a rainstorm or right after. Note where water collects and where it runs off. In many landscapes, the food forest is most successful when it works with water instead of fighting it.
- Wet spots: Consider a rain garden edge with edible-tolerant plants like elderberry (in suitable climates)
- Dry slopes: Use swales (shallow, level trenches) and deep mulch to slow water and prevent erosion
- Downspouts: Redirect into a mulch basin (not directly at a foundation) to hydrate trees
Step 3: Check soil basics
- Do a soil test (pH, organic matter, basic nutrients). Budget: $20–$60.
- Aim for a mulched, organic-rich soil surface—food forests thrive with fungal, forest-like soil biology.
- If your soil is heavy clay, build a wide mulched area and add compost annually rather than trying to “fix” it overnight.
Design the Layout Like an Outdoor Room (Not a Vegetable Plot)
Homeowners love the idea of edible landscaping, but the magic happens when it feels intentional—like a designed garden, not a collection of plants. Treat your food forest as a series of outdoor “rooms” that connect to patios, paths, and seating.
Three layout approaches that look polished
1) The patio-edge “soft wall”
Plant a layered border 6–12 feet deep along one side of your patio to add privacy, fragrance, and seasonal color.
- Back row: Dwarf fruit trees spaced for airflow
- Mid-layer: Blueberries or raspberries (with trellis control)
- Front edge: Herbs and flowering groundcovers
2) The side-yard edible passage
Turn a narrow side yard into a productive, beautiful walkway.
- Use stepping stones or decomposed granite paths for a clean, modern look.
- Espalier fruit trees along a fence to keep growth flat and elegant.
- Add a slim bench or bistro set as a “garden pause.”
3) The backyard grove + lounge zone
Create a small “grove” of 2–5 fruit trees with a mulched understory and a seating circle nearby. It feels like a destination—ideal for year-round outdoor living.
- Place a gravel pad with lounge chairs under light canopy shade.
- Add a fire pit or chiminea for shoulder-season comfort.
- Use solar path lights to guide evening access for harvesting.
Plant Selection: Reliable Food Forest Plants (by Layer)
Choose plants that match your climate zone, chill hours, and summer heat. When in doubt, start with a smaller plant palette and expand over time.
Canopy / small canopy trees (choose dwarf or semi-dwarf for most yards)
- Apple (great for many regions; look for disease-resistant cultivars)
- Pear (often tough and productive; some need pollination partners)
- Plum (excellent spring bloom and fruit; prune for airflow)
- Peach (best in climates with lower disease pressure; requires maintenance)
- Fig (warm climates; can be trained as a shrub in borderline zones)
- Citrus (warm climates or containers in colder regions)
Understory / small trees + large shrubs
- Serviceberry (beautiful, landscape-friendly edible fruit)
- Mulberry (productive; pick a variety suited for your space and manage size)
- Elderberry (great in many regions; prefers moisture; cook berries before eating)
Shrub layer (high impact, easy wins)
- Blueberries (also gorgeous ornamental shrubs; need acidic soil)
- Raspberries/blackberries (productive; give them boundaries and a trellis)
- Currants/gooseberries (cooler climates; handle partial shade well)
Herb layer (fragrance + pollinators + patio cooking)
- Rosemary (mild climates; container-friendly elsewhere)
- Thyme (great between stepping stones)
- Sage (tough, drought-tolerant)
- Chives (edible blooms, pest confusion)
- Lemon balm (use in containers; spreads)
Groundcovers (living mulch that looks intentional)
- Strawberries (edible and charming; great at path edges)
- Creeping thyme (aromatic, durable)
- White clover (nitrogen fixer; great in informal zones)
Roots + vines (small space boosters)
- Garlic and onions (excellent around fruit trees)
- Sunchokes (vigorous; place where spread is okay)
- Grapes on a pergola (shade + fruit; dramatic patio feature)
- Hardy kiwi (vigorous vine; needs strong support and pruning)
Materials and Hardscape: Make It Feel Like a Designed Landscape
Food forests shine when they’re paired with durable, good-looking hardscape. Think pathways, edging, and seating that make harvesting easy and your yard feel finished.
Path materials that work with edible landscaping
- Decomposed granite: Natural look, great drainage, easy to refresh. Budget: $3–$8/sq ft installed.
- Gravel (pea or 3/8"): Affordable and permeable. Use stabilizing grid for a cleaner patio-adjacent look. Budget: $2–$7/sq ft installed.
- Natural stone stepping stones: Premium feel, perfect through mulched beds. Budget: $8–$20/sq ft installed.
- Pavers: Best for dining zones and grill areas near the food forest. Budget: $12–$30/sq ft installed.
Mulch and edging recommendations
- Arborist wood chips: Ideal for food forests—feeds soil and retains moisture. Often free to $50 per load locally.
- Compost top-dress: Apply 1–2 inches annually around plants (keep away from trunks).
- Edging: Steel edging for modern landscapes; natural stone for cottage-style. Budget: $3–$12/linear ft depending on material and install.
Outdoor Furniture and Features That Pair Beautifully with a Food Forest
A food forest isn’t just for harvesting—it’s a backdrop for everyday patio living. Choose furniture and features that handle shade, fallen petals, and seasonal use.
Furniture picks that work in edible landscapes
- Dining set: Powder-coated aluminum or teak for durability and easy cleanup.
- Lounge seating: All-weather resin wicker (high-quality) or aluminum frames with quick-dry cushions.
- Bench seating: Place a bench along a main path for a “pick-and-rest” spot—cedar and teak age beautifully outdoors.
- Storage: A deck box for gloves, harvest baskets, pruners, and string ties keeps the garden functional.
Design features that elevate year-round outdoor living
- Pergola with vines: Grapes for shade; wisteria is gorgeous but not edible—choose based on goals.
- Low-voltage lighting: Path lights and uplights for small trees make the landscape glow in winter.
- Water source: A frost-proof hose bib or a discreet hose reel makes maintenance easy.
- Compost area: Hide it behind shrubs with a simple screen fence.
Climate and Maintenance: Design for Your Region (and Your Schedule)
Food forests become easier over time, but the first 1–3 years require attention. Plan for establishment, then enjoy the payoff.
Climate-smart design considerations
- Hot, dry climates: Prioritize drought-tolerant trees (fig, pomegranate where suitable), heavy mulch, and drip irrigation. Add afternoon shade with canopy placement.
- Humid climates: Choose disease-resistant fruit varieties, space plants for airflow, and avoid wetting leaves with overhead watering.
- Cold climates: Pick hardy varieties, protect young trees from winter sunscald, and design windbreaks with evergreen hedging (non-edible is fine if it improves comfort).
- Coastal zones: Salt spray and wind demand tough choices—consider hardy shrubs, sheltered courtyards, and wind screens.
Seasonal maintenance rhythm (realistic and doable)
- Spring: Compost top-dress, refresh mulch, prune as needed, check irrigation, plant herbs.
- Summer: Deep watering, harvest, light pruning, keep pathways clear for outdoor entertaining.
- Fall: Major planting season in many regions, leaf mulch, protect young trees, add bulbs/garlic.
- Winter: Structural pruning (in many climates), tool maintenance, plan additions, enjoy evergreen structure and lighting.
Budget Ranges: What a Food Forest Costs
Your budget depends on plant size, irrigation, and how much hardscape you add for patio living.
- Starter (DIY, small area): $300–$1,200
- 1–3 young fruit trees, a few berry shrubs, herbs, mulch, basic drip kit
- Mid-range (designed beds + paths): $1,500–$6,000
- 5–12 shrubs/trees, steel or stone edging, decomposed granite path, upgraded irrigation
- Outdoor-living upgrade (patio + lighting + structure): $7,000–$25,000+
- Paver patio expansion, pergola, lighting, seating, multiple trees, professional installation
Common Mistakes to Avoid
- Planting too close together: It looks lush for a year, then becomes a pruning headache. Give fruit trees room and keep airflow in mind.
- Skipping a path: If you can’t comfortably walk in to harvest, you won’t. Build access from the start.
- Choosing plants that don’t match your climate: A beautiful catalog variety can fail fast without the right chill hours or heat tolerance.
- Ignoring maintenance reality: Brambles and vines are productive but need boundaries, support, and seasonal pruning.
- Mulching incorrectly: Mulch volcanoes around trunks can rot bark. Keep mulch a few inches away from stems and trunks.
- Forgetting about patio mess: Place high-drop fruits (like mulberry) away from paving, seating, and pools to avoid staining.
FAQ: Designing a Food Forest at Home
How much space do I need for a food forest?
You can start with as little as a 6–10 foot deep border along a fence or patio edge. A “micro food forest” can be a single dwarf tree surrounded by berries, herbs, and strawberries.
What are the easiest plants for beginners?
Blueberries (with the right soil), raspberries (with a trellis), herbs like thyme and chives, and disease-resistant apple varieties are reliable starters. Choose plants recommended by local nurseries for your zone.
Do I need raised beds?
Not necessarily. Food forests typically use mulched planting zones rather than traditional raised beds. Raised planters can be great near patios for herbs and greens, especially if you want a cleaner, more modern outdoor design.
How do I keep it from looking messy?
Use clear edges, repeat plant groupings, and include pathways. A defined border (steel edging or stone) and a consistent mulch layer instantly makes edible landscaping look intentional.
Can I design a food forest around an existing patio?
Yes—patio living and food forests pair beautifully. Start with a layered planting bed along one or two patio edges, keep fruit-drop plants away from dining zones, and add lighting so it feels inviting at night.
Should I install irrigation?
For most homeowners, drip irrigation is the difference between a thriving food forest and a stressful one—especially during summer heat. It’s efficient, discreet, and easy to expand as you plant more layers.
Next Steps: Build Your Food Forest in a Weekend (and Grow It for Years)
Pick one zone of your yard—often a fence line, the edge of a patio, or a side yard—and design it as a layered, edible border with a clear path. Start small: one dwarf fruit tree, two berry shrubs, a handful of herbs, and a generous layer of wood-chip mulch. Add drip irrigation if your climate demands it, then expand the layers season by season. By next year, you’ll be harvesting more, watering less, and enjoying a backyard that feels like a private garden retreat.
For more outdoor design ideas, patio living inspiration, and landscaping guides that make your yard feel like your favorite place to be, explore more articles on thedecormag.com.
More Articles
 How to Design a Rain Garden - The Decor Mag
 Best Outdoor Serving Cart Options - The Decor Mag
 Outdoor Kitchen Warming Drawer Install - The Decor Mag
 How to Choose Outdoor Umbrella or Sail Shade - The Decor Mag
 Best Outdoor Lounge Furniture Picks - The Decor Mag
 Outdoor Refrigerator and Ice Maker Setup - The Decor Mag
 Best Outdoor Cushion Fabric Choices - The Decor Mag
 How to Create a Kitchen Garden - The Decor Mag
 Outdoor Kitchen Vent Hood Sizing - The Decor Mag
 Turn Your Tired Porch into a $100 Summer Oasis (DIY Guide)