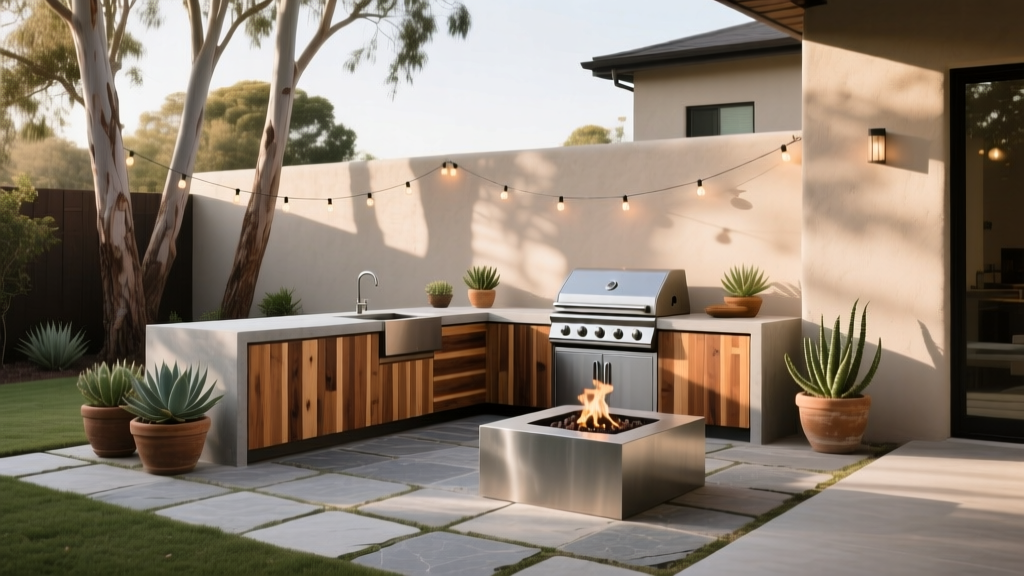
Outdoor Kitchen Cedar Plank Grill Setup - The Decor Mag
An outdoor kitchen is one of the fastest ways to turn a basic patio into a true outdoor living space—somewhere you’ll actually want to cook, host, and linger long after the last plate is cleared. And if you’re looking for a signature “wow” moment that feels elevated but still approachable, a cedar plank grill setup is hard to beat. It delivers restaurant-level flavor, a beautiful presentation, and that unmistakable cedar aroma that instantly says: this isn’t just backyard grilling.
What makes cedar plank grilling especially relevant for homeowners upgrading patios, decks, and yards is how well it fits into real-life outdoor design. It works on compact balcony-style layouts with a small grill cart, and it scales seamlessly into full outdoor kitchens with built-in grills, prep zones, and bar seating. Cedar plank cooking also encourages a slower, more intentional style of entertaining—perfect for year-round outdoor living when you’re layering in heaters, lighting, and weather-friendly materials.
This guide covers the full outdoor kitchen cedar plank grill setup: design and layout, material recommendations, furniture and storage, plant pairings for a cohesive landscape feel, climate considerations, and the common mistakes that can derail results. You’ll get practical tips and budget ranges so you can build a patio cooking zone that looks as good as it tastes.
Why Cedar Plank Grilling Belongs in a Well-Designed Outdoor Kitchen
Cedar plank grilling is more than a recipe technique—it’s a design-friendly cooking ritual. The planks add drama at the grill, and the results (especially with salmon, trout, chicken, and vegetables) feel “chef-level” without requiring complicated equipment.
- Sensory payoff: aroma, gentle smoke, and a beautiful browned finish.
- Entertaining-friendly: planks act as a serving board for a seamless grill-to-table moment.
- Outdoor-living aligned: encourages gathering around the grill and outdoor dining area.
- Works with multiple grills: gas, charcoal, pellet smokers, and even some electric setups.
From a patio living perspective, cedar plank cooking pairs perfectly with a thoughtfully designed prep zone, a dedicated serving counter, and lighting that keeps the action going after sunset.
Planning Your Outdoor Kitchen Layout for Cedar Plank Success
A cedar plank grill setup benefits from a little extra staging: soaking planks, prepping ingredients, and having a safe place to move hot planks. A smart outdoor kitchen layout prevents frantic trips inside and keeps guests comfortable.
The “Three-Zone” Outdoor Kitchen Layout
- Prep Zone: counter space, cutting board, seasoning area, sink or water access for soaking planks.
- Cook Zone: grill with heat-safe landing space on both sides.
- Serve & Hang Zone: outdoor dining table or bar seating, beverage station, and traffic flow that doesn’t cut through the grill area.
Recommended Dimensions (Practical Guidelines)
- Landing space: aim for 12–18 inches of heat-safe counter on at least one side of the grill (both sides is ideal).
- Walkways: 36 inches minimum clearance; 42–48 inches is more comfortable for entertaining.
- Prep counter: 4–6 feet of continuous counter if you can; 3 feet works for compact patios.
- Dining distance: keep dining seating 5–7 feet from the grill to avoid heat and smoke.
Best Layout Styles for Patios and Decks
- Linear run: grill + prep counter in one line; great for narrow patios and townhouse yards.
- L-shape: adds a dedicated soaking/prep corner and a clear serving edge.
- U-shape: maximum counter space and a natural “chef’s stage” for hosting.
- Grill island + dining terrace: ideal for larger yards; keeps cooking central and social.
Cedar Plank Grill Setup Essentials (Tools, Materials, and Safety)
Dialing in the setup is what separates a good cedar plank night from a smoky, scorched scramble. Here’s what to stock in your outdoor kitchen and why.
Planks: What to Buy
- Food-grade cedar planks (avoid construction lumber and any treated wood).
- Size: most common is 5x11 inches; choose wider for bigger fillets or veggie medleys.
- Thickness: thicker planks last longer and are less likely to char through.
Budget: $8–$20 for a multi-pack of planks; thicker, premium packs can run $20–$35.
Must-Have Accessories for an Outdoor Kitchen Cedar Plank Station
- Large soaking pan or hotel pan: stainless steel is durable and easy to sanitize.
- Instant-read thermometer: essential for salmon and chicken (and for confident results).
- Long grill tongs + fish spatula: safer handling for hot planks and delicate proteins.
- Heat-resistant gloves: a small upgrade that prevents burns and improves control.
- Spray bottle (water): for quick flare-up control.
- Metal tray or stone landing pad: a dedicated place to rest hot planks off the grill.
Safety Upgrades Worth Adding
- Non-combustible backsplash: porcelain, stainless steel, or stone behind the grill area.
- Fire-resistant mat: especially on decks or composite surfaces.
- Proper ventilation for covered patios: a vent hood or open-air clearance to avoid smoke buildup.
Materials and Finishes That Match Cedar Plank Cooking (and Hold Up Outdoors)
Cedar planks bring a warm, rustic note. Your outdoor kitchen and patio materials can echo that warmth without sacrificing modern durability.
Countertops: Best Options for a Grill-Forward Outdoor Kitchen
- Leathered granite: natural texture, hides smudges, performs well in heat and sun. Typical installed range: $60–$140/sq ft.
- Porcelain slab: sleek, stain-resistant, excellent for freeze/thaw climates. Typical installed range: $80–$160/sq ft.
- Concrete (sealed): customizable and contemporary, but needs consistent sealing. Typical installed range: $70–$150/sq ft.
Design tip: choose mid-tone counters (soft charcoal, greige, warm gray) to complement cedar without looking too rustic.
Cabinetry and Surrounds
- Marine-grade polymer: excellent in humid, coastal, or rainy climates. Budget: $3,000–$10,000+ depending on size.
- Stainless steel: modern and resilient; choose 304 stainless for better corrosion resistance. Budget: $2,500–$9,000+.
- Stone veneer island: timeless and landscape-friendly; coordinate with retaining walls or garden edging. Budget: $2,500–$8,000+.
Flooring Underfoot: Patio and Deck Recommendations
- Porcelain pavers: slip-resistant, easy maintenance, great for year-round outdoor living. Installed: $15–$35/sq ft.
- Natural stone (thermal bluestone): upscale and durable; can get hot in direct sun. Installed: $25–$60/sq ft.
- Composite decking: consistent look; add a grill mat and ensure adequate airflow. Installed: $25–$55/sq ft.
Furniture and Entertaining Features for a Cedar Plank Night
Cedar plank grilling is a social style of cooking. The best patio furniture setup keeps guests comfortable without crowding the cook zone.
Furniture Picks That Work Hard (and Look Great)
- Dining table: teak, powder-coated aluminum, or high-quality resin wicker with a stone or slatted top.
- Seating: outdoor dining chairs with quick-dry cushions; add two lounge chairs nearby for “hang” seating.
- Bar seating: counter-height stools at an island create a built-in audience—keep them out of the grill’s heat path.
Budget ranges:
- Starter patio dining set: $600–$1,500
- Mid-range entertaining setup (dining + lounge): $2,000–$5,000
- High-end, resort-style outdoor living: $6,000–$15,000+
Lighting for Evening Grilling
- Task lighting: dedicated grill lights or under-counter LEDs for safe plank handling.
- Ambient lighting: string lights, bollards, or soft wall sconces to define the patio living zone.
- Accent lighting: uplight a small tree or tall grasses to make the yard feel finished after dark.
All-Season Comfort Additions
- Overhead cover: pergola, pavilion, or retractable awning for sun and light rain.
- Heating: infrared heaters under a covered patio; tabletop fire feature for shoulder seasons.
- Wind control: privacy screens, hedges, or a slatted wood wall (untreated cedar or thermally modified wood).
Landscaping and Plant Pairings That Elevate the Outdoor Kitchen
A well-designed outdoor kitchen shouldn’t feel like a standalone appliance wall. Landscaping ties the cooking area into the garden and makes the entire patio feel intentional.
Best Plants Near an Outdoor Kitchen (Low-Mess, High-Impact)
- Herb containers: rosemary, thyme, chives, basil (warm months), oregano. Place 2–4 feet from the grill for easy snipping.
- Structural evergreens: boxwood (mild climates), dwarf yaupon holly, inkberry holly, or compact junipers for year-round structure.
- Ornamental grasses: blue fescue, little bluestem, or fountain grass for movement and soft screening.
- Pollinator-friendly color: lavender (dry climates), salvia, coneflower, or catmint—beautiful and generally low maintenance.
Avoid near the grill: messy fruiting trees over dining (dropping), thorny shrubs near walkways, and super resinous plants too close to open flames.
Edible Landscaping Ideas for Patio Living
- Raised beds: add a narrow bed along a fence line for greens and herbs; keep it visible from the kitchen.
- Espalier fruit trees: for warm, sunny walls—space-saving and architectural.
- Citrus in pots: great for warm climates or seasonal moves in cooler zones.
Climate and Maintenance Considerations (So Your Setup Lasts)
Your outdoor kitchen and cedar plank routine will look different depending on weather, sun exposure, and seasonal use. Build for your climate now, and you’ll avoid expensive fixes later.
Hot, Sunny Climates
- Choose UV-stable materials: powder-coated aluminum furniture, porcelain pavers, and fade-resistant outdoor fabric.
- Add shade: pergola with a shade canopy or adjustable louvers to keep the cook zone comfortable.
- Heat management: use light-to-mid-tone pavers to reduce glare and surface temperature.
Humid, Coastal, or Rainy Regions
- Corrosion resistance: 304 stainless (or better), polymer cabinetry, and marine-grade hardware.
- Airflow: avoid sealing the grill into a tight nook; allow ventilation under counters.
- Mold prevention: choose quick-dry cushions, store textiles in a deck box, and wash seasonally.
Freeze/Thaw and Snowy Winters
- Countertops: porcelain slab and granite generally outperform materials that absorb water.
- Winterizing: shut off and drain water lines; cover appliances; store planks in a dry place indoors.
- Traction: choose slip-resistant patio surfaces and keep pathways well-lit.
Cedar Plank Maintenance and Storage
- Store planks dry: sealed bin in a garage or indoor pantry prevents warping and musty odors.
- One-time use vs. reuse: many planks can be reused once if not overly charred—scrub lightly and dry fully.
- Clean the grill: cedar oils can leave residue; brush grates and empty grease trays routinely.
Common Mistakes to Avoid
- Using non-food-safe cedar: never use scrap wood or treated lumber.
- Skipping the soak: a dry plank burns fast; soak 1–2 hours for better performance.
- Overcrowding the grill: leave room for airflow and safe handling—especially when guests gather.
- No landing zone: setting hot planks on flimsy surfaces can scorch or crack materials.
- Wrong counter material at the grill edge: avoid sensitive finishes right next to high heat.
- Poor lighting: cooking in dim light increases accidents and overcooking.
FAQ: Outdoor Kitchen Cedar Plank Grill Setup
Do I need a built-in grill for cedar plank cooking?
No. Cedar plank grilling works on freestanding gas grills, charcoal grills, and pellet smokers. A built-in grill simply makes the outdoor kitchen feel seamless and adds more counter space for prep and serving.
How long should I soak cedar planks?
Soak for 1–2 hours in water. For extra flavor, some cooks use a mix of water and citrus slices or a splash of wine—just keep safety first and avoid sugary liquids that can scorch quickly.
What’s the best countertop near a grill for outdoor kitchens?
Porcelain slab and granite are top performers for outdoor kitchen counters. They handle heat, sun, and stains well, making them ideal for busy patio cooking and entertaining setups.
Can cedar plank grilling work in winter?
Yes—if your patio is set up for year-round outdoor living. Add task lighting, a wind break, and a safe heating solution. Keep planks stored indoors so they stay dry, and allow extra preheat time for the grill in cold weather.
How do I keep my outdoor kitchen looking cohesive with the landscape?
Repeat materials and colors: match stone veneer to garden walls, echo wood tones in a pergola, and use layered planting (evergreens + grasses + seasonal bloomers) to visually “nest” the kitchen into the yard.
What’s a realistic budget for adding a cedar plank-ready outdoor kitchen setup?
A functional, cedar plank-friendly setup can start around $800–$2,500 with a quality grill cart, prep table, lighting, and storage. A mid-range outdoor kitchen with counters and built-ins often falls between $7,500–$20,000, while larger custom installations can run $25,000–$75,000+ depending on materials, utilities, and appliances.
Next Steps: Build a Patio Cooking Zone You’ll Use All Year
Start by mapping your grill, prep, and serving zones—then choose heat-smart materials, add a proper landing space for hot planks, and layer in lighting so the outdoor kitchen performs after sunset. Finish the scene with comfortable seating, a few bold container plants or ornamental grasses, and an herb station that makes cedar plank nights feel effortless.
Ready for more outdoor kitchen ideas, patio living layouts, and landscaping inspiration? Explore more fresh outdoor design guides on thedecormag.com.
More Articles
 Outdoor Living Project Checklist: A Practical, Step-by-Step Workflow for Landscape Professionals
 Best Outdoor Bar Salt and Spice Station - The Decor Mag
 Kid-Safe Outdoor Furniture: Materials That Survive Play
 Materials vs Science: How Engineering Precision and Material Innovation Are Redefining Outdoor Living
 Best Outdoor Rug Options for Durability - The Decor Mag
 How to Design a Cottage Core Garden - The Decor Mag
 Best Color Guides for Summer: Science-Backed Palettes for Outdoor Living Spaces
 Best Outdoor Bar Serving Shelf Ideas - The Decor Mag
 Outdoor Kitchen Countertop Materials - The Decor Mag
 How to Design a Dragonfly Garden - The Decor Mag