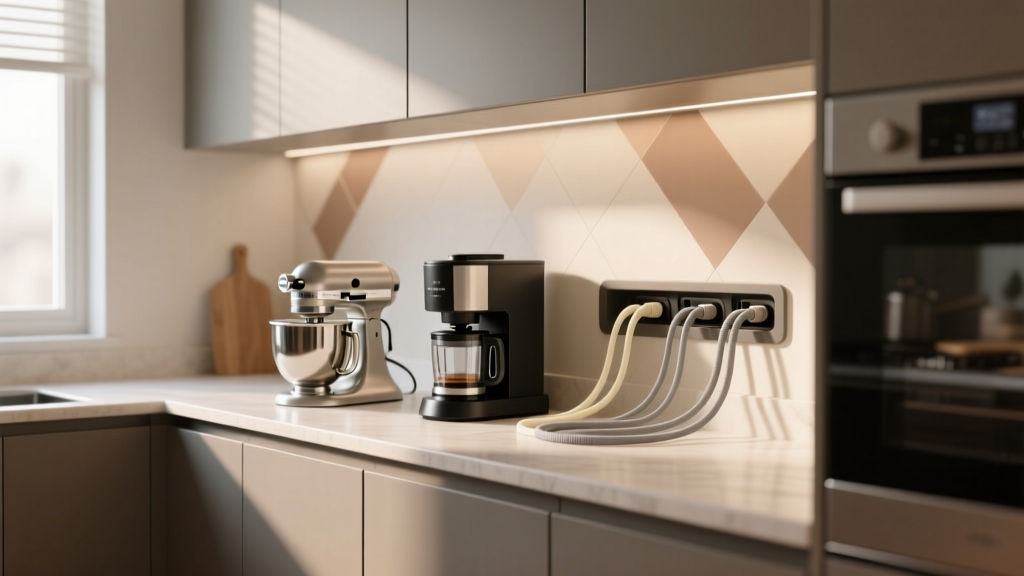
Best Kitchen Appliance Cord Management - The Decor Mag
Few things make a kitchen feel cluttered faster than a tangle of appliance cords on the countertop. Even in a beautifully renovated space—new quartz, statement pendants, sleek cabinet fronts—cords can interrupt the clean lines that modern kitchen design and timeless functionality depend on. Beyond aesthetics, cord management directly impacts safety, cleaning, and how effortlessly you move through daily cooking routines.
Good kitchen appliance cord management is also one of the most cost-effective upgrades you can make. Some solutions are as simple as relocating a power strip; others involve renovation-level planning like appliance garages, pop-up outlets, or dedicated small-appliance circuits. Whether you’re planning a full kitchen renovation or refining an existing kitchen organization system, the goal is the same: keep power accessible, cords controlled, and counters calm.
This guide covers practical cord management ideas for real kitchens—measurements that matter, materials that hold up, budget ranges, common mistakes to avoid, and design approaches aligned with current trends (hidden storage, integrated outlets, minimal visual clutter) while respecting long-term usability.
Why Cord Management Belongs in Every Kitchen Design Plan
Cord management isn’t just a finishing touch. It supports how your kitchen looks, functions, and stays safe over time.
- Cleaner countertops: Fewer visible cords means a more intentional, “designed” look—especially important in open-concept kitchens.
- Safer workflows: Reduced snag hazards near sinks, cooktops, and prep zones.
- Easier cleaning: Wiping counters becomes simple when cords aren’t draped across backsplashes and corners.
- Longer appliance life: Proper storage prevents bent plugs, pinched cords, and heat exposure.
- Better resale appeal: Buyers notice smart kitchen storage solutions and thoughtful electrical planning.
Start Here: Map Your Appliances and Power Needs
The best kitchen organization starts with an inventory. Before buying clips or drilling holes, identify what actually needs to live on the counter and what can be stored.
1) Create an “Everyday Appliance List”
Typical countertop regulars include coffee makers, kettles, toasters, air fryers, stand mixers, and blenders. Decide what stays out based on frequency.
- Daily use: Keep accessible; plan dedicated, neat power.
- Weekly use: Store in an appliance garage or cabinet with an outlet.
- Occasional use: Store deeper; avoid permanent cords on counters.
2) Measure Your Zones (Small Numbers, Big Payoff)
These measurements help you choose cord solutions that don’t fight your layout:
- Backsplash clearance: Leave at least 2–3 inches behind appliances for airflow and cord routing (more for air fryers and toaster ovens).
- Outlet spacing: If renovating, aim for outlets every 4 feet along countertop runs (often aligned with code practices, but verify local requirements).
- Cord slack: Plan for 6–12 inches of managed slack rather than tight, stretched cords (reduces strain on plug and receptacle).
- Appliance garage depth: Target 14–18 inches deep to accommodate bulkier appliances and cord bends.
Best Cord Management Solutions by Kitchen Area
Countertop Solutions (Fast Upgrades, Big Visual Impact)
If you’re improving an existing kitchen without changing wiring, focus on surface-level cord control that blends with your decor.
Appliance Cord Wraps and Retractors
Many appliances have built-in wraps; if yours don’t, add a heat-safe wrap solution.
- Best for: Mixers, blenders, toasters, rice cookers.
- Materials: Look for silicone (heat-resistant and flexible) or ABS plastic (rigid, clean look).
- Cost: $6–$20 per appliance.
- Tip: Mount wraps on a flat area that won’t interfere with ventilation slots.
Counter-Edge Cable Clips
Adhesive clips guide cords along the back edge of the counter so they don’t droop or cross prep zones.
- Best for: Coffee stations, toaster areas, charging corners.
- Materials: Silicone clips are gentle on cords; nylon clips are firmer.
- Cost: $8–$25 per multi-pack.
- Maintenance: Clean the mounting area with isopropyl alcohol before sticking; replace adhesive every 1–2 years in high-heat zones.
Slim Power Strips with Cord Channels
A slim, surge-protected strip mounted discreetly can power a coffee grinder, kettle, and toaster without multiple cords fighting for a single receptacle.
- Best for: Beverage stations, baking counters.
- Design approach: Mount under the upper cabinet lip or against the side wall of a cabinet panel (not above a sink).
- Cost: $25–$80 depending on surge rating and USB ports.
- Tip: Use a cord cover channel (paintable PVC) to hide the strip’s main cord along the backsplash line.
Backsplash and Outlet Upgrades (Renovation-Friendly and High-End)
Current kitchen renovation trends emphasize minimal visual clutter—especially with slab backsplashes and full-height tile. Outlet planning is where cord management becomes part of the architecture.
Under-Cabinet Plug Mold (Discrete and Functional)
Plug mold is a narrow outlet strip mounted under upper cabinets. It keeps cords low-profile and preserves a clean backsplash.
- Best for: Kitchens with statement tile or stone backsplashes.
- Layout tip: Place plug mold toward the cabinet front edge so plugs don’t hit the wall.
- Cost: $80–$250 for materials; $200–$600 installed depending on electrical complexity.
- Design note: Choose finishes that match cabinet hardware (stainless, matte black, white).
Pop-Up or Flush Countertop Outlets
Great for islands where you want power without cords stretching across seating zones. Pop-up outlets have become a go-to in modern kitchen design, but they must be chosen carefully for durability.
- Best for: Kitchen islands and peninsula prep areas.
- Spacing: Keep at least 12 inches from sink cutouts and away from heavy chopping zones.
- Cost: $150–$400 for the unit; $300–$900 installed.
- Maintenance: Choose models with spill-resistant lids and clean debris from the rim weekly to prevent sticking.
In-Cabinet Outlets for Hidden Appliance Storage
Installing outlets inside cabinets supports one of the most timeless (and trend-forward) organization strategies: keeping small appliances off the counter without sacrificing accessibility.
- Best for: Stand mixers, air fryers, multi-cookers, espresso machines.
- Cost: $50–$150 per outlet plus electrician labor ($150–$400+ depending on access).
- Tip: Add a pull-out shelf rated for 75–100 lbs for mixers to avoid lifting.
Appliance Garages (The Clean-Counter Classic)
Appliance garages are resurging with a more refined look: pocket doors, tambour fronts, or lift-up panels that disappear into the cabinetry. They’re a cornerstone of kitchen design for homeowners who want a curated countertop while keeping daily tools close.
- Best for: Coffee stations, toaster zones, smoothie prep.
- Recommended dimensions:
- Width: 24–36 inches (wider for a full beverage bar)
- Depth: 14–18 inches
- Height: 16–20 inches (taller for grinders and pour-over setups)
- Materials:
- Thermofoil/interior laminate: Easy wipe-down, budget-friendly.
- Painted wood: Premium look, may show wear near heat/steam.
- Stainless or aluminum liner (optional): Great behind espresso machines for moisture resistance.
- Cost: $300–$1,200 for cabinet modifications; $1,500–$5,000+ custom with specialty doors and electrical.
Ventilation reminder: Do not run heat-producing appliances (toaster ovens, air fryers) inside a closed appliance garage unless it’s designed with proper clearance and ventilation. Heat and trapped steam can damage cabinetry and create a safety risk.
Product and Material Recommendations (What Holds Up in Real Kitchens)
Adhesives: Choose Heat- and Humidity-Resistant Options
- Best: 3M VHB-style mounting tape for cord channels and clips (stronger bond over time).
- Use caution: Basic foam tapes can fail near ranges, kettles, and dishwashers.
- Prep steps: Degrease surface, dry fully, apply pressure for 30–60 seconds, and allow 24 hours cure time before loading cords.
Cord Covers and Channels
- PVC paintable channels: Best for blending into a painted wall or underside of cabinets.
- Aluminum channels: Sleeker, more durable; ideal in contemporary kitchens with metal accents.
- Cost: $10–$40 per 4–6 feet.
Fasteners and Finishes
- Matte black: Popular in modern kitchens; hides scuffs well.
- White: Best for bright shaker kitchens; choose UV-stable plastics to prevent yellowing.
- Stainless: Works with pro-style ranges and industrial lighting; fingerprints may show.
Layout Strategies That Reduce Cord Clutter Long-Term
Create Dedicated Stations
Instead of spreading appliances across the counter, group by activity. This is a core kitchen design principle that improves function and keeps cord management contained.
- Coffee/tea station: Near water source if possible; add plug mold or a hidden power strip; store pods/filters above.
- Baking station: Near pantry; include a mixer lift shelf and in-cabinet outlet.
- Breakfast station: Toaster and blender together; cord clips at the back edge.
Plan for “Landing Zones” Near Outlets
Avoid putting outlets only where they look good. Put them where you naturally set appliances down.
- Best practice: Keep at least one outlet within 24 inches of the primary prep zone to prevent cords crossing cutting boards and sink edges.
- Island tip: Place outlets on the working side—not the seating side—to reduce cord drape near stools.
Budget Guide: What Cord Management Costs
- $20–$100 (Quick refresh): Cord wraps, adhesive clips, one cord channel, basic cable ties.
- $100–$400 (Upgraded organization): Slim power strip mounted discreetly, better channels, drawer/cabinet cord pass-through grommets, improved countertop grouping.
- $400–$1,500 (Targeted electrical improvements): Under-cabinet plug mold, a pop-up outlet, one or two in-cabinet outlets.
- $1,500–$5,000+ (Renovation-level): Appliance garage buildout with custom doors, multiple in-cabinet outlets, refined station layout changes.
Where to spend: If you cook daily, prioritize outlet placement and station planning over decorative hiding tricks. Good electrical design supports your kitchen organization for decades.
Common Cord Management Mistakes to Avoid
- Running cords across the sink or cooktop zone: Water and heat exposure increases risk and degrades cord insulation.
- Overloading a single outlet: High-wattage appliances (kettles, toaster ovens, air fryers) should not share undersized power strips. If in doubt, consult an electrician.
- Closing doors on cords: Pinched cords can fray and create intermittent power issues. Use a cord pass-through grommet instead.
- Hiding heat-producing appliances in sealed cabinets: Trapped heat and steam can warp shelves, discolor finishes, and shorten appliance life.
- Using low-quality adhesive near heat/steam: Clips falling off create mess and potential tripping or snag hazards.
- Skipping maintenance: Dust and grease buildup makes cord solutions fail sooner and look dingy.
Maintenance: Keep Cord Management Clean and Reliable
- Monthly wipe-down: Clean cord channels and clips with a mild degreaser; dry thoroughly to preserve adhesives.
- Quarterly check: Inspect for frayed cords, loose plugs, and clips pulling away.
- Heat check: If a cord feels warm during use, unplug and reassess placement and load.
- Replace when needed: Adhesive components typically last 12–24 months in busy kitchens; swap before they fail.
FAQ: Kitchen Appliance Cord Management
What’s the best way to hide cords on a kitchen island?
For renovations, a pop-up or flush countertop outlet placed on the working side is the cleanest approach. For existing kitchens, mount a slim power strip under the counter overhang (working side) and route the main cord through a discreet channel.
Are appliance garages still a good idea in modern kitchen design?
Yes—especially with today’s pocket doors and streamlined tambour fronts. They align with the trend toward minimal visual clutter while supporting timeless functionality. Just avoid storing or operating high-heat appliances in a sealed compartment without ventilation.
How do I manage cords in a small kitchen with limited outlets?
First, group appliances into one or two stations and store the rest. Use a quality surge-protected power strip mounted neatly (not loose on the counter) and add cord clips to keep slack controlled. If you’re renovating, add outlets where you actually prep and plug in daily.
What materials work best for cord clips near a stove or kettle?
Silicone clips and heat-resistant adhesives perform better in warm, humid areas than basic plastics. Keep any adhesive-mounted solution a safe distance from direct heat and steam sources, and avoid placing clips where grease accumulates heavily.
Can I run an air fryer inside a cabinet if I add an outlet?
Generally, it’s not recommended unless the cabinet is designed specifically for it with adequate clearance and ventilation. Air fryers exhaust hot air; running them in enclosed cabinetry can damage finishes and create safety concerns. A pull-out shelf in an open area is a better compromise.
Next Steps: A Simple Plan to Get a Cleaner, Safer Countertop
- Audit your countertop appliances and pick 3–5 that truly deserve daily access.
- Assign stations (coffee, breakfast, baking) and keep cords contained within each zone.
- Choose one fast fix (cord wraps + clips) and one structural improvement (plug mold or an in-cabinet outlet) if your budget allows.
- Recheck clearances so cords aren’t near water, heat, or cutting paths.
A kitchen that looks calm and works hard is rarely an accident—it’s the result of smart layout planning and details like cord management done right. For more kitchen renovation ideas, storage solutions, and design trend guidance, explore the latest inspiration at thedecormag.com.
More Articles
 Best Kitchen Dish Drying Rack Solutions - The Decor Mag
 Best Kitchen Ladder for High Shelf Access - The Decor Mag
 Small Kitchen Storage Hacks That Work (2026)
 Best Kitchen Dutch Oven Storage Ideas - The Decor Mag
 Kitchen Shaker Cabinet Timeless Appeal - The Decor Mag
 Kitchen Cabinet Soft Close: How to Choose (2026)
 Best Essentials Inspiration: Building a Thoughtful, Functional, and Joyful Kitchen
 How To Match Nightstand With Lighting: A Practical, Design-Forward Guide
 Best Kitchen Baking Sheet Vertical Storage - The Decor Mag
 Kitchen Quartz vs Granite Countertops - The Decor Mag