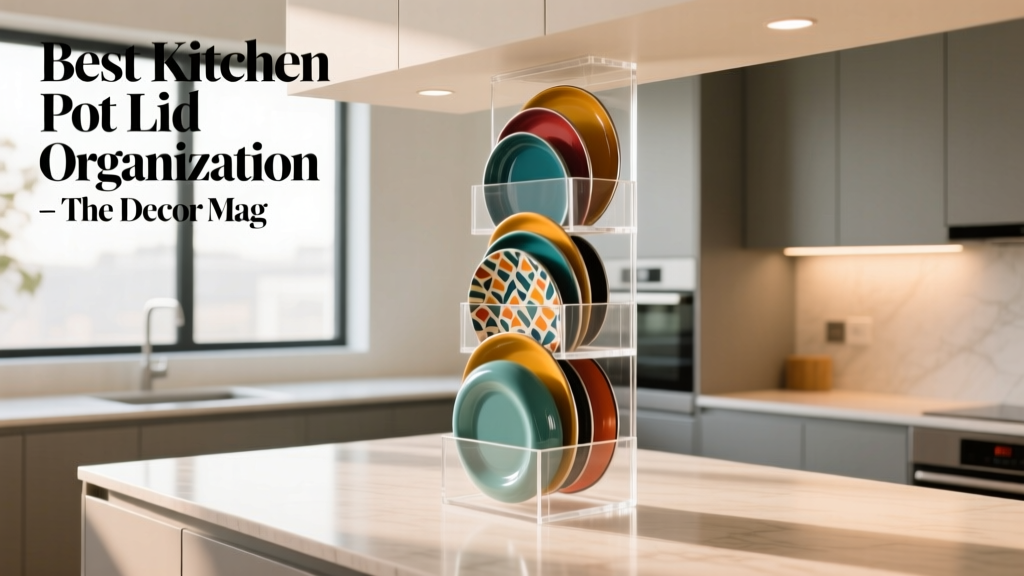
Best Kitchen Pot Lid Organization - The Decor Mag
Pot lids are one of the most frustrating items to store well. They’re bulky, awkwardly shaped, and prone to clanging, scratching, and toppling stacks of cookware. Yet in most kitchens—especially during a renovation—lid storage becomes an afterthought, squeezed into whatever cabinet space remains. The result is wasted storage, noisy mornings, and cabinet doors that never seem to close smoothly.
Great pot lid organization is more than “tidy.” It improves workflow at the stove, protects your cookware investment, and makes your kitchen feel calmer and more premium. Whether you’re planning a full kitchen renovation or just upgrading a few cabinets, the right storage approach can reclaim space, reduce wear and tear, and support modern kitchen design trends like streamlined fronts, hidden clutter, and highly functional drawer systems.
This guide covers the best kitchen pot lid organization solutions—from DIY fixes to renovation-grade cabinet inserts—plus layout recommendations, measurements, cost ranges, material comparisons, and mistakes to avoid.
Start with a Quick Lid Inventory (It Drives the Right Solution)
Before buying organizers or designing cabinetry, take a 10-minute inventory. The “best” solution depends on your lid types and how often you cook.
- Count your lids and match each to its pot/pan (or decide what to donate).
- Measure diameter of the largest lids (common sizes: 8", 10", 12", 14").
- Note lid style:
- Glass lids (more fragile, benefit from padded dividers)
- Stainless lids (durable but can scratch and clang)
- Domed lids (need extra vertical clearance)
- Universal lids (often thicker; check knob height)
- Identify where lids are used most (near cooktop, range, or prep zone).
Practical clearance guideline: most standard lids fit comfortably with 10–12 inches of vertical clearance if stored on edge. Domed lids and tall knobs may require 12–14 inches.
Best Pot Lid Organization Solutions (Ranked by Functionality)
1) Deep Drawer with Adjustable Dividers (Best for Renovations)
If you’re renovating or can convert a base cabinet to drawers, this is the gold standard for pot lid organization. A deep drawer keeps lids stable, quiet, and accessible—no kneeling into dark cabinets or pulling out stacks.
Recommended drawer specs:
- Drawer depth: 21"–24" (standard base depth)
- Drawer height: 8"–10" for lids; 10"–12" if storing lids with pots
- Drawer width: 24" is workable; 30"–36" is ideal for larger sets
Best inserts and materials:
- Solid wood or plywood dividers: timeless, durable, renovation-friendly
- Steel divider systems: sleek, adjustable, modern; great for contemporary kitchens
- Bamboo dividers: attractive, budget-friendly, but less resistant to moisture over time
Design approach: Store lids vertically in a dedicated section of a deep drawer. Use dividers spaced 1.25"–2.5" apart depending on lid thickness. Keep larger lids toward the back; smaller lids near the front for quick grabs.
Cost range:
- Basic adjustable drawer dividers: $20–$60
- Drawer peg systems or premium inserts: $80–$250+
- Converting a cabinet to drawers (during renovation): often $200–$800+ per cabinet section depending on brand and hardware
Maintenance tip: Add a thin, washable drawer liner to reduce noise and protect finishes. Wipe down monthly to prevent grit from scratching lid rims.
2) Lid Organizer Rack Inside a Base Cabinet (Best Budget Upgrade)
If you’re not ready to switch to drawers, a cabinet rack is a practical step up from stacking. It turns “dead” vertical space into an organized zone.
Two smart placements:
- On the cabinet door: maximizes interior space, ideal for lighter lids
- Mounted to a side wall or floor: more stable for heavier stainless lids
Measurements to check:
- Door clearance: allow 1"–1.5" between lids and cabinet face frame or hinges
- Cabinet interior depth: standard is ~23"; confirm your racks don’t interfere with stored pots
- Knob height: tall knobs may snag—test with a cardboard template
Material comparison:
- Powder-coated steel: durable, resists chips; best overall
- Stainless steel: premium look, great for humid kitchens; higher cost
- Plastic: cheapest; can warp over time and doesn’t feel “built-in” in a renovation-grade kitchen
Cost range:
- Door-mounted racks: $15–$50
- Heavy-duty cabinet racks: $30–$120
Maintenance tip: Tighten screws every few months—door racks loosen with repeated slamming. Soft-close hinges help reduce stress.
3) Pull-Out Lid Organizer (Best for Accessibility)
Pull-out systems bring lids into view like a pantry shelf. They’re especially helpful for homeowners prioritizing aging-in-place features, improved ergonomics, or simply a smoother cooking routine.
Where they work best:
- Base cabinets near the cooktop
- Between the range and sink (a key kitchen workflow zone)
What to look for:
- Full-extension slides for complete access
- Soft-close hardware to prevent clanging and protect glass lids
- Adjustable dividers so you can reconfigure as your cookware changes
Cost range: $80–$300+ depending on slide quality, finish, and brand.
Design trend tie-in: Pull-outs align with current kitchen renovation trends favoring efficient, concealed storage rather than countertop clutter.
4) Vertical Tray Divider Cabinet (Best for a “Built-In” Look)
Tray divider cabinets are usually designed for baking sheets and cutting boards, but they’re excellent for pot lids—especially wide, flat stainless lids.
Recommended specs:
- Slot width: 2"–3" for lids; wider if storing trays too
- Cabinet width: 9"–12" works for many households; 15" if you have large sets
- Height: base cabinet height is typically sufficient; ensure lids clear the face frame
Best locations:
- Next to the oven (if also storing sheet pans)
- Near the cooktop (if used primarily for lids)
Cost range:
- DIY dividers: $25–$100
- Built-in cabinetry solution (during renovation): varies widely, often $200–$600+ for the cabinet segment plus hardware
Maintenance tip: Vacuum crumbs and dust from slots quarterly. A narrow crevice tool makes this fast.
5) Wall or Backsplash Rail Storage (Best for Small Kitchens—Used Carefully)
Open storage rails with hooks can hold lighter lids and free cabinet space, but they must be planned thoughtfully. In high-end kitchen design, the goal is “curated open storage,” not visual clutter.
Best practice: Limit to 2–4 most-used lids, hung neatly and uniformly.
Materials:
- Stainless rail systems: modern, easy to wipe down
- Powder-coated metal: strong, affordable, many finishes
- Wood rails: warm and timeless; avoid near greasy cooking zones
Cost range: $30–$150+ depending on rail length and accessories.
Maintenance tip: Grease builds quickly near ranges. Wipe weekly with a degreasing dish soap solution; avoid harsh abrasives on coated finishes.
Layout Planning: Where Pot Lid Storage Works Best
Smart kitchen organization follows the same principles designers use for full renovations: place items where you use them, reduce bending/reaching, and keep paths clear.
Best placements for lid storage:
- Adjacent to the cooktop/range (ideal for daily cooking)
- Near pot and pan storage (so everything stays together)
- Away from the sink unless your lids are always drip-dried and put away (moisture can encourage odor and mineral spotting)
Space-saving tip: If you’re short on base cabinets, allocate one 12" wide cabinet section with vertical dividers for lids, trays, and cutting boards. It’s one of the highest “function per inch” upgrades in a kitchen remodel.
Materials and Finish Choices That Last
Durable materials matter because lid storage is high-contact: constant sliding, tapping, and grabbing.
- Powder-coated steel: strong, chip-resistant, easy to clean; suits most kitchen styles
- Stainless steel: premium and corrosion-resistant; pairs well with contemporary kitchens and pro-style ranges
- Hardwood (maple, oak): warm, timeless; best in drawers with stable humidity
- Bamboo: budget-friendly and attractive; can swell slightly in humid environments
- Plastic: fine for renters or temporary fixes; less stable long-term
Scratch prevention: Glass lids and polished stainless lids benefit from:
- Felt bumpers where lids touch cabinet doors
- Soft drawer liners (thin, non-adhesive is easiest to refresh)
- Dividers with smooth, rounded edges (avoid raw metal corners)
Budget Considerations: What’s Worth Spending On
If you’re prioritizing your kitchen renovation budget, put money where it improves daily use and reduces frustration.
- Best value upgrades (under $100): door-mounted rack, basic adjustable dividers, quality drawer liner
- Mid-range investment ($100–$300): pull-out organizer with full-extension, soft-close slides
- Renovation-grade upgrade ($300+ per cabinet area): deep drawer conversion or custom inserts matched to your cookware
Where not to overspend: ultra-specialized single-purpose gadgets that can’t adjust. Cookware collections change; adjustable systems stay useful.
Common Pot Lid Organization Mistakes to Avoid
- Stacking lids flat in a pile: causes scratching, clanging, and falling stacks—especially with glass lids.
- Ignoring knob height: tall knobs can prevent cabinet doors from closing or snag on pull-outs.
- Overloading door-mounted racks: heavy lids can strain hinges and loosen screws. Use soft-close hinges and keep weight reasonable.
- Storing lids far from pots: it adds steps and frustration, undermining good kitchen workflow.
- Choosing non-adjustable organizers: what fits today may not fit after your next cookware purchase.
- Skipping moisture control: putting away damp lids can lead to odor, water spots, and grime buildup around knobs.
Maintenance and Care: Keep Lids Clean and Quiet
A well-organized cabinet stays organized longer when it’s easy to maintain.
- Monthly: remove lids, wipe shelves/drawers, and shake out liners.
- For glass lids: check and tighten knob screws (they loosen over time).
- For stainless lids: wipe fingerprints with a microfiber cloth; use a gentle cleaner to avoid haze.
- For racks and pull-outs: inspect mounting screws and slide performance; tighten and clean debris from slide tracks.
Noise reduction tip: Add small clear bumpers where lids contact metal racks, especially in door-mounted setups.
FAQ: Kitchen Pot Lid Organization
What’s the best way to store pot lids in a small kitchen?
Use vertical storage: a door-mounted rack, a slim tray-divider cabinet (9"–12" wide), or vertical dividers in a deep drawer. These options minimize wasted space and keep lids easy to grab.
Are pot lid organizers better in drawers or cabinets?
Drawers are typically more functional: better visibility, less bending, and less noise. Cabinets can work well with a rack or pull-out insert if drawers aren’t an option.
How much clearance do I need to store lids vertically?
Plan for 10–12 inches of height for most lids, and 12–14 inches for domed lids or tall knobs. Always test your largest lid before finalizing an organizer.
Will a door-mounted lid rack damage my cabinet door?
It can if overloaded or poorly installed. Use short, appropriate screws, distribute weight evenly, and avoid storing your heaviest lids on the door. Soft-close hinges and periodic tightening help prevent long-term wear.
What materials hold up best for lid organizers?
Powder-coated steel and stainless steel are the most durable and moisture-resistant. Hardwood is excellent in drawers and custom inserts, while bamboo is a good budget option if humidity is moderate.
How do I stop lids from clanging?
Store lids vertically with dividers, add a drawer liner or cabinet mat, and use small bumpers where lids touch metal or door surfaces. Soft-close hardware also makes a noticeable difference.
Next Steps: Choose a System That Matches Your Kitchen Routine
For the best kitchen pot lid organization, aim for vertical storage, easy access near the cooktop, and materials that can handle daily wear. If you’re renovating, prioritize deep drawers with adjustable dividers or a dedicated tray-divider cabinet. If you’re upgrading on a budget, a well-mounted cabinet rack or an entry-level pull-out insert can transform how your kitchen functions.
Pick one cabinet or drawer to improve first, measure your largest lids, and choose an adjustable organizer that can evolve with your cookware. For more kitchen renovation planning tips, storage ideas, and timeless design inspiration, explore the latest guides on thedecormag.com.
More Articles
 Wood and Colors Compared: How Species, Finishes, and Pigments Shape Kitchen Design Decisions
 Kitchen Cabinet Color for Resale (2026)
 Kitchen Textured Cabinet Door Trends - The Decor Mag
 Best Kitchen Ladder for High Shelf Access - The Decor Mag
 How to Choose Kitchen Cabinet Door Styles - The Decor Mag
 Best Kitchens for Functional Design: Layouts, Brands, and Ergonomic Principles That Work Every Day
 Best Kitchen Wrap Storage Solutions - The Decor Mag
 How To Match Nightstand With Lighting: A Practical, Design-Forward Guide
 Best Kitchen Mug Display Ideas - The Decor Mag
 Kitchen Backsplash Ideas That Stand Out - The Decor Mag