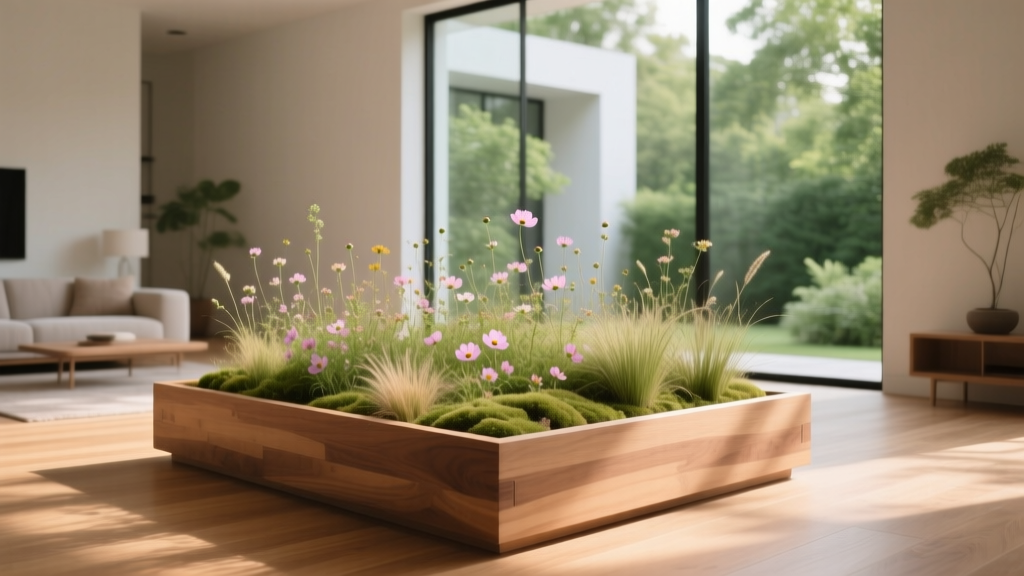
How to Design a Pocket Meadow - The Decor Mag
A pocket meadow is one of the most rewarding ways to upgrade an outdoor living space—especially if you want a yard that feels lush, alive, and a little bit magical without committing to a full-scale prairie restoration. Think of it as a smaller, curated meadow vignette: a dense mix of grasses and flowering perennials that brings movement, color, and pollinators right up to your patio, pathway, or favorite sitting spot.
For homeowners, the appeal is practical as well as beautiful. A pocket meadow can reduce mowing, boost biodiversity, soften hardscape edges, and create a natural privacy screen—often with less long-term work than a traditional lawn-and-annuals setup. Done well, it becomes a living “outdoor room” that changes with the seasons, supports year-round outdoor living, and elevates the entire landscape design of your property.
Whether you’re carving out a 6' x 10' strip along a fence or transforming a sunny corner near your patio, the design principles are the same: start with the right location, build strong structure with grasses, add long-blooming perennials, and give the planting a crisp edge so it looks intentional and complements your outdoor design.
What Exactly Is a Pocket Meadow?
A pocket meadow is a small, designed area—often 50 to 500 square feet—planted with meadow-style species (primarily ornamental grasses and flowering perennials) that thrive with minimal irrigation once established. It’s not “wild” in the neglected sense; it’s a planned landscape that reads as naturalistic and relaxed, but still tidy and deliberate.
- Best for: Sunny yards, side yards, front-yard foundation zones, patio borders, slopes, and underused lawn areas.
- Typical size: A ribbon bed (3–6 feet deep) or a larger island bed (8–20 feet wide), scaled to the home and hardscape.
- Style range: From modern meadow (clean lines + limited palette) to cottage meadow (looser mix + more color).
Step 1: Choose the Right Location (and Read the Light)
Sunlight is the make-or-break factor for meadow planting. Most classic meadow species need 6+ hours of sun to stay upright, bloom heavily, and outcompete weeds. That said, you can absolutely design a pocket meadow for partial shade—you’ll just choose different plants.
Ideal placement ideas for outdoor living
- Along a patio edge: A 3–5 foot deep pocket meadow softens pavers and creates a breezy backdrop for dining or lounging.
- Between a fence and lawn: Turns a boring strip into a pollinator corridor and adds privacy.
- At the end of a view: Replace a “dead corner” with a focal point visible from indoor windows.
- On a slope: Deep-rooted grasses help stabilize soil and reduce erosion.
Quick site checklist
- Sun: Full sun (best) or part sun (choose shade-tolerant species).
- Soil: Well-draining is ideal; heavy clay needs amendment and smarter plant choices.
- Water access: Helpful for establishment year; after that, many meadows become drought-tolerant.
- Visibility: Place it where you’ll enjoy it from seating areas, patios, and main pathways.
Step 2: Pick a Layout That Looks Intentional (Not Accidental)
The fastest way to make a pocket meadow feel “designed” is to give it a strong outline and a clear relationship to your patio, walkway, or lawn. Naturalistic planting looks best when it has a crisp boundary—like a picture in a frame.
Three layout approaches that work in most yards
- Ribbon meadow: A long, shallow bed (3–6 feet deep) that borders a fence, path, or patio. Great for small yards.
- Island meadow: An oval or kidney-shaped bed surrounded by lawn or gravel. Best for medium to large yards.
- Courtyard meadow: A meadow bed paired with hardscape (pavers, stepping stones, or gravel) that invites you to walk through it.
Edging materials that elevate the look
- Steel edging (2–4 inch): Clean, modern, long-lasting; excellent for crisp curves. Budget: $3–$10 per linear foot (materials).
- Brick soldier course: Classic and charming; pairs beautifully with cottage meadows. Budget: $6–$15 per linear foot installed (varies widely).
- Natural stone cobbles: A relaxed, high-end look; great for drainage edges near patios. Budget: $10–$30+ per linear foot installed.
- Mown edge (turf “trench”): Most affordable; needs regular re-cutting. Budget: minimal if DIY.
Step 3: Build the Planting Like a Pro (Structure, Seasons, Repeat)
Great meadow design isn’t random—it’s layered. Use grasses for structure and movement, then thread in flowering perennials with overlapping bloom times. Repeating a few “signature” plants is what makes the whole thing feel cohesive and patio-ready.
A reliable plant formula
- 50–70% grasses/sedges: Backbone, winter interest, weed suppression.
- 30–50% flowering perennials: Color, pollinators, seasonal drama.
- 1–3 accent plants: Taller spikes or bold shapes for focal points.
Top plant picks (by sun exposure)
Full sun pocket meadow (most common)
- Grasses: Little bluestem (Schizachyrium scoparium), prairie dropseed (Sporobolus heterolepis), switchgrass (Panicum virgatum), feather reed grass (Calamagrostis x acutiflora ‘Karl Foerster’ for a more formal look).
- Long bloom perennials: Purple coneflower (Echinacea), black-eyed Susan (Rudbeckia), anise hyssop (Agastache), yarrow (Achillea), coreopsis.
- Pollinator magnets: Bee balm (Monarda), blazing star (Liatris), milkweed (Asclepias—choose native species for your region).
- Late-season stars: Asters (Symphyotrichum), goldenrod (Solidago—many garden-friendly varieties), sedum (Hylotelephium).
Part shade pocket meadow (morning sun or dappled light)
- Grasses/sedges: Tufted hair grass (Deschampsia), bottlebrush grass (Elymus hystrix), Pennsylvania sedge (Carex pensylvanica), palm sedge (Carex muskingumensis).
- Perennials: Jacob’s ladder (Polemonium), woodland aster, heuchera (coral bells), geranium macrorrhizum, astrantia (in cooler climates), Japanese anemone (for late-season bloom).
Design tip: choose a palette, then repeat
Instead of 20 different flowers, pick 6–10 core plants and repeat them in drifts. It reads as intentional landscape design, frames outdoor living areas beautifully, and simplifies maintenance.
Step 4: Prepare the Site for Low Maintenance (Weed Control Matters)
The secret to a successful pocket meadow isn’t just plant selection—it’s preparation. Weeds are the biggest early challenge, especially in year one.
Best prep methods for homeowners
- Sheet mulching (smothering): Layer cardboard + compost + mulch; wait 6–12 weeks (or overwinter) before planting. Great for DIY.
- Sod removal: Fast and effective, but labor-intensive; best for smaller areas.
- Solarization: Clear plastic over moist soil in hot months; good for sunny sites and heavy weed seed banks.
Mulch choices that support meadow style
- Shredded hardwood mulch: Best for establishment year; helps retain moisture and suppress weeds.
- Composted bark: More stable, less float in rain; great near patios and pavers.
- Gravel mulch (in dry climates): Excellent for drought-tolerant meadows and modern patio landscaping; choose 3/8" gravel for walkability and a refined look.
Step 5: Integrate Seating, Paths, and Patio Living
A pocket meadow becomes a true outdoor living upgrade when you can sit beside it, walk through it, and experience it up close. The key is balancing softness (plants) with structure (hardscape and furniture).
Furniture recommendations that pair beautifully with meadow planting
- Powder-coated aluminum lounge chairs: Sleek, weather resistant, works with modern meadow edges. Budget: $300–$1,200 per chair.
- Teak bench or dining set: Warm, natural, and timeless next to grasses. Budget: $400–$2,500+ depending on size and brand.
- All-weather wicker seating: Cozy for cottage-style meadows; choose UV-stable resin. Budget: $800–$4,000+ for a set.
Hardscape and pathway ideas
- Stepping stones through the meadow: Use large-format bluestone, concrete slabs, or porcelain pavers for a modern look. Budget: $8–$30 per square foot installed (varies by region/material).
- Gravel “pause points”: A small decomposed granite or compacted gravel pad for a chair and side table. Budget: $6–$15 per square foot installed.
- Border the meadow with a narrow mowing strip: A 12–18 inch strip of turf (or gravel) makes maintenance easier and looks crisp.
Outdoor lighting for year-round impact
- Low-voltage path lights: Guide movement along edges and stepping stones.
- Warm spotlights: Uplight tall grasses for winter silhouettes.
- Soft string lighting over a nearby patio: Adds atmosphere while the meadow becomes the “view.”
Climate and Maintenance Considerations
A pocket meadow can be designed for most climates, but you’ll get the best results by matching plants to your region, soil, and irrigation reality. Many meadow perennials are drought-tolerant once established, but they still need consistent moisture in year one.
Seasonal care plan (simple and realistic)
- Spring: Cut back last year’s growth (leave 6–10 inches), remove debris, top-dress with compost if needed, and refresh mulch in thin spots.
- Summer: Water deeply during establishment; after that, water only during prolonged drought. Spot-weed regularly (10 minutes weekly beats a weekend rescue).
- Fall: Enjoy peak color; leave seed heads and grasses standing for structure and wildlife habitat.
- Winter: Let grasses stand—this is when a meadow looks sculptural, especially with frost and low-angle light. Add lighting to highlight texture near patios and windows.
Watering guidance
- Establishment year: 1 inch of water per week (rain + irrigation), adjusting for heat and soil type.
- After establishment: Many meadow plantings thrive with minimal supplemental water, especially if you use regionally adapted natives.
Regional notes
- Hot/dry climates: Consider gravel mulch, drought-tolerant grasses, and xeric perennials. Avoid thirsty species unless you have drip irrigation.
- Humid climates: Prioritize air flow and avoid overcrowding; choose mildew-resistant varieties of monarda and phlox.
- Cold winters: Choose hardy natives and leave plants standing for winter protection; cut back in early spring before new growth.
Budget Ranges: What a Pocket Meadow Typically Costs
Your budget depends on size, whether you DIY, and whether you’re adding hardscape or outdoor living features like seating pads and lighting.
- DIY small pocket meadow (50–150 sq ft): $150–$700
- Includes plants (plugs or small pots), mulch, and basic edging.
- Mid-size DIY + upgraded edging (150–400 sq ft): $700–$2,500
- Adds steel edging, higher plant density, and a few accent boulders or stepping stones.
- Professionally installed pocket meadow (150–600 sq ft): $3,000–$12,000+
- Often includes site prep, premium plant material, irrigation tweaks, lighting, and hardscape integration.
Common Mistakes to Avoid
- Skipping weed control in the beginning: Most “meadow failures” are really weed pressure problems. Prep thoroughly and weed often in year one.
- Planting too many different species: A scattered mix reads messy. Repeat a smaller palette in drifts for a designer look.
- Ignoring height and sightlines: Place taller grasses toward the back (or center of an island bed). Keep lower bloomers near paths and patios.
- No crisp edge: Without edging, a pocket meadow can look accidental next to a lawn or patio. Steel, stone, brick, or a clean mow line fixes this instantly.
- Overwatering after establishment: Many meadow plants prefer deep, infrequent watering. Constant irrigation can encourage floppy growth and disease.
- Cutting everything down in fall: Leaving grasses standing adds winter interest and supports wildlife—plus it looks incredible from your indoor seating areas.
FAQ: Pocket Meadow Design
How big does a pocket meadow need to be to look good?
Even 50–80 square feet can look intentional if you use a strong edge and repeat plants in groups. For a more immersive feel near patio living areas, 150–300 square feet is a sweet spot.
Can I plant a pocket meadow instead of a lawn?
Yes—many homeowners replace a section of lawn (especially along fences or unused side yards) to reduce mowing and add pollinator habitat. Keep a clean border so the meadow reads as a designed landscape feature.
Should I use seeds or plants?
For small residential pocket meadows, plants (plugs or small containers) are more predictable and give faster results. Seed mixes can be cost-effective for larger areas, but they take longer to establish and require more careful weed management.
Will a pocket meadow attract bees near my patio?
It can, especially during peak bloom. If you’re concerned, place the heaviest-blooming pollinator plants a few feet away from dining zones and keep grasses and lower-nectar plants closer to seating areas. A small path or gravel strip also creates comfortable separation.
How do I keep it from looking messy in winter?
Use a crisp edge, include upright grasses, and add subtle landscape lighting. If you prefer a tidier winter look, selectively trim floppy stems while leaving grasses and strong seed heads for structure.
Do I need irrigation?
Drip irrigation is helpful in year one and during drought. Many meadow plantings can be low-water after establishment, especially when matched to your climate and soil.
Your Next Steps: A Simple Plan to Start This Month
- Pick your location: Choose a sunny (or part-shade) spot you see from your patio or main pathway.
- Define the shape: Lay out a ribbon or island with a hose, then commit to a crisp edge (steel, brick, stone, or a mow line).
- Select a tight plant palette: Choose 6–10 plants total, focusing on long bloom, strong structure, and seasonal succession.
- Prep the site: Sheet mulch or remove sod; plan for consistent watering during establishment.
- Add one “living feature”: A small gravel pad with a chair, stepping stones through the planting, or a few low-voltage lights to extend evening patio living.
A pocket meadow doesn’t just add flowers—it changes how you use your yard. It creates movement, privacy, and a natural atmosphere that makes patios feel more like a destination and less like an add-on. Start small, keep the edges crisp, and let the planting mature into the kind of outdoor space you’ll want to linger in all year.
For more landscaping ideas, patio design tips, and outdoor living inspiration, explore the latest guides on thedecormag.com.
More Articles
 Premium Outdoor Living Trends 2026: Innovation, Sustainability, and Elevated Craftsmanship
 Outdoor Living Budget Checklist: A Practical, Step-by-Step Planning Tool for Homeowners
 Kid-Safe Outdoor Furniture: Materials That Survive Play
 Best Outdoor Bar Salt and Spice Station - The Decor Mag
 Best Outdoor Cocktail Cart Picks - The Decor Mag
 Best Outdoor Bar Chip and Dip Station - The Decor Mag
 Practical & Aesthetic Wood Storage Ideas for Outdoor Living Spaces
 How to Create a Potager Garden - The Decor Mag
 Cheap vs Premium Precision in Outdoor Living: What Really Matters for Durability, Safety, and Long-Term Value
 Best Bedroom Inspiration for Cozy: Science-Backed Design Strategies That Warm Your Space and Improve Sleep