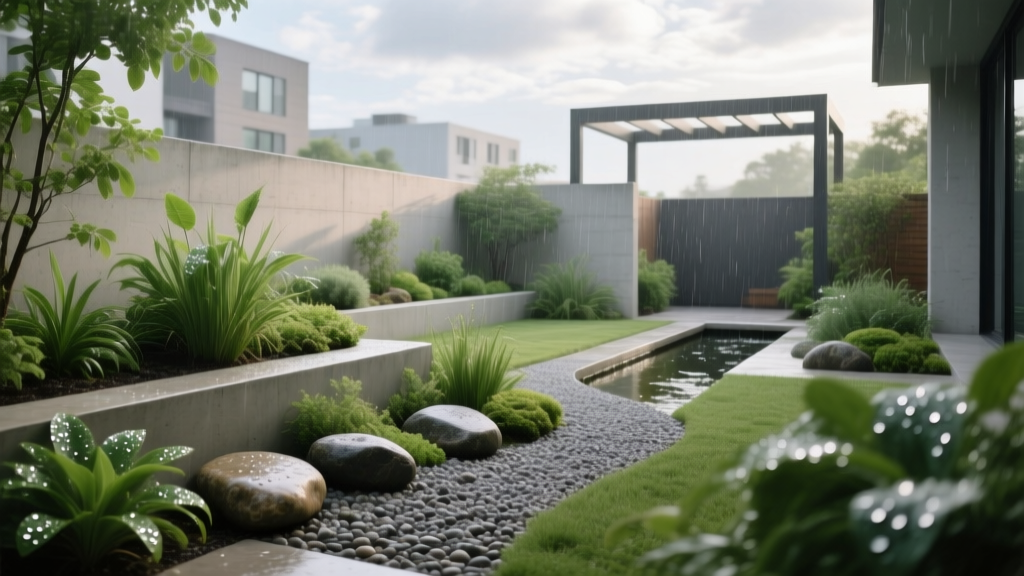
How to Design a Rain Garden - The Decor Mag
Rain has a way of revealing what your yard is really doing. Maybe water rushes off the patio in sheets, puddles linger near the walkway, or the lawn turns into a muddy slip-and-slide every time there’s a storm. A rain garden turns those frustrating moments into a design opportunity—capturing runoff, filtering it naturally, and transforming a problem area into a beautiful landscape feature you’ll enjoy from your outdoor living spaces.
Done well, a rain garden feels like a purposeful extension of your patio living area: a lush planting bed with seasonal color, pollinator activity, and sculptural texture—while quietly working behind the scenes to reduce erosion and help manage stormwater. It’s one of the most practical upgrades you can make to a yard, especially if you want more usable outdoor space without constantly fighting drainage issues.
Whether you’re refreshing a small courtyard, designing a backyard entertaining zone, or improving curb appeal, this guide walks you through rain garden design with layout tips, plant suggestions, material recommendations, budget ranges, and the most common mistakes homeowners make.
What a Rain Garden Does (and Why It Elevates Outdoor Living)
A rain garden is a shallow, planted depression that collects stormwater runoff from roofs, driveways, patios, and walkways. Instead of sending water straight to the street or pooling against your foundation, a rain garden slows it down, lets it soak into the soil, and filters pollutants through plant roots and amended soil.
- Improves drainage near patios, downspouts, and low spots
- Reduces erosion on slopes and along hardscape edges
- Adds year-round interest with ornamental grasses, flowering perennials, and winter structure
- Supports pollinators and beneficial insects (a huge plus for kitchen gardens)
- Creates a “destination” view from seating areas and windows
Think of it as functional landscaping that also happens to be one of the most attractive garden beds you can build.
Step 1: Choose the Right Location
Best placement for performance and aesthetics
Start by identifying where water naturally flows. The ideal rain garden location is downhill from a runoff source (like a downspout or patio edge), but not so close to your home that it creates moisture problems.
- Distance from structures: Place at least 10 feet from your foundation (more if your soils are slow-draining).
- Downspouts: Great sources of water—consider routing one downspout into the garden with a swale or buried drain line.
- Patio runoff: If your patio sheds water, a rain garden can act like a planted “catch basin” at the low edge.
- Visibility: Put it where you can enjoy it—near a patio seating area, along a path, or as a focal point from the kitchen window.
Avoid these locations
- Over septic systems or drain fields
- In areas that stay soggy for days (that’s closer to a wetland garden than a rain garden)
- In spots with steep slopes (over ~12%) unless professionally designed
- Too close to large tree roots that you don’t want to disturb
Step 2: Test Drainage and Soil (So Your Garden Works)
A rain garden should drain within 24–48 hours after a storm. A simple infiltration test prevents the most common failure: a rain garden that becomes a mosquito-friendly pond.
- Dig a hole about 12 inches deep in the proposed area.
- Fill it with water and let it drain completely (this “pre-soaks” the soil).
- Fill it again and time how long it takes to drain.
Rule of thumb: If the water level drops about 1 inch per hour (or faster), you’re in good shape. If it drains slower, you may need deeper soil amendments, a smaller garden, or an overflow strategy.
Soil improvements that make a difference
- Compost: Improves structure and plant health; blend into the top 8–12 inches.
- Washed coarse sand: Helps infiltration in clay-heavy soils (avoid fine sand, which can worsen compaction).
- Topsoil (if needed): Use clean, screened topsoil for reshaping and planting zones.
Many successful rain gardens use a custom mix (often called “rain garden soil”): roughly 50–60% sand, 20–30% topsoil, and 20–30% compost. Your local landscape supply yard may carry a blended option.
Step 3: Size and Shape Your Rain Garden
You don’t need a massive space. A well-sized rain garden can handle runoff from a portion of your roof or patio and dramatically reduce puddling.
Quick sizing guidance
- Small yards: 50–120 sq ft (great for one downspout)
- Medium yards: 120–250 sq ft (handles larger roof sections or patio runoff)
- Large yards: 250–500+ sq ft (multiple downspouts or driveway runoff)
If you want a simple starting point, aim for a rain garden area that’s about 10–20% of the drainage area feeding it (roof/patio section). In clay soils, lean larger; in sandy soils, you can go smaller.
Depth and layout that look intentional
Most residential rain gardens are 4–8 inches deep. Deeper is not always better—shallow, wide gardens can look more natural and integrate beautifully with patio landscaping.
- Kidney/teardrop shapes feel organic and soften hardscape lines.
- Crescent shapes work well along patio edges or at the base of a slope.
- Layered “basin + berm” designs add dimension: excavate the basin and use the removed soil to create a subtle berm on the downhill side.
Step 4: Build the Basin, Inlet, and Overflow (The “Hidden” Design Details)
Excavation and grading basics
Your goal is a level bottom so water spreads evenly and soaks in. After digging:
- Use a long board and a level to check the basin floor.
- Create gently sloped sides (no steep edges that collapse).
- Compact lightly with your feet—don’t over-compact.
Inlet options (where water enters)
- Rock-lined channel (swale): Attractive and durable; use river rock (1–3") over landscape fabric or a layer of gravel for stability.
- Buried drain pipe: A clean look from downspout to basin; use 4" corrugated pipe or PVC with a pop-up emitter at the garden edge.
- Rain chain + catch rocks: Beautiful for patio living—pair with a small rock pad to prevent splash and erosion.
Overflow: your safety valve
Every rain garden needs a controlled overflow for heavy storms.
- Spillway: A slightly lower point on the berm lined with stone so extra water exits without eroding.
- Direct overflow away from the house toward a lawn, dry creek bed, or storm drain path.
Step 5: Choose Plants for Beauty, Toughness, and Season-Long Style
Great rain garden design is all about planting zones. The center experiences the most water; the edges are drier. This is where you can create a layered, professionally designed look—just like any high-end landscape bed.
Planting zones
- Bottom (wet zone): Tolerates occasional standing water
- Mid-slope (moist zone): Handles wet/dry swings
- Rim (dry zone): More like traditional perennials and shrubs
Plant suggestions (widely available favorites)
Perennials & flowering plants (mix for long bloom season):
- Swamp milkweed (Asclepias incarnata): Monarch magnet; thrives in moist soil
- Blue flag iris (Iris versicolor): Elegant spring color, great structure
- Cardinal flower (Lobelia cardinalis): Hummingbird favorite, vivid red
- Purple coneflower (Echinacea purpurea): Tough, sunny edges
- Black-eyed Susan (Rudbeckia fulgida): Summer brightness and easy care
- Bee balm (Monarda): Bold blooms; choose mildew-resistant varieties if humid
Ornamental grasses & texture plants (for movement and winter interest):
- Switchgrass (Panicum virgatum): Upright form, strong winter structure
- Little bluestem (Schizachyrium scoparium): Copper fall color; best on the rim
- Sedges (Carex spp.): Excellent for edges and moist zones
Shrubs for structure (great for patio views and four-season design):
- Red twig dogwood (Cornus sericea): Winter stems pop against snow
- Buttonbush (Cephalanthus occidentalis): Pollinator powerhouse for wetter zones
- Inkberry holly (Ilex glabra): Evergreen structure in many climates
Design tip: repeat, don’t collect
For a cohesive, “designer” look, repeat the same plants in drifts. A simple formula:
- Pick 3–5 main perennials and plant in groups of 3, 5, or 7.
- Add 1–2 grasses/sedges for movement and winter presence.
- Anchor with 1–3 shrubs (if space allows) for year-round structure.
Materials and Edging That Make It Feel Like a Finished Outdoor Feature
A rain garden shouldn’t look like a ditch. The right materials connect it to your patio design and overall landscaping.
Edging and borders
- Natural stone (flagstone or chopped stone): Premium look, long-lasting; ideal near patios and walkways.
- Steel or aluminum edging: Clean, modern lines; excellent for contemporary outdoor living spaces.
- Timber edging: Budget-friendly but shorter lifespan; choose rot-resistant wood and avoid treated lumber where water flows.
Mulch choices
- Shredded hardwood mulch: Stays in place better during storms than bark nuggets.
- Pine fines: Natural look, good knit; refresh more often.
- River rock (selective use): Best for inlet areas and splash zones; avoid using rock as the main “mulch” everywhere (it heats up and can trap debris).
Outdoor furniture placement (yes, it matters)
If your rain garden is near a patio, treat it like a view feature:
- Position a bench or bistro set to face the rain garden for a seasonal “show.”
- Use weather-resistant materials like powder-coated aluminum, teak, or all-weather wicker—especially near splash zones.
- Add low-voltage landscape lighting (path lights or small uplights) to highlight grasses and winter stems for year-round outdoor living ambiance.
Budget Ranges: What a Rain Garden Typically Costs
- DIY small rain garden (50–120 sq ft): $300–$1,200
- Soil amendments: $80–$300
- Plants: $150–$700 (depends on pot size and plant count)
- Mulch/stone: $70–$250
- Mid-size DIY with upgraded stone inlet/edging: $1,200–$3,000
- Professionally installed rain garden: $3,000–$8,000+
- Higher if you add drainage piping, significant regrading, or premium stonework
Want the biggest visual impact per dollar? Spend on plants in 1–2 gallon sizes (for faster fill-in) and a stone-lined inlet that looks intentional.
Climate and Seasonal Considerations
Cold climates (freeze/thaw and snow)
- Choose plants with strong winter structure (switchgrass, red twig dogwood).
- Keep the inlet and spillway clear of leaf buildup before winter.
- Avoid salt-laden runoff from de-iced driveways; if unavoidable, select salt-tolerant plants and add a buffer bed.
Hot or drought-prone climates
- Pick plants that handle swings between wet storms and dry stretches (many native grasses excel here).
- Mulch well to reduce evaporation.
- Use drip irrigation temporarily for establishment—most rain gardens need supplemental watering in the first growing season.
Humid climates
- Prioritize airflow: avoid overcrowding and choose mildew-resistant varieties (especially Monarda/bee balm).
- Use shredded mulch rather than thick, moisture-trapping layers.
Maintenance: Keep It Looking Like a Designed Landscape (Not a Wild Patch)
The first year is the most hands-on. After establishment, rain garden maintenance is typically lighter than a traditional lawn area.
Simple seasonal checklist
- Spring: Cut back grasses and perennials, top up mulch, re-edge borders, check for sediment buildup at the inlet.
- Summer: Weed early, water during extended dry spells, deadhead selectively for longer bloom.
- Fall: Remove excess leaves from the basin (a thin layer is fine), check the overflow path, plant bulbs on the rim for spring color.
- Winter: Leave seed heads and grasses for structure and birds; inspect after freeze/thaw storms for erosion.
Common Mistakes to Avoid
- Placing it too close to the house: Keep a safe buffer to protect foundations and basements.
- Skipping the drainage test: If it doesn’t infiltrate, it won’t function.
- Making it too deep and narrow: Shallow and wide generally performs better and looks more natural.
- Not building an overflow: Without a spillway, heavy storms can wash out plants and mulch.
- Using the wrong mulch: Large bark nuggets float away; use shredded mulch and stone where splash occurs.
- Planting only “wet” plants everywhere: Match plants to zones for healthier growth and better design.
FAQ: Rain Garden Design Questions Homeowners Ask
Do rain gardens attract mosquitoes?
A properly designed rain garden drains within 24–48 hours, which prevents mosquitoes from completing their breeding cycle. If water stands longer, improve infiltration with soil amendments or adjust the size/overflow.
Can I build a rain garden next to a patio?
Yes—and it can look fantastic as part of patio landscaping. Keep the basin far enough from the home, use a rock-lined inlet to control splash, and add edging so it reads as a finished garden bed.
What if my soil is heavy clay?
Clay can work, but you’ll likely need more amendment (sand + compost), a wider garden footprint, and a reliable overflow. In extreme cases, consult a landscape professional for a hybrid solution with underdrains.
Are native plants required?
Native plants are strongly recommended because they handle local weather swings and support pollinators, but you can include well-behaved ornamentals that tolerate periodic wetness. Avoid invasive species and choose plants suited to your light and moisture conditions.
How long does it take for a rain garden to look full?
With 1–2 gallon perennials and proper spacing, expect a satisfying look in one season and a mature, filled-in garden in 2–3 years. Grasses and shrubs add early structure while perennials knit together.
Can a rain garden handle roof runoff from multiple downspouts?
Yes, if it’s sized appropriately and has a sturdy inlet and overflow. For larger roof areas, consider splitting runoff into two smaller rain gardens for easier integration into your landscape design.
Next Steps: A Simple Plan You Can Start This Weekend
- Walk your yard during a rain (or right after) and note puddles and flow paths from roof, driveway, and patio edges.
- Pick a visible spot at least 10 feet from the foundation where a rain garden will improve both drainage and the view from your outdoor living area.
- Do a quick infiltration test and decide whether you’ll amend soil or scale the design.
- Sketch a shape with a hose, plan an inlet and a stone-lined overflow, then build planting zones.
- Choose a tight plant palette for a cohesive, designer look—and plant in repeating drifts.
A rain garden is one of those upgrades that pays you back every time it rains—and every time you step outside to enjoy your patio, garden, or backyard. For more landscaping ideas, outdoor furniture guides, and inspiring patio living designs, explore more articles on thedecormag.com.
More Articles
 Science vs Summer: How Thermal Physics, Material Science, and Bioclimatic Design Shape Outdoor Living
 Best Outdoor Lantern and Candle Options - The Decor Mag
 Outdoor Pavilion Ceiling Fan Wiring - The Decor Mag
 Best Outdoor Bar Herb Garden Planter - The Decor Mag
 How to Create a Succulent Garden - The Decor Mag
 How to Create a Bat Friendly Garden - The Decor Mag
 Best Outdoor Ice Bucket Station Ideas - The Decor Mag
 Best Outdoor Bar Wine Glass Hanger - The Decor Mag
 Pergola vs Awning vs Sail Shade: Best Patio Shade (2026)
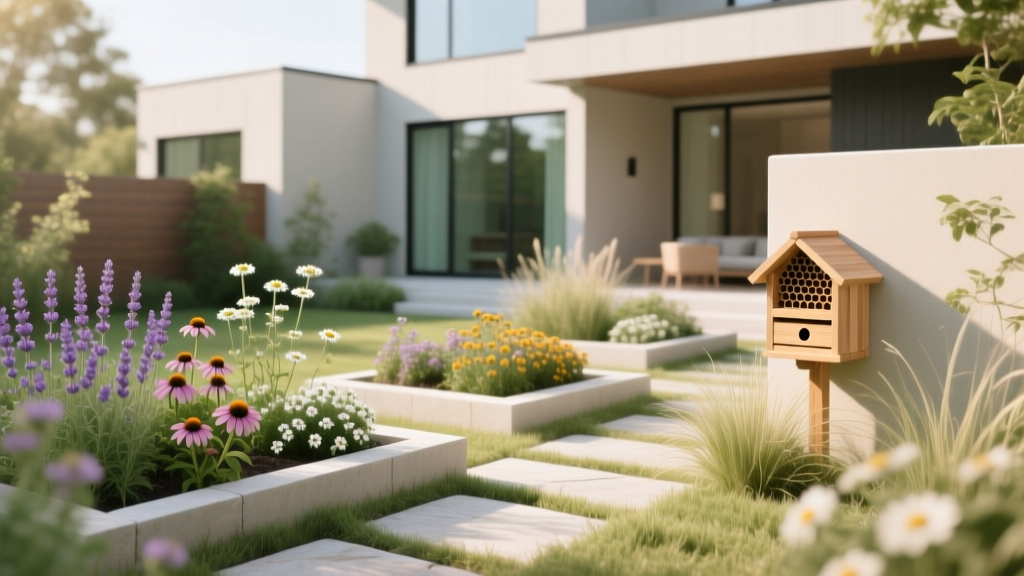 How to Design a Bee Garden - The Decor Mag