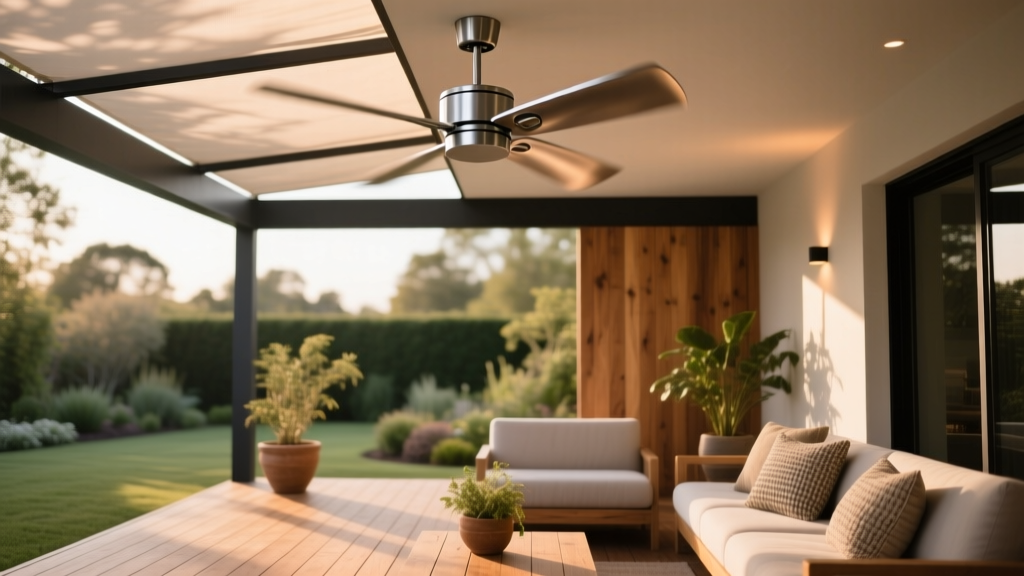
Outdoor Pavilion Ceiling Fan Wiring - The Decor Mag
An outdoor pavilion can be the crown jewel of a backyard—part shade structure, part entertaining hub, part everyday retreat. Add a ceiling fan, and the whole space becomes noticeably more livable: summer air feels lighter, bugs are less persistent, and even warm evenings stay comfortable long after the grill cools down.
But a ceiling fan in an outdoor pavilion isn’t just a décor upgrade. The wiring choices you make—power source, switches, wet-rated fixtures, conduit, and weatherproof connections—directly affect safety, reliability, and how “finished” the space feels. Thoughtful wiring also unlocks better lighting, smart controls, and a layout that supports real outdoor living: dining, lounging, and hosting across multiple seasons.
This guide walks you through outdoor pavilion ceiling fan wiring from a homeowner’s perspective, with practical, design-forward recommendations. You’ll learn how to plan the electrical, choose materials that handle sun and moisture, avoid common mistakes, and build a pavilion that feels intentional—like an outdoor room, not an afterthought.
Start With the Big Picture: How You Want to Use the Pavilion
Before you pick a fan or run a single wire, map the pavilion’s purpose. Wiring is easier (and often cheaper) when it’s designed around how you’ll actually live in the space.
Choose a “primary zone” and wire for it
- Outdoor dining pavilion: Prioritize centered fan placement, dimmable overhead lighting, and a switch location near the main entry.
- Lounge pavilion: Consider two smaller fans or one large fan plus layered lighting (sconces, string lights, or landscape lighting) for ambiance.
- Outdoor kitchen pavilion: Separate circuits for fan and task lighting; plan for additional loads like vent hoods, refrigerators, or heaters.
- Poolside pavilion: Wet-rated equipment, corrosion-resistant hardware, and GFCI protection are non-negotiable.
Fan placement affects comfort more than fan size
- Center the fan over the main seating or dining area, not necessarily the pavilion’s geometric center.
- Maintain safe clearances: typically 7 ft. minimum from floor to blades (check local code and manufacturer specs), and allow ample distance from beams.
- For larger pavilions, consider two fans spaced evenly rather than one oversized unit.
Safety and Code Basics (What Homeowners Should Know)
Outdoor ceiling fan wiring touches on electrical code, weatherproofing, and structural support. Many homeowners hire a licensed electrician—and that’s often the smartest route—yet you’ll still benefit from understanding the essentials so you can plan correctly and avoid budget surprises.
Outdoor ratings: damp vs. wet
- Damp-rated: Suitable for covered patios and pavilions where the fan is protected from direct rain. Great for most roofed pavilions with adequate overhang.
- Wet-rated: Built for direct exposure to rain and heavy moisture. Ideal for open-sided pavilions, coastal climates, and areas with wind-driven rain.
GFCI protection is a must
Outdoor circuits generally require GFCI protection to reduce shock risk. Many outdoor pavilion electrical plans include:
- GFCI breaker at the main panel or GFCI device upstream in the circuit
- Weather-resistant (WR) receptacles in weatherproof “in-use” covers
Fan-rated boxes and structural support
A ceiling fan must be mounted to a fan-rated electrical box and secured to framing that can handle vibration. If your pavilion has exposed beams, your electrician may recommend a brace or blocking between rafters to create a rock-solid anchor point.
Wiring Configurations That Make Outdoor Living Easier
The best outdoor pavilion wiring is the wiring you don’t have to think about. These common setups help you get the right comfort and lighting without constant fiddling.
Option 1: One switch for fan, one switch for light (most popular)
This is the sweet spot for many patio living spaces: predictable, intuitive, and easy for guests.
- Pros: Simple daily use; independent control of airflow and lighting.
- Design benefit: Lets you keep soft lighting on for evening ambiance while dialing the fan up or down.
- Best for: Dining pavilions and multipurpose outdoor rooms.
Option 2: Single switch with remote control (clean look, flexible control)
- Pros: Minimal wall clutter; great when adding wiring to an existing pavilion is difficult.
- Considerations: Choose a weather-resistant remote solution and store remotes where they won’t bake in the sun or get damp.
- Best for: Retrofits and minimalist pavilion designs.
Option 3: Smart control + separate lighting zones (premium comfort)
For homeowners aiming at year-round outdoor living, smart switches and zoned lighting make the pavilion feel like an indoor room.
- Pros: Scheduling, voice control, dimming scenes, and easy seasonal adjustments.
- Great pairings: Fan + recessed downlights + perimeter string lights or beam-mounted sconces.
- Best for: Outdoor kitchens, entertaining-focused backyards, and integrated landscape lighting plans.
Materials and Weatherproofing: What to Specify for Outdoor Pavilion Wiring
Outdoor electrical longevity depends on using the right materials from the start. Heat, UV exposure, wind-driven rain, and insects can all take a toll.
Common wiring pathways (your electrician may choose based on pavilion construction)
- Conduit (often PVC or metal): Protects conductors from moisture and physical damage; a strong choice for exposed or surface-mounted runs.
- UF (underground feeder) cable: Often used for underground runs from the main house to the pavilion (as allowed by local code).
- THWN/THHN conductors in conduit: Common for outdoor conduit runs; durable and code-friendly.
Specify outdoor-ready components
- Weatherproof boxes and covers: Look for outdoor-rated, gasketed covers and corrosion-resistant fasteners.
- WR + tamper-resistant receptacles: Ideal for patios, pergolas, and pavilions used by families.
- Corrosion resistance: In coastal or humid climates, prioritize stainless or coated hardware, and consider wet-rated fans even under cover.
Lighting choices that pair beautifully with ceiling fans
Ceiling fans often provide a central light, but layered lighting makes the pavilion feel intentional and improves nighttime usability.
- Warm LED (2700K–3000K): Flattering for skin tones and food; cozy for patio living.
- Dimmable fixtures: Essential for entertaining and late-night lounging.
- Downlights in beams: Clean, architectural look for modern pavilions.
- String lights on a separate switch: Adds instant atmosphere without harsh glare.
Design Recommendations: Furniture, Layout, and Plantings That Work With a Fan-Cooled Pavilion
Once airflow is handled, you can design the pavilion like a real outdoor room—with comfortable furniture, practical surfaces, and landscaping that supports privacy and shade.
Furniture that stays comfortable under a fan
- All-weather lounge seating: Powder-coated aluminum frames with solution-dyed acrylic cushions (often marketed as Sunbrella-type fabrics) handle sun and spills.
- Outdoor dining sets: Teak, aluminum, or high-quality composite tops are reliable for covered patios and open pavilions.
- Rugs: Use polypropylene outdoor rugs to define the space and soften acoustics under a pavilion roof.
Layouts that benefit from airflow
- Dining-first layout: Table centered under the fan, buffet console on one side, grill/outdoor kitchen nearby but not directly under the fan (helps avoid pushing smoke back toward guests).
- Lounge + fire feature: Seating in a U-shape with a fire table, fan set to a gentle speed so it doesn’t disrupt flames.
- Hybrid entertaining: Dining on one half, lounge on the other—consider two fans or a large fan plus a second lighting zone.
Plants that complement a pavilion (and handle breezes)
A ceiling fan improves comfort, but landscaping brings the setting to life. Choose plants that won’t constantly drop debris into seating areas or get shredded by airflow.
- Fragrant, resilient options: Lavender, rosemary, and salvia (great for sunny edges and pollinators).
- Privacy screens: Clumping bamboo (in appropriate climates), podocarpus, or wax myrtle for evergreen coverage.
- Container-friendly plants: Dwarf citrus (warm climates), ornamental grasses, or hardy herbs near dining areas.
- Shady pavilion edges: Ferns, hostas (cooler climates), and hydrangeas where morning sun is available.
Climate and Seasonal Considerations for Year-Round Outdoor Living
Your climate should guide both fan selection and wiring decisions—especially if you plan to use the pavilion beyond summer.
Hot, humid climates
- Choose a higher airflow fan (CFM rating matters) and consider multiple speeds.
- Prioritize mildew-resistant outdoor fabrics and quick-dry cushions.
- Use sealed, wet-rated components if storms are frequent or rain blows in.
Cold or four-season climates
- Consider adding infrared electric heaters (plan wiring capacity early).
- Look for fans with a reversible motor (useful for gentle air circulation under a roof even in cooler months).
- Winterize: turn power off at the switch or breaker when not in use for extended periods, as recommended by your electrician.
Coastal and high-salt environments
- Use wet-rated, corrosion-resistant fans designed for coastal use.
- Plan for more frequent cleaning and hardware checks.
- Choose stainless fasteners and robust exterior-rated boxes and covers.
Budget Ranges: What Outdoor Pavilion Ceiling Fan Wiring Typically Costs
Costs vary widely by distance from the main panel, trenching needs, pavilion construction, and how many circuits you add for outlets, lighting, and heaters. These ranges are a helpful starting point for planning a realistic patio and landscaping budget.
- Basic fan install (existing power present): $250–$750
- New wiring run + switch leg + fan-rated box: $600–$1,800
- Power to a detached pavilion (trenching + subpanel often required): $2,000–$7,500+
- Upgraded plan (fan + layered lighting + multiple outlets): $1,500–$5,000+
- Premium outdoor living electrical (kitchen loads, heaters, smart controls): $5,000–$15,000+
Design tip: even if you’re not buying everything now, ask your electrician to run extra conduit or capacity where feasible. It’s one of the most cost-effective “future-proofing” moves in outdoor design.
Common Mistakes to Avoid
- Using an indoor-rated fan outdoors: It may fail quickly and can become a safety issue in moisture.
- Skipping a fan-rated electrical box: A standard box may not handle vibration and weight.
- Poor switch placement: Place controls where you naturally enter the pavilion—no one wants to cross a dark patio to find a switch.
- Forgetting lighting layers: A single bright center light can feel harsh; add dimmable zones for a true outdoor room effect.
- Underplanning for future upgrades: Outdoor kitchens, heaters, speakers, and landscape lighting are harder to add after finishes are complete.
- Ignoring wind-driven rain: If your pavilion is open-sided, treat it like a wet location—especially on the edges and at the eaves.
Maintenance: Keep the Fan (and Wiring) Performing Beautifully
- Seasonal cleaning: Wipe blades and the motor housing every 1–2 months in peak season; pollen and dust build up fast outdoors.
- Check fasteners: At the start of spring and end of summer, confirm mounting hardware is snug (fans can loosen over time).
- Inspect covers and gaskets: Replace cracked weatherproof covers to keep moisture out of boxes and connections.
- Coastal care: Rinse gently or wipe with a damp cloth to reduce salt residue, and check for corrosion.
FAQ: Outdoor Pavilion Ceiling Fan Wiring
Do I need a wet-rated fan if my pavilion is covered?
If the pavilion roof has generous overhangs and the fan won’t be exposed to rain, a damp-rated fan may be acceptable. If wind-driven rain is common, the pavilion is open-sided, or you’re in a coastal/humid climate, a wet-rated fan is a safer long-term choice.
Can I add a ceiling fan to an existing pavilion?
Often yes. The main questions are whether you have a suitable power source, whether the structure can support a fan-rated box and bracing, and how wiring will be routed (concealed vs. conduit). A quick site visit from a licensed electrician can confirm the best approach.
Should the fan and lights be on the same switch?
For everyday patio living, separate controls are more comfortable: one switch for the fan and one for lighting (or dimming). A remote can work well too, especially for retrofits, but plan a “home base” storage spot so it doesn’t get lost.
What’s the best height for an outdoor pavilion ceiling fan?
Many pavilions perform well with blades roughly 8–10 feet above the finished floor, but it depends on roof height, beam layout, and the fan model’s clearance requirements. Always follow manufacturer instructions and local code requirements.
Can a ceiling fan help with bugs on patios?
Yes—steady airflow can make it harder for mosquitoes to linger near seating areas. Pair the fan with smart landscaping (avoid standing water, use citronella-scented plants strategically) and warm, downward-facing lighting to reduce insect attraction.
Do I need a dedicated circuit for the pavilion fan?
Not always, but it’s often recommended—especially if you’re adding outlets, lighting zones, speakers, or heaters. Dedicated capacity helps prevent nuisance tripping and makes the pavilion feel like a true extension of the home.
Next Steps: Turn a Fan Wiring Plan Into a Finished Outdoor Room
Sketch your pavilion layout (dining, lounge, or kitchen), decide where you want switches and lighting zones, and choose a damp- or wet-rated ceiling fan that matches your climate. Then bring that plan to a licensed electrician so the wiring, weatherproofing, and support details are handled safely and cleanly.
With the right electrical foundation, your pavilion becomes a true year-round outdoor living space—cooler in summer, brighter and more inviting at night, and ready for upgrades as your patio and landscaping evolve.
For more patio living inspiration, outdoor design layouts, and landscaping ideas that elevate everyday life, explore the latest guides on thedecormag.com.
More Articles
 How to Create a Zen Garden - The Decor Mag
 How to Design a Coastal Garden - The Decor Mag
 How to Design a Dragonfly Garden - The Decor Mag
 Outdoor Pavilion Insect Screen Options - The Decor Mag
 Safety vs Scheme: Balancing Aesthetic Vision with Real-World Outdoor Living Protection
 Modern Outdoor Living Space Ideas for 2026 - The Decor Mag
 Best Outdoor Bar Bread Basket Station - The Decor Mag
 Outdoor Gazebo with Screen Curtains - The Decor Mag
 Outdoor Kitchen Flat Top Grill Setup - The Decor Mag
 DIY Summer Porch Makeover: Budget Refresh Under $100