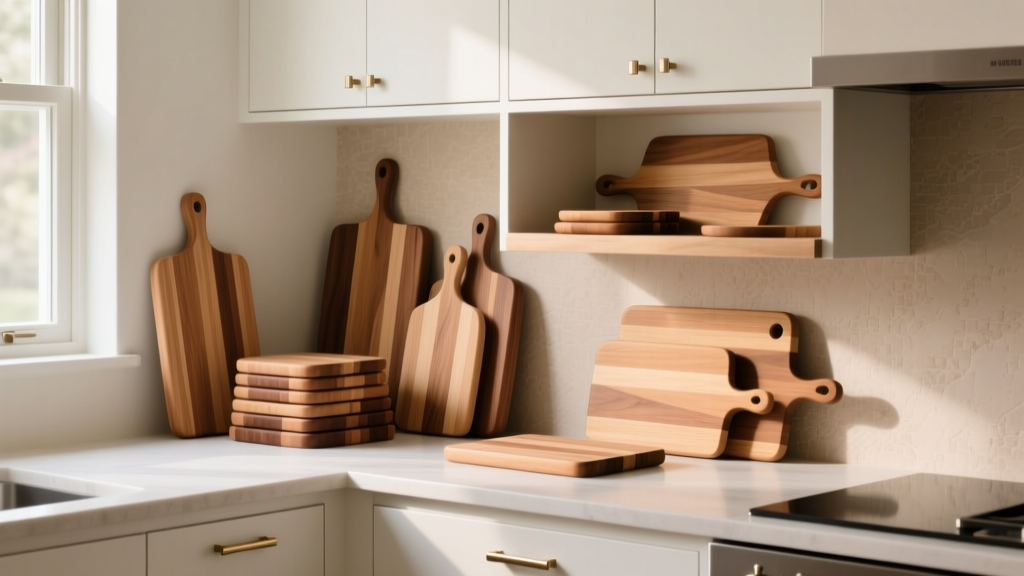
Best Kitchen Cutting Board Storage - The Decor Mag
A cutting board seems like a small detail—until it’s always in the way. For many homeowners, boards end up stacked on the countertop, wedged into an overcrowded cabinet, or stored flat where they never fully dry. The result is clutter, warped wood, dull knives, and a kitchen that feels less functional than it should.
Great kitchen cutting board storage fixes multiple pain points at once: it frees up work surfaces, protects your boards (and your cabinets) from moisture, and creates a smoother cooking workflow. Whether you’re planning a full kitchen renovation or simply upgrading organization, the right storage approach can make your kitchen feel more custom, efficient, and hygienic—without sacrificing style.
Today’s kitchen design trends lean heavily toward clean countertops, hidden storage, and thoughtful “zones” (prep, cooking, cleanup). Cutting board storage fits perfectly into that movement, and it’s one of the easiest upgrades to plan into cabinetry or add after the fact.
What Makes Cutting Board Storage “Best”?
The best cutting board storage balances accessibility, airflow, and protection. Before choosing a solution, consider how many boards you own (and their sizes), how often you use them, and where you prep most often.
Key criteria to look for
- Vertical storage: Boards dry faster and are easier to grab when stored on edge.
- Ventilation: Prevents trapped moisture that leads to odors, mold, or warped wood.
- Right placement: Store near your primary prep zone—typically between sink and cooktop.
- Stable dividers: Keeps boards upright and prevents sliding or tipping.
- Knife-friendly access: Avoid tight slots that scrape edges or chip boards.
Recommended measurements (for real-life kitchens)
- Standard board widths: 10–18 inches wide; thickness often 0.5–1.5 inches
- Minimum slot width per board: 1.25 inches (more if you store multiple thick boards)
- Ideal divider spacing: 1.5–2 inches for easy grab-and-go access
- Minimum cabinet depth: 12 inches works for most; 15–18 inches is comfortable for large boards
- Vertical clearance: At least 14–16 inches for average boards; 18+ inches for oversized boards
Best Cutting Board Storage Locations in a Kitchen Layout
Placement matters as much as the storage solution itself. A well-designed kitchen renovation considers “travel distance” and keeps prep tools close to where you use them.
1) Near the prep zone (most practical)
The ideal spot is in the main prep area—often the stretch of counter between sink and cooktop. Storing boards here reduces back-and-forth steps and keeps the workflow clean.
- Best options: vertical cabinet divider, pull-out organizer, under-counter slot
- Why it works: boards are immediately accessible during chopping and rinsing
2) Next to the sink (best for cleanup)
If you wash boards frequently (especially plastic), placing storage adjacent to the sink is convenient. Prioritize ventilation so damp boards dry fully.
- Best options: ventilated pull-out, open rack inside a sink-base cabinet (not directly under plumbing leaks)
- Avoid: storing wet boards flat under the sink
3) Island storage (best for entertaining kitchens)
For open-plan kitchens, the island is often the main prep station. Adding cutting board storage here keeps countertops clear while making prep feel seamless.
- Best options: island end panel slot, shallow pull-out near seating side, integrated divider cabinet
4) Pantry or tall cabinet (best for bulk board collections)
If you keep specialty boards (large carving boards, cheese boards, serving slabs), a pantry cabinet can store them vertically without crowding daily-use items.
- Best options: tall cabinet with adjustable dividers or a dedicated “tray” pull-out
Top Cutting Board Storage Solutions (Built-In and Add-On)
Vertical cabinet dividers (the renovation-friendly classic)
This is one of the most timeless, functionality-first approaches in kitchen cabinetry. A base cabinet (typically 12, 15, or 18 inches wide) is fitted with vertical dividers to hold cutting boards, baking sheets, and trays.
- Best for: homeowners planning a kitchen remodel or cabinet refresh
- Recommended cabinet width: 12–18 inches (wider if you store many boards)
- Divider material: plywood, finished wood, or metal rails
- Pro tip: request dividers with a smooth finish to avoid splinters and to wipe clean easily
Cost range: $75–$250 as an add-on in semi-custom cabinetry; $200–$600+ in custom builds depending on materials and finish.
Pull-out cutting board organizers (best for accessibility)
A pull-out system turns a deep base cabinet into easy-access vertical storage. It’s especially useful for homeowners who dislike digging into cabinets or who want a more ergonomic setup.
- Best for: maximizing organization in standard base cabinets
- Look for: ball-bearing slides, adjustable dividers, and a wipeable interior
- Ventilation tip: choose open-wire or slotted designs for airflow
Cost range: $60–$200 for retrofit pull-outs; $250–$800 if integrated into new cabinetry with premium hardware.
Countertop vertical racks (best for renters and quick upgrades)
If you need an immediate solution without installation, countertop racks keep boards upright and dry. This aligns with the “intentional countertop styling” trend—functional items can look curated when chosen carefully.
- Best for: everyday boards used daily
- Materials that look elevated: powder-coated steel, stainless steel, bamboo with sealed finish
- Placement: near prep zone but out of splash range from the sink
Cost range: $15–$60.
Wall-mounted rails and brackets (best for small kitchens)
Wall storage is popular in compact kitchen design, especially when base cabinets are limited. It can also complement modern and Scandinavian-style kitchens where functional items are displayed neatly.
- Best for: small kitchens, galley layouts, or minimal cabinetry
- Hardware to consider: stainless rails, S-hooks, board brackets, or pegboard systems
- Design tip: match metal finish to faucet and cabinet hardware for a cohesive look
Cost range: $30–$150 depending on rail length and finish.
Toe-kick drawers (best hidden storage trend)
Toe-kick drawers use the recessed space beneath base cabinets—an increasingly popular kitchen renovation detail for homeowners aiming for clean, minimal countertops. It’s a smart place for flat items like thin boards and trays.
- Best for: thin boards, flexible mats, lightweight trays
- Watch out: moisture and crumbs; choose easy-to-clean surfaces
Cost range: $200–$800+ depending on cabinetry and hardware; typically best planned during a remodel.
Inside-cabinet door mounts (best budget DIY)
Mounting a slim rack to the inside of a cabinet door can work for lightweight plastic boards or thin boards. This is common in DIY kitchen organization upgrades.
- Best for: lightweight boards and small kitchens
- Not ideal for: heavy butcher-block boards (risk of door sagging)
- Installation tip: measure clearance carefully so the rack doesn’t hit shelves or hinges
Cost range: $10–$40.
Material Recommendations: What Works Best (and Why)
Cutting board storage isn’t only about where boards go—it’s also about what the storage system is made of and how it handles moisture, weight, and cleaning.
Stainless steel
- Pros: durable, moisture-resistant, easy to sanitize, fits modern kitchen design
- Cons: shows fingerprints; can look industrial if not balanced with warmer materials
- Best use: countertop racks, wall rails, pull-out frames
Powder-coated steel
- Pros: affordable, available in modern colors (black, white, warm neutrals)
- Cons: chips if banged by heavy boards; check for rust protection
- Best use: racks and divider systems in budget-friendly upgrades
Sealed wood or plywood dividers
- Pros: blends with cabinetry, timeless look, easy to customize spacing
- Cons: needs a quality finish to resist moisture and staining
- Best use: built-in cabinet dividers and custom storage
Bamboo organizers
- Pros: warm look, lightweight, often budget-friendly
- Cons: can swell or delaminate if finish is poor; avoid soaking and wipe dry
- Best use: countertop racks in low-splash areas
Budget Considerations: What to Spend (and Where It Pays Off)
Cutting board storage can be a simple $20 fix or a cabinet-level upgrade. The best choice depends on your kitchen renovation timeline and how strongly you value daily convenience.
- $10–$50: inside-cabinet door rack, basic countertop rack, simple dividers
- $50–$200: better countertop racks, retrofit pull-out organizers, wall rail systems
- $200–$800+: integrated pull-outs, toe-kick drawers, semi-custom cabinet divider upgrades
Where to invest: If you cook often, spend more on a pull-out organizer or built-in vertical divider near the prep zone. Quality slides and stable dividers reduce daily annoyance and prevent boards from tipping or scraping cabinets.
Common Cutting Board Storage Mistakes to Avoid
- Storing boards flat while damp: This traps moisture and leads to warping (especially wood) and odors.
- Overcrowding a single slot: Tight stacks scrape boards, slow drying, and make it annoying to pull one out.
- Ignoring board size: Oversized boards need deeper cabinets or dedicated storage; don’t force them into shallow spaces.
- Placing wood boards under the sink: High humidity and leak risk shorten board lifespan.
- Choosing rough or unfinished dividers: They catch grime and can splinter; always choose smooth, sealed surfaces.
- Mounting heavy boards on weak door racks: This can stress hinges and misalign doors over time.
Maintenance Tips: Keep Boards Clean, Dry, and Long-Lasting
For wood and end-grain boards
- Dry boards upright with airflow on both sides; avoid leaving them on a wet counter.
- Oil regularly with food-grade mineral oil (every 3–6 weeks for frequent use; more often in dry climates).
- Use board cream (mineral oil + beeswax) for added water resistance.
- Never soak; wipe, wash quickly, and dry immediately to prevent warping.
For plastic boards
- Choose a storage spot that allows drip-drying (rack or ventilated pull-out).
- Dishwasher-safe boards can still warp; avoid high-heat cycles if warping is an issue.
- Replace deeply grooved boards—they hold bacteria and dull knives faster.
Keep the storage area clean
- Line the base of a cabinet divider section with a removable, wipeable mat.
- Wipe dividers monthly with mild soap and water; dry thoroughly.
- If your boards often go away slightly damp, prioritize wire or slotted systems for airflow.
FAQ: Kitchen Cutting Board Storage
What’s the best way to store cutting boards to prevent warping?
Store boards vertically with airflow on both sides and avoid putting them away damp. For wood boards, dry immediately after washing and oil regularly.
Should cutting boards be stored near the sink or near the stove?
Most kitchens work best with cutting boards near the main prep zone, typically between the sink and cooktop. If you wash boards frequently, near-sink storage is convenient as long as it’s well-ventilated and not in a leak-prone spot.
Are pull-out organizers worth it during a kitchen renovation?
Yes, especially if you cook daily or want a clutter-free countertop. Pull-outs improve access in deep base cabinets and help boards dry upright when designed with open sides or slotted dividers.
How much space should I plan for cutting board storage in new cabinets?
A dedicated 12–18 inch base cabinet section with vertical dividers works well for most households. Plan 1.5–2 inches per slot and at least 14–18 inches of vertical clearance depending on board height.
Can I store cutting boards in a drawer?
You can, but it’s best for thin boards stored on edge with dividers. Avoid stacking damp boards flat in a drawer—poor airflow increases odor and warping risk.
What’s a good solution for a small kitchen with limited cabinets?
Wall-mounted rails, compact countertop racks, or an inside-cabinet door mount can keep boards accessible without taking up valuable shelf space. Choose a finish that matches your kitchen hardware for a cohesive look.
Next Steps: Upgrade Your Kitchen Organization with Purpose
Start by measuring your largest board and identifying your true prep zone. If you’re renovating, ask your cabinet supplier about vertical dividers, toe-kick drawers, or a pull-out organizer tailored to your base cabinet widths. If you’re not remodeling, a well-made countertop rack or wall rail can still deliver a noticeable improvement in kitchen organization and everyday flow.
For more practical renovation guidance, storage ideas, and kitchen design inspiration, explore the latest on thedecormag.com.
More Articles
 Best Kitchens for Functional Design: Layouts, Brands, and Ergonomic Principles That Work Every Day
 Cheap vs Premium Real: What the Label Doesn’t Tell You About Butter, Cheese, and Olive Oil
 Best Kitchen Specialty Cooking Oil Storage - The Decor Mag
 Best Kitchen Cleaning Supply Storage - The Decor Mag
 Best Kitchen Canister Set Displays - The Decor Mag
 Kitchen Terrazzo Floor Tile Guide - The Decor Mag
 Kitchen Cabinet Interior Finish: Best Choices (2026)
 Best Kitchen Food Storage Container Systems - The Decor Mag
 Kitchen Fluted Cabinet Door Trends - The Decor Mag
 Kitchen Hidden Appliance Drawer Ideas - The Decor Mag