Kitchen Curved Architectural Details - The Decor Mag
Curves are having a real moment in kitchen design—and for good reason. After years of sharp corners and rigid lines, homeowners are gravitating toward curved architectural details that feel softer, more welcoming, and visually “custom.” The best part: a curved kitchen doesn’t have to be ultra-modern or expensive. Subtle arches, rounded islands, and radius countertops can blend into everything from warm transitional kitchens to classic European-inspired spaces.
Beyond style, curves can improve flow and day-to-day function. Rounded corners reduce bruised hips in tight walkways, curved edges encourage better circulation around islands, and arched niches can turn dead wall space into purposeful storage. If you’re planning a kitchen renovation—or simply refining your current layout—curved details are one of the most effective ways to add architectural interest without clutter.
This guide breaks down where curves work best, which materials hold up in real life, how much to budget, and how to avoid the common mistakes that make curved kitchens feel gimmicky rather than timeless.
Why Curves Work: Beauty, Movement, and Safer Traffic Flow
Curved architectural details bring a human scale to kitchens, which often contain large rectangles (cabinets, appliances, backsplashes, islands). Introducing one or two curved elements helps balance those strong lines.
- Improved circulation: Rounded edges make it easier to move around islands and through narrow zones.
- Fewer sharp corners: Helpful for families with kids, smaller kitchens, or high-traffic layouts.
- Architectural character: Arches and radius details can look built-in and higher-end than flat drywall returns.
- Trend-forward but adaptable: Curves pair well with current kitchen design trends (warm woods, fluted textures, mixed metals) while still feeling classic when used sparingly.
Where to Add Curved Architectural Details (High Impact Areas)
1) Curved Kitchen Islands
A curved kitchen island is often the most dramatic—and functional—place to introduce radius forms. Curved overhangs make seating feel more social and allow more comfortable clearance around stools.
Practical measurements:
- Walkway clearance: 42 inches minimum around the island (48 inches for multiple cooks or high-traffic homes).
- Seating overhang: 12 inches minimum; 15 inches is more comfortable for adults.
- Stool spacing: 24 inches per seat for everyday comfort (30 inches if you want generous elbow room).
- Curved end radius: A 6–12 inch radius on corners reads subtle and refined; larger radii create a more sculptural effect.
Design approaches:
- “Softened rectangle” island: Straight sides with gently rounded ends—easy to execute and timeless.
- Kidney or racetrack shape: A more organic curve, best in larger kitchens with open circulation paths.
- Curved waterfall edge: A statement detail that pairs well with quartz, porcelain slab, or solid surface.
Cost range: A standard island with minor radius corners may add $300–$1,200 in fabrication. Fully curved cabinetry and countertops can add $2,500–$10,000+ depending on size, material, and custom millwork.
2) Radius Countertops and Rounded Corners
If you want a subtle upgrade, start with radius countertop corners. It’s a small move that improves daily comfort and safety, especially in tight kitchens where corners are at hip level.
Material recommendations:
- Quartz: Durable, low maintenance, consistent patterning. Works well with gentle radii; tighter curves may show seam planning limitations.
- Porcelain slab: Heat- and stain-resistant, excellent for modern kitchens; fabrication can be pricier and requires experienced installers.
- Solid surface (acrylic): One of the best for smooth curves and integrated sinks; scratches can be buffed out.
- Butcher block: Warm and forgiving; can be shaped easily into curves, but needs regular oiling and careful water management.
Budget note: Rounding a few corners is often a modest upcharge. Large radius edges, curved front profiles, or thickened miters increase labor and can add 10–25% to countertop fabrication costs.
3) Arched Doorways and Pass-Throughs
Arched openings are a favorite in transitional kitchen design because they feel architectural, not decorative. They also visually frame adjacent spaces like a pantry, breakfast nook, or scullery.
Best uses:
- Entry from a hallway into an open kitchen
- Opening to a butler’s pantry or coffee bar
- Pass-through to a dining area (especially in older homes)
Measurements that look intentional:
- Arch height: Keep the spring line (where the curve begins) at least 80 inches, and ideally aligned with nearby door head heights for cohesion.
- Wall thickness depth: If you have a thick wall, consider a gently arched “tunnel” return for a custom look.
Cost range: A simple drywall arch in an existing opening can run $800–$2,500. Structural changes or resizing openings often land at $3,000–$8,000+ depending on load-bearing requirements.
4) Curved Kitchen Cabinetry and Appliance Panels
Curved cabinet ends (often called radius end panels) make runs feel tailored and can soften the look of tall pantry banks. This is also a smart way to transition between cabinetry and a walkway.
Where it works best:
- At the end of an island facing a major pathway
- On a tall pantry run that meets an entry point
- Around a built-in breakfast nook or banquette edge
Material and construction tips:
- Bent plywood with veneer: Strong and stable; great for stained wood finishes.
- MDF with paint: Common for painted curved panels; ensure edges are properly sealed to resist moisture.
- Thermofoil: Budget-friendly but not always ideal near heat sources; check manufacturer specs for durability.
Cost range: Expect $400–$1,500 per curved end panel depending on size, finish, and cabinet line. Fully curved base cabinets (true radius boxes) can be $1,500–$4,000+ each.
5) Curved Backsplashes and Niche Details
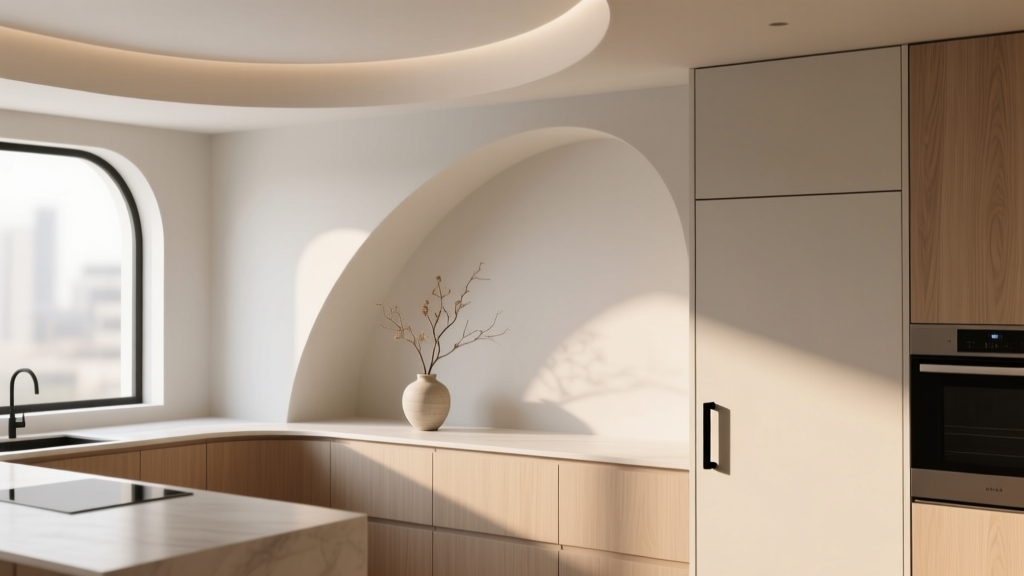
Curves aren’t limited to openings and furniture-like elements. A softly arched niche over a range, a rounded plaster hood, or a curved tile backsplash can become a kitchen focal point without changing the layout.
Trending (and lasting) options:
- Plaster or microcement range hood with rounded edges: Warm, sculptural, and less “boxy.”
- Arched niche shelf: Use for oils, salt, or decor—best with sealed stone or tile inside for easy cleaning.
- KitKat or finger mosaic tile in gentle arcs: Adds texture and pairs well with warm wood cabinets.
Maintenance note: Choose grout that resists staining (high-performance cement grout or epoxy in splash-heavy areas). For plaster hoods, use a sealed finish and keep a strong, properly vented range hood insert to minimize grease buildup.
Material Comparisons: Choosing the Right Surface for Curves
Curves often require more fabrication time and skilled labor. Selecting the right material can control cost while improving durability.
- Quartz: Best for everyday low-maintenance kitchens. Avoid overly complex tight curves unless your fabricator confirms feasibility.
- Natural stone (marble, quartzite): Beautiful for curved waterfall edges and statement islands. Marble needs more upkeep; quartzite is generally tougher but varies by slab.
- Solid surface: One of the easiest materials for seamless curves, integrated sinks, and coved backsplashes. Great for family kitchens and modern designs.
- Wood: Excellent for curved furniture-style islands or rounded shelf details. Requires consistent sealing near sinks and dishwashers.
- Tile: Small-format tile handles curves best. Large-format tile can look sleek but requires precise cutting and planning around radii.
Layout Planning: How Curves Affect Kitchen Function
Curves can improve movement, but they still need to respect the fundamentals of kitchen layout and organization.
Key planning guidelines
- Keep the work zones efficient: If you’re curving the island, maintain a clear prep zone between sink, fridge, and range.
- Protect landing areas: Provide at least 15 inches of counter on the handle side of the fridge and 12–18 inches beside the cooktop or range for safe set-down space.
- Don’t sacrifice storage access: Curved base cabinets can reduce usable interior volume. Counterbalance with deeper drawers elsewhere.
- Plan lighting early: Curves create shadows. Add layered lighting—recessed, under-cabinet, and decorative pendants—to prevent dark corners.
Budget Considerations and Where to Spend
Curved architectural details can be as affordable as rounding a few corners—or as custom as fully radiused cabinetry and stone. The best strategy is to choose one “hero curve” and support it with subtle repeats.
Typical cost ranges (ballpark):
- Radius countertop corners: $0–$300 per corner (often bundled; varies by fabricator)
- Curved island panel or end: $400–$1,500+
- True curved cabinetry (custom): $5,000–$20,000+ added to a full kitchen, depending on scope
- Arched drywall opening: $800–$2,500
- Plaster/microcement hood: $2,000–$8,000+ including hood insert and finishing
Where it’s worth investing:
- High-traffic edges: Rounded island corners and end panels pay off daily.
- Quality fabrication: Curves show flaws faster than straight lines—choose experienced installers.
- Ventilation: If you’re doing a sculptural hood, invest in a properly sized insert and ducting.
Maintenance Advice: Keeping Curves Looking Crisp
- Clean curved seams gently: Use non-abrasive cleaners so you don’t dull curved edges, especially on polished stone.
- Seal where needed: Natural stone and grout lines should be sealed on a schedule recommended by your installer (often annually, depending on product and use).
- Watch for bump damage: Rounded corners reduce chipping, but painted curved panels can scuff. Choose durable cabinet paint (conversion varnish or catalyzed finishes) when possible.
- Use the right hardware: Soft-close hinges and drawer glides protect curved cabinet doors from slamming stress.
Common Mistakes to Avoid
- Overdoing the theme: Too many arches and curves can feel like a set design. Pick one main curved feature and echo it subtly.
- Ignoring clearances: A curved island that pinches a walkway below 42 inches can make the kitchen feel smaller, not smoother.
- Choosing the wrong tile scale: Large tile fights tight curves. For arched niches and rounded splash edges, small-format tile (mosaics, zellige-style, or 2x6) is more forgiving.
- Not planning seams: Stone and quartz curves require seam strategy. Poor seam placement becomes a focal point.
- Skipping ventilation planning: Sculptural hoods still need serious performance. Undersized inserts lead to grease buildup and lingering odors.
- Forgetting functional storage: Curved cabinets can reduce interior space; balance with deep drawers, pull-outs, and a well-planned pantry.
FAQ: Kitchen Curved Architectural Details
Are curved kitchen islands practical for everyday cooking?
Yes—when planned correctly. A “softened rectangle” island with rounded ends often delivers the best mix of prep space, seating, and easy circulation. Keep at least 42 inches of clearance around it and maintain a dedicated prep zone.
What’s the most budget-friendly way to add curves in a kitchen renovation?
Start with radius countertop corners, a curved end panel on the island, or an arched drywall opening in a non-structural wall. These options can add architectural interest without the cost of fully custom curved cabinetry.
Which countertop material is easiest for curved edges?
Solid surface is typically the most forgiving for seamless curves and integrated details. Quartz and natural stone can also work well, but the curve radius and seam planning matter more.
Do curves make a small kitchen feel bigger or smaller?
Often bigger—because curves reduce visual “hard stops” and improve flow. The key is keeping clearances generous and avoiding bulky curved shapes that eat into walkway space.
Are arched doorways a passing kitchen trend?
Arches cycle in popularity, but they’re also rooted in classic architecture. A simple, well-proportioned arch that matches your home’s style tends to age well—especially when paired with timeless finishes.
How do I coordinate curved elements with modern appliances and flat-front cabinets?
Use curves as accents: a rounded island end, an arched niche, or a soft plaster hood. Keep the rest of the kitchen clean-lined, and repeat one curve elsewhere (like a rounded shelf edge or light fixture shape) to make it feel intentional.
Next Steps: How to Bring Curves Into Your Kitchen Plan
Start by identifying your kitchen’s biggest pain points—tight walkways, sharp island corners, a bland wall that needs character, or a layout that feels too boxy. Then choose one curved architectural detail that solves a functional issue while adding style. For many homeowners, that’s a rounded island corner or a gentle arch into a pantry or breakfast nook.
Before you finalize drawings, do these quick actions:
- Measure clearances around your island and major pathways (aim for 42–48 inches).
- Request curved detail samples from your cabinet maker or fabricator (edge profiles, panel radii, finish options).
- Confirm seam placement and curve feasibility with your countertop fabricator early.
- Plan lighting to prevent shadows along curved surfaces and niches.
Curves bring comfort, movement, and a custom feel—without sacrificing the timeless functionality that makes a kitchen truly work. For more kitchen renovation ideas, organization tips, and finish inspiration, explore the latest guides on thedecormag.com.
More Articles
 Best Kitchen Lighting for Function & Style (2026)
 Kitchen Counter Materials for Your Lifestyle (2026)
 How to Choose Kitchen Backsplash Grout Color - The Decor Mag
 How To Clean Fluted: A Practical, Step-by-Step Guide for Stainless Steel, Copper, and Cast Iron Cookware
 Kitchen Drawer Organization That Lasts (2026)
 Walk-In Pantry Kitchen Design Ideas (2026)
 Best Kitchen Specialty Cooking Oil Storage - The Decor Mag
 Best Kitchen Island Ideas for Every Size - The Decor Mag
 How to Design a Kitchen with a Breakfast Bar - The Decor Mag
 Minimalist Alternatives to Essential Kitchen Tools: Smart Substitutions That Reduce Clutter Without Compromising Performance