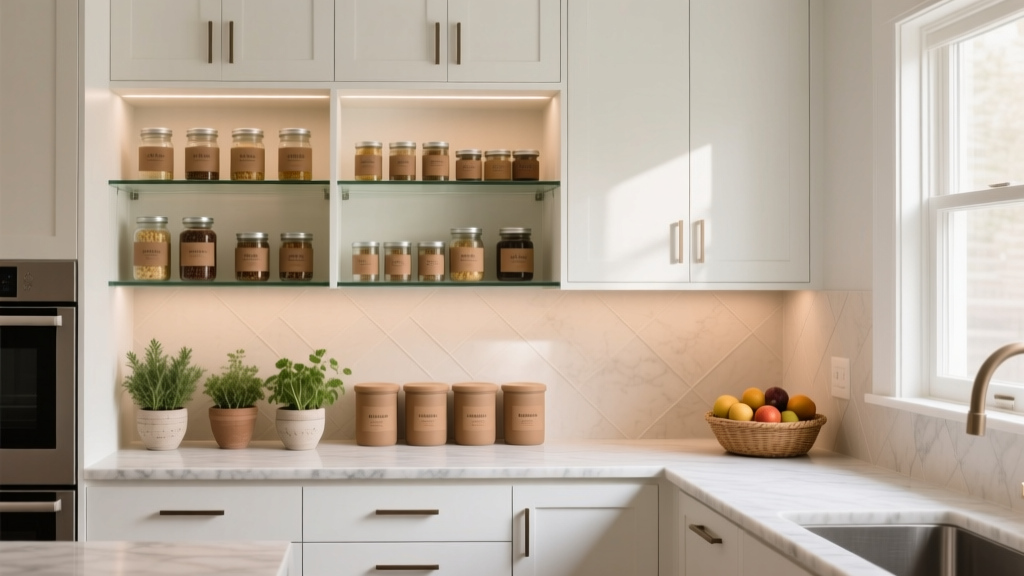
Kitchen Pantry Organization: Pro Tips (2026)
A well-organized kitchen pantry is one of those upgrades that pays you back every single day. It speeds up meal prep, reduces food waste, keeps your counters clear, and makes your entire kitchen feel more intentional—especially if you’re planning a renovation or trying to elevate your kitchen design without a full remodel.
Pantry organization also bridges the gap between “pretty kitchen” and “functional kitchen.” Current kitchen design trends favor clean sightlines, concealed storage, and highly efficient work zones. A professional-style pantry supports all of that by giving every item a designated home, using smart layouts, and relying on durable, easy-to-maintain materials.
Whether you have a walk-in pantry, a reach-in closet, or a few cabinet shelves, the principles are the same: assess, zone, contain, label, and maintain. The result is a pantry that looks polished and works hard—timeless functionality with a modern, curated feel.
Step 1: Assess Your Pantry Space and Set a Goal
Measure before you buy anything
Grab a tape measure and write down:
- Pantry width, depth, and height (in inches)
- Shelf spacing (distance between shelves)
- Door swing clearance and any obstructions (light switches, trim, outlets)
- Baseboard height and whether shelves must notch around it
Useful reference measurements for pantry planning:
- Ideal shelf depth: 10–12 inches for most pantries (prevents “lost in the back” items)
- Deep pantry shelves: 14–16 inches only if using pull-out drawers or turntables
- Vertical clearance:
- 6–8 inches for canned goods
- 9–12 inches for cereal boxes, pasta, and snacks
- 12–16 inches for small appliances or tall bottles
- Aisle width (walk-in pantry): 36 inches minimum; 42–48 inches feels comfortable
Decide what “organized” means for your household
Professional pantry organization is less about matching containers and more about reducing friction. Choose 2–3 priorities:
- Faster weeknight cooking
- Kid-friendly snack access
- Better bulk storage (Costco-style)
- Cleaner aesthetic for an open-concept kitchen
- Reducing expired items and duplicates
Step 2: Choose the Right Pantry Layout (Even Without Remodeling)
Layout options that work in real kitchens
Your pantry’s footprint determines the best organizational approach. These layouts align with both current renovation trends and timeless storage design:
- Reach-in pantry (closet-style): Best with adjustable shelving and clear bins. Keep shelf depth around 12 inches.
- Walk-in pantry: Consider U-shaped shelving for maximum storage. Use the back wall for overflow and bulk items.
- Butler’s pantry / prep pantry: Trending in kitchen renovations—use it to store small appliances, coffee station items, and entertaining supplies.
- Pull-out pantry cabinet: Great for narrow kitchens; relies on full-extension slides for visibility.
Pro tip: Avoid “one giant shelf” syndrome
Long, deep shelves invite clutter. Instead, build in smaller zones using:
- Pull-out drawers (even retrofit wire drawers)
- Turntables for oils, vinegars, nut butters
- Tiered risers for cans and spices
- Stackable bins to create compartments
Step 3: Set Up Pantry Zones Like a Designer
Professionals organize pantries by use, not by packaging. Start by grouping everything into categories, then assign each category a “zone” based on frequency of use and height.
Core pantry zones to copy
- Everyday cooking zone: oils, vinegar, salt, pepper, grains, pasta, canned tomatoes
- Baking zone: flour, sugar, chocolate chips, extracts, baking powder/soda, parchment
- Breakfast zone: cereal, oatmeal, coffee/tea, syrup, toaster items
- Snack zone: bars, crackers, fruit snacks, chips (use bins for easy grab-and-go)
- Meal helpers zone: broths, sauces, spice blends, boxed mixes
- Backstock zone: duplicates, bulk buys, party supplies (least accessible shelves)
Placement rules that keep it functional
- Eye level = prime real estate: Put everyday items between 48–66 inches high.
- Heavy items low: Flour, bulk rice, canned cases go below 36 inches to reduce strain.
- Kid-access shelf: If applicable, dedicate a bin shelf at 30–48 inches.
- Rarely used up high: Serving platters, seasonal baking tools, and backup paper goods can go above 66 inches.
Step 4: Upgrade Shelves and Surfaces with Durable, Easy-Clean Materials
Pantry materials matter more than most homeowners realize. Spills happen, humidity fluctuates, and shelves take a beating from cans and jars. If you’re renovating a kitchen or refreshing a pantry, choose surfaces that hold up and clean easily.
Material comparisons (pros use these guidelines)
- Melamine-coated shelving: Budget-friendly, wipeable, and common in pantry systems. Can chip under heavy impact. Best for light-to-medium loads.
- Plywood with painted finish: More durable than particleboard and holds screws well. Great for custom pantry shelving in renovations.
- Solid wood shelves: Timeless and strong, but requires sealing/painting to resist stains and humidity. Higher cost.
- Wire shelving: Inexpensive and breathable, but items tip and labels snag. Add shelf liners to improve stability.
- Pull-out drawers (wood or metal): Most “pro” upgrade for deep pantries—full visibility and less wasted space.
Maintenance advice
- Use a washable shelf liner in high-spill zones (oils, syrups). Replace annually or as needed.
- For painted shelves, choose a scrubbable satin or semi-gloss finish for easier cleanup.
- Wipe sticky containers before returning them to prevent residue buildup.
Step 5: Choose Pantry Products That Look Good and Work Better
Pantry products should solve specific problems: visibility, freshness, accessibility, and space efficiency. Mixing a few high-impact solutions usually works better than buying a matching set of everything.
High-value pantry organizers (worth the space)
- Clear, airtight containers: Best for flour, sugar, rice, cereal, and snacks. Choose square/rectangular shapes to save space.
- Stackable bins with handles: Ideal for snacks, packets, and kid-friendly zones.
- Lazy Susans (10–12 inch): Great for sauces, oils, nut butters. Use a lip-edge style to prevent tipping.
- Can risers / tiered organizers: Improves visibility and prevents expired cans hiding behind new ones.
- Over-the-door racks: Perfect for spices, wraps, foil, and small packets—just confirm door clearance.
- Pull-out baskets: A renovation favorite for lower shelves; reduces bending and rummaging.
Labeling that actually stays readable
- Use water-resistant labels or a label maker for bins and containers.
- Label the front and top for easy identification when stacked.
- Add purchase month or “use by” notes on bulk items to reduce waste.
Suggested container sizing (practical starting point)
- 1–2 quart: nuts, dried fruit, lentils
- 3–4 quart: pasta, cereal, baking sugar
- 6–8 quart: flour, bulk rice, pet treats
Budget and Cost Ranges: What Pantry Organization Really Costs
You can organize like a pro at multiple budget levels. The difference is usually in adjustability, durability, and how much you customize the space.
Budget refresh: $50–$200
- Basic clear bins, a couple of turntables, shelf liner, and labels
- Best for renters or quick kitchen upgrades before a larger renovation
Mid-range upgrade: $200–$800
- Airtight container set, tiered can organizers, over-the-door storage, and a few pull-out baskets
- Potential addition of adjustable shelving kits
Custom pantry system: $800–$3,500+
- Built-in shelving, drawers, integrated lighting, and tailored zones
- Cost varies by pantry size, materials (melamine vs. plywood vs. hardwood), and hardware quality
Renovation-level enhancements to consider
- LED lighting: $30–$200 DIY; $200–$800 installed depending on wiring and fixtures
- Door upgrade (solid core, glass insert, or pocket door): $200–$1,500+
- Pull-out pantry cabinet insert: $250–$1,200 depending on width and slide quality
Professional Techniques for a Pantry That Stays Organized
Use FIFO: “First In, First Out”
Stock newer items behind older ones to minimize expiration waste. This is especially effective for:
- Canned goods
- Pasta and grains
- Snacks and lunchbox items
Create a one-minute reset system
- Keep an “open items” bin for partially used bags (chips, crackers, baking ingredients).
- Store backstock separately so daily shelves don’t become overcrowded.
- Maintain one empty bin as a “pantry return” spot for misplaced items.
Light it like a premium pantry
Good lighting makes a pantry feel high-end and helps you use what you have. If you’re renovating, consider:
- Recessed LED or a small flush-mount fixture
- Motion-sensor LED strips under shelves
- Warm-neutral color temperature (around 3000K) for a clean, inviting look
Common Pantry Organization Mistakes to Avoid
- Overbuying containers first: Organize categories and zones before purchasing organizers.
- Too-deep shelves without pull-outs: Anything deeper than 12 inches becomes a hiding place for clutter.
- No label system: A pantry looks tidy for a week, then drifts. Labels keep it stable.
- Storing spills without protection: Oils and syrups should sit on a wipeable tray or liner.
- Mixing food with non-food clutter: Keep batteries, candles, and tools out of the main food zone (or give them a dedicated bin).
- Ignoring airflow: Don’t cram items to the ceiling; allow a little breathing room to prevent stale odors and crushed packages.
Quick Pro Checklist: Organize Your Pantry in One Afternoon
- Empty pantry and wipe shelves (warm soapy water, then dry).
- Sort into zones: cooking, baking, breakfast, snacks, backstock.
- Measure shelf height and adjust if possible.
- Add liners or trays where spills happen.
- Place daily items at eye level; heavy items low.
- Decant messy staples into airtight containers.
- Label bins and containers (front + top).
- Set a 10-minute monthly “pantry edit” reminder.
FAQ: Pantry Organization and Kitchen Design
What’s the ideal depth for pantry shelves?
For most reach-in pantries, 10–12 inches is the sweet spot. Deeper shelves (14–16 inches) can work if you add pull-out drawers, tiered risers, or turntables so items don’t disappear in the back.
Are pull-out drawers worth it in a pantry?
Yes, especially for lower shelves and deep pantry sections. Full-extension pull-outs improve visibility and reduce wasted space. Expect to spend $250–$1,200 depending on width, finish, and slide quality.
Should I decant everything into matching containers?
Only where it helps. Decant staples that spill or go stale (flour, sugar, cereal, rice, snacks). Keep cans, jars, and boxed items in bins or on risers. A partly decanted pantry can look just as polished and is often more practical.
What pantry features are trending in kitchen renovations right now?
Homeowners are leaning into prep pantries, appliance garages, integrated lighting, and custom zones for coffee bars and entertaining. The common thread is concealed storage paired with easy access—clean countertops and efficient workflow.
How do I keep my pantry from attracting pests?
Use airtight containers for grains and sweets, wipe shelves regularly, and avoid storing open bags. Check packages for damage before storing, and rotate stock monthly. If you have recurring issues, add sealed bins for high-risk items like flour and pet treats.
How often should I reorganize my pantry?
A full reset is usually needed 2–4 times a year. For maintenance, do a quick monthly check: toss expired items, wipe sticky spots, and pull older products to the front (FIFO).
Next Steps: Make Your Pantry Work Like a Showroom and a Workhorse
Start with measurements, choose a layout strategy that suits your pantry type, and build zones around how you actually cook. Add a few high-impact upgrades—airtight containers, pull-outs, lighting, and labels—and your pantry will support your kitchen renovation goals while improving day-to-day flow immediately.
If you’re planning a broader kitchen design update, consider your pantry as part of the overall storage plan: it can reduce upper cabinets, keep counters clear, and create that streamlined, modern look homeowners love—without sacrificing timeless practicality.
For more kitchen renovation inspiration, storage solutions, and home decor ideas, explore the latest guides and design trends on thedecormag.com.
More Articles
 Warm & Inviting Kitchens: Design Tips (2026)
 Best Kitchen Prep Bowl Collection Display - The Decor Mag
 Kitchen Brass Hardware Renaissance - The Decor Mag
 Best Kitchen Colander Storage Solutions - The Decor Mag
 Small Alternatives to Spaces: Smart, Space-Saving Kitchen Solutions That Actually Work
 Best Kitchen Compost Bin Options - The Decor Mag
 Kitchen Butcher Block Countertop Care - The Decor Mag
 Best Styleguides for Designing: Real-World Examples, Practical Insights, and Tactical Implementation
 Kitchen Counter Materials for Your Lifestyle (2026)
 Kitchen Cabinet Depth Standards (2026)