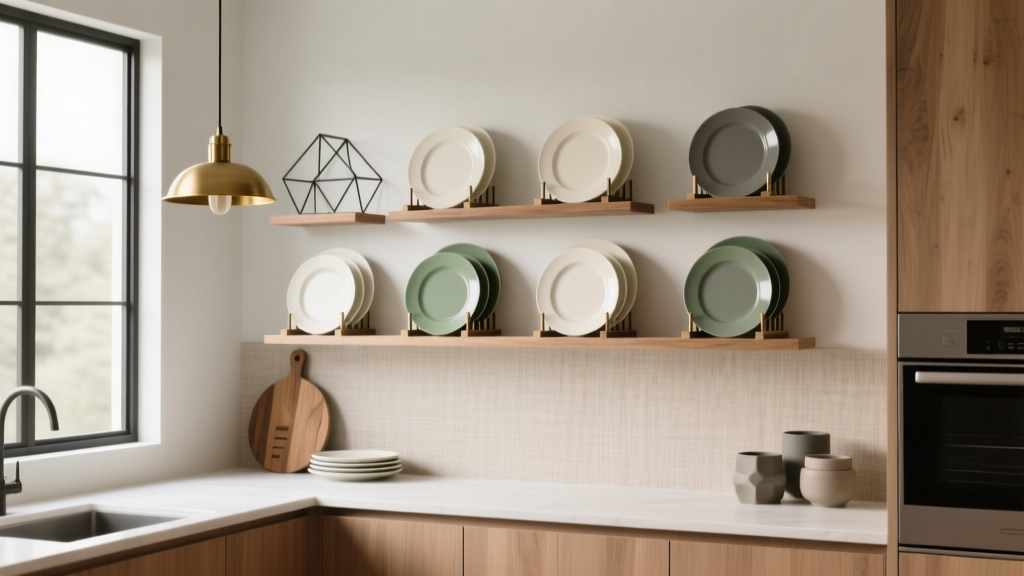
Best Kitchen Plate Rack Display Options - The Decor Mag
A plate rack can be one of the most satisfying “small upgrades” in a kitchen renovation: it adds storage, creates a styled focal point, and makes everyday dishes easier to grab. Whether you’re planning a full kitchen remodel or just trying to improve organization, plate racks bridge the gap between practical kitchen storage and curated home decor.
Today’s kitchens are leaning into layered, lived-in design—think warm woods, mixed metals, zellige backsplashes, and a blend of open and closed storage. Plate rack displays fit right into these trends while staying timeless: they highlight beautiful dishware, reduce cabinet clutter, and help you keep essentials within reach. The key is choosing the right type, sizing it correctly, and installing it where it truly improves workflow.
This guide covers the best kitchen plate rack display options, complete with recommended materials, layout ideas, measurements, cost ranges, and the mistakes that often trip homeowners up.
Why Plate Racks Work: Function Meets Display
A well-designed plate rack solves common kitchen challenges:
- Faster access: Plates stand upright and are easy to pull without unstacking.
- Better visibility: Great for households that rotate dishware or entertain often.
- Decor impact: Turns everyday items into a design feature—especially in open-plan kitchens.
- Space efficiency: Upright plate storage can take less depth than stacked piles in certain cabinets.
Plate racks are especially helpful in renovation plans that prioritize organization: pantry systems, drawer-based lowers, appliance garages, and intentional open shelving.
Best Kitchen Plate Rack Display Options (By Type)
1) Wall-Mounted Plate Racks
Wall-mounted racks are a classic choice when you want a dedicated display zone—often near a breakfast nook, coffee station, or dining-adjacent wall.
Best for: Older homes, farmhouse kitchens, English country style, transitional kitchens with warm finishes.
Recommended measurements:
- Depth: 4–7 inches (deep enough to support dinner plates without projecting too far into the walkway)
- Plate spacing: 1 1/4–1 1/2 inches between vertical dividers for standard plates
- Mounting height: Bottom of rack typically 48–54 inches from the floor, depending on ceiling height and who uses it most
Material recommendations:
- Hardwoods (oak, maple, walnut): durable, stainable; ideal for long-term installations
- Painted MDF: budget-friendly and smooth; best in low-humidity zones away from the range
- Metal + wood hybrid: more contemporary; good for industrial or modern rustic kitchens
Budget range:
- DIY basic rack: $40–$150
- Mid-range prebuilt: $150–$500
- Custom millwork: $600–$2,000+ (especially when sized to a full wall section)
Design tip: If you want a cleaner, current look, choose a rack with simple slats and minimal scalloping. For a more traditional feel, add a small rail or plate groove detail at the bottom.
2) Built-In Plate Racks Inside Upper Cabinets
One of the most renovation-friendly solutions is a plate rack built into an upper cabinet—either behind a door (hidden) or within a glass-front cabinet (display-forward). This approach preserves a tidy look while improving dish organization.
Best for: homeowners who want function first, minimal visual clutter, or a mix of open and closed storage.
Recommended measurements:
- Cabinet depth: standard 12 inches works; 13–15 inches can feel roomier for larger dinnerware
- Divider spacing: 1 1/4 inches for everyday plates; 1 1/2 inches for heavier stoneware
- Clearance above base: ensure at least 10–11 inches from rack base to cabinet top for taller plates
Material recommendations:
- Solid wood or plywood inserts: stronger under load than thin MDF
- Sealed finish (water-based polyurethane): helps protect against moisture from warm dishes
Budget range:
- Retrofit insert: $50–$250
- Cabinetmaker add-on (during remodel): $200–$800 per cabinet
Trend-forward idea: Use reeded or fluted glass cabinet doors—a popular current kitchen design trend—to soften the look of dish storage while still showcasing color and texture.
3) Open-Shelf Plate Ledges (Plate Shelf Display)
If you love the look of curated open shelving but want more security than a flat shelf, a plate ledge is a smart compromise. These shallow shelves include a front lip to prevent slips and are ideal for decorative plates, platters, and seasonal collections.
Best for: small kitchens that need vertical storage, homeowners who like to refresh decor seasonally, and modern traditional kitchens.
Recommended measurements:
- Ledge depth: 3–5 inches for plates displayed vertically
- Front lip height: 3/4–1 1/4 inches (higher for heavier platters)
- Spacing between ledges: 10–14 inches depending on plate diameter
Budget range:
- DIY ledges: $20–$80
- Ready-made ledges (wood/metal): $40–$200 each
- Full ledge wall (multiple rows + paint): $200–$800
Layout tip: Install ledges on a wall that won’t be splashed with grease. Avoid placing them directly next to the range unless you have a strong hood and you’re committed to frequent cleaning.
4) Countertop Plate Racks and Dish Drying Racks (Display + Daily Use)
Countertop racks can do double duty: a drying station that looks good enough to leave out, or a dedicated “daily plates” rack near the dishwasher for easy unloading.
Best for: renters, quick upgrades, and kitchens with limited upper cabinet space.
Material comparisons:
- Stainless steel: durable, modern, low maintenance; best for wet use
- Bamboo: warm and budget-friendly; needs drying and occasional oiling to prevent splitting
- Powder-coated metal: stylish, color options; check for rust resistance at joints
Budget range:
- Basic countertop plate rack: $15–$60
- Designer drying rack system: $80–$250
Placement tip: Keep 12–18 inches of clear counter space around the rack so it doesn’t disrupt prep zones. The best spot is typically between sink and dishwasher.
5) Plate Racks for Islands and Peninsulas (End Panels and Seating Sides)
Island end-caps and peninsula backs are underused real estate. A built-in plate rack on an island end can add charming display without sacrificing primary storage.
Best for: open-plan kitchens, homes that entertain, and renovations focused on maximizing storage.
Recommended measurements:
- Minimum width: 12–18 inches for a useful vertical rack section
- Depth: 3–6 inches depending on whether plates sit in slots or on a ledge
- Height: 24–36 inches looks balanced on most islands
Budget range:
- Simple add-on shelving: $150–$600
- Custom island panel millwork: $800–$3,000+
Design approach: Match the rack finish to island cabinetry for a built-in look, or contrast it with a wood tone to echo today’s mixed-material kitchen trend.
Choosing the Right Material: What Works Best in Kitchens
Kitchen plate racks live in a high-use environment. Choose materials that can handle humidity, temperature changes, and frequent wiping.
- Solid wood: longest lifespan; can be refinished. Best for custom cabinetry and permanent racks.
- Plywood (cabinet-grade): stable and strong; excellent for inserts and built-ins.
- MDF: smooth paint finish; keep away from repeated moisture exposure (near sink/range).
- Stainless steel: ideal for countertop drying racks; won’t swell or warp.
- Bamboo: attractive and affordable; needs consistent drying and occasional conditioning.
Finish recommendation: For wood racks, use a durable, wipeable topcoat. In white kitchens, a satin or semi-gloss finish cleans more easily than flat paint.
Layout and Styling Tips That Feel Current (Not Cluttered)
Modern kitchen design is moving toward warmth and personality, but the rooms still need to function. A plate rack looks best when it’s intentional.
Smart layout rules
- Keep everyday plates near the dishwasher. This reduces unloading time and keeps traffic flowing.
- Use open display where it adds balance. For example: one plate rack wall + mostly closed cabinetry elsewhere.
- Mind walkways. Avoid racks that protrude more than 7 inches in narrow paths.
- Group by color and scale. Keep the largest plates centered; layer salad plates and small platters around them.
Plate display styling ideas
- Monochrome dish sets for a calm, modern organic look (whites, creams, warm greige).
- Handmade ceramics for texture—especially popular in current kitchen trends.
- Seasonal rotation: store extras in a nearby cabinet; switch what’s on display quarterly.
- Add one supporting element: a small framed print, copper pan, or wood board nearby to make the display feel integrated.
Budget Considerations: Where to Spend vs. Save
Plate racks can be affordable, but they can also balloon in cost when built into custom millwork. A practical way to plan:
- Save with a countertop rack or a retrofit cabinet insert if you’re not changing cabinets.
- Spend on built-ins when you’re already renovating—especially if your cabinetmaker can integrate dividers efficiently.
- Prioritize durability if you’ll store heavy stoneware or use the rack daily.
Typical cost ranges by project scope:
- Quick upgrade (countertop rack or small ledge): $15–$200
- Weekend DIY wall rack project: $50–$300
- Remodel add-on (cabinet insert or glass-door display): $200–$800
- Custom feature wall or island millwork: $800–$3,000+
Installation and Maintenance Advice
Installation tips for a secure, long-lasting rack
- Anchor into studs for wall-mounted racks, or use rated toggle anchors if studs aren’t available.
- Account for plate weight. A set of 12 stoneware dinner plates can weigh 20–30+ lbs. Add a safety margin.
- Use a level and spacing jig so dividers stay consistent and plates don’t wobble.
- Seal wood to resist humidity and simplify cleaning.
Easy maintenance routine
- Weekly: dust ledges and wipe racks with a damp microfiber cloth.
- Monthly: remove plates, wipe the rack thoroughly, and check for loose screws.
- For grease-prone kitchens: use a gentle degreasing dish soap solution; avoid harsh abrasives on painted finishes.
Common Mistakes to Avoid
- Placing a display rack too close to the range. Grease buildup makes plates look dull and adds cleaning work.
- Oversizing the rack in a tight kitchen. A deep rack in a narrow walkway can feel visually and physically intrusive.
- Using weak materials for heavy dishware. Thin MDF dividers can sag or chip over time.
- Inconsistent divider spacing. If slots vary, plates won’t sit evenly and the display looks messy.
- Displaying too much at once. A packed rack reads as clutter; leave breathing room.
- Skipping a protective finish. Unsealed wood stains easily from humidity and handling.
FAQ: Kitchen Plate Rack Display Options
What’s the best plate rack option for a small kitchen?
A cabinet insert or a narrow wall-mounted rack usually works best. If you’re tight on wall space, consider a plate ledge (3–5 inches deep) above a coffee station or between windows.
How much space do I need between plate dividers?
Plan for 1 1/4 inches for standard ceramic plates and 1 1/2 inches for thicker stoneware. If you’re storing mixed sets, size to your thickest plate.
Are open plate racks still in style?
Yes—especially when paired with modern organic materials (light oak, warm whites) and balanced with closed cabinetry. Current kitchen design trends favor a curated, not crowded, display.
Can I add a plate rack without replacing cabinets?
Often, yes. Many homeowners add a retrofit plate rack insert inside an existing upper cabinet, or install a simple wall rack or plate ledge as a standalone project.
How do I keep displayed plates from getting dusty or greasy?
Avoid placing racks right next to the range, run a quality vent hood during cooking, and wipe shelves weekly. For kitchens that cook heavily, consider a glass-front cabinet plate rack instead of fully open storage.
Next Steps: Pick the Right Rack for Your Renovation Plan
Start by deciding whether your priority is daily convenience (cabinet insert near the dishwasher), decor impact (wall-mounted display or ledges), or flexibility (countertop rack). Measure your plates, map your kitchen workflow, and choose a material that matches your cooking habits and maintenance tolerance.
If you’re renovating, talk with your cabinetmaker early—plate racks are easiest and most cost-effective when integrated into the cabinet plan from the start. For quick upgrades, a well-placed plate ledge or countertop rack can still transform kitchen organization and style in a weekend.
For more kitchen renovation ideas, storage solutions, and design inspiration, explore the latest guides on thedecormag.com.
More Articles
 Best Kitchen Mixing Bowl Storage - The Decor Mag
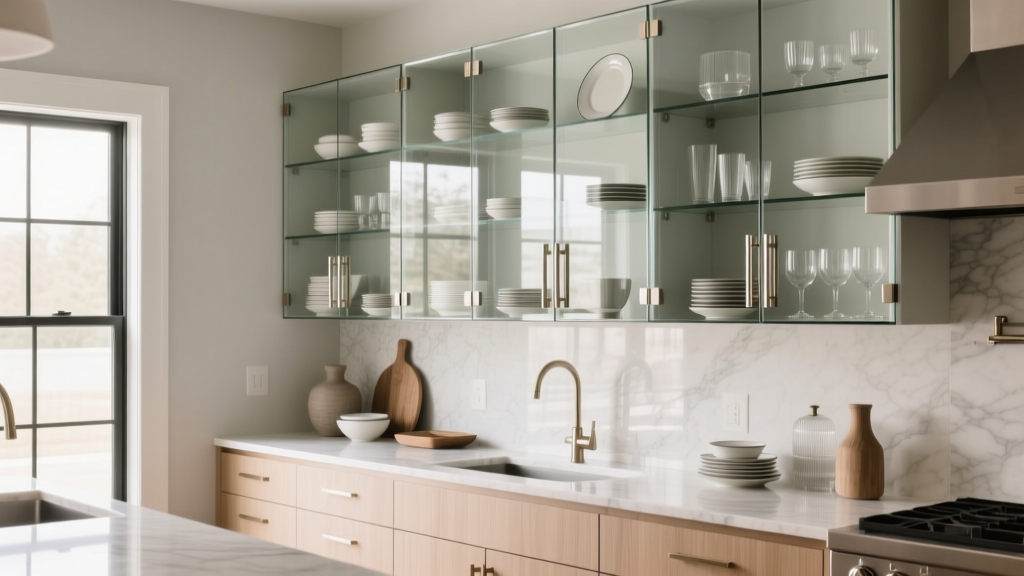 Kitchen Glass Front Cabinet Styling - The Decor Mag
 Kitchen Pot Filler Faucet Guide - The Decor Mag
 Best Kitchen Baking Sheet Organization - The Decor Mag
 Best Kitchen Canister Set Displays - The Decor Mag
 Best Kitchen Herb Garden Window Ideas - The Decor Mag
 Best Kitchen Specialty Cooking Oil Storage - The Decor Mag
 How to Style a Kitchen Open Shelf Display - The Decor Mag
 Best Kitchen Charging Drawer Solutions - The Decor Mag
 Best Kitchen Towel Storage Ideas - The Decor Mag