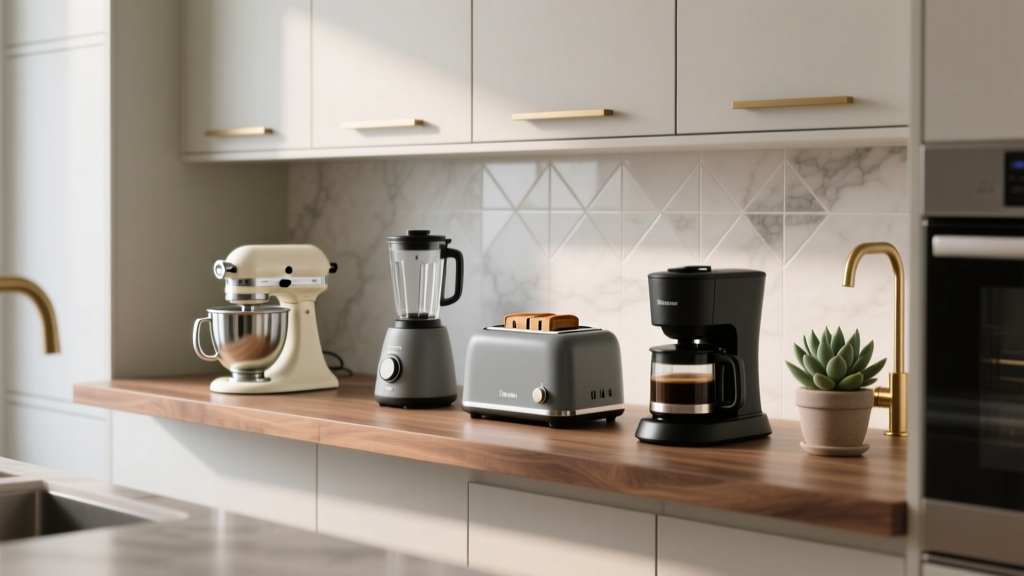
Best Kitchen Small Appliance Storage - The Decor Mag
Small appliances make modern kitchens work harder—espresso machines power busy mornings, air fryers speed up weeknight dinners, and stand mixers turn weekend baking into a ritual. The problem is that these same appliances quickly take over the countertop, making even a newly renovated kitchen feel cramped and visually noisy.
Great kitchen small appliance storage isn’t about hiding everything. It’s about creating a kitchen design where your most-used tools are easy to access, safely stored, and integrated into the layout. With the right cabinet configurations, materials, and a few practical measurements, you can reclaim counter space while keeping your kitchen organized, efficient, and beautiful.
This guide covers the best storage approaches for common small appliances, current kitchen design trends (like appliance garages and concealed stations), budget-friendly upgrades, and renovation-level solutions that add lasting value.
Start With a Simple Plan: What You Own, What You Use, and Where It Belongs
Before choosing cabinets or organizers, take a quick inventory. This step saves money and prevents the most common renovation regret: building storage that doesn’t fit your real life.
Inventory by frequency
- Daily/weekly: coffee maker, toaster, electric kettle, blender, air fryer
- Weekly/monthly: stand mixer, slow cooker, rice cooker, food processor
- Occasional: waffle iron, ice cream maker, dehydrator, specialty grills
Measure the appliances (and the “real” clearance)
Use a tape measure and record:
- Width x depth x height
- Cord length (helps determine outlet placement)
- Operating clearance (especially for heat and steam)
Practical clearance guidelines:
- Air fryer / toaster oven: leave 3–6 inches behind and above for ventilation (follow manufacturer guidance).
- Stand mixer: plan for 16–18 inches of cabinet height if storing on a lift; 19–20 inches is safer for larger models.
- Coffee station: allow 24–30 inches of counter width for machine + grinder + mugs, plus an outlet.
Best Storage Solutions by Kitchen Layout
1) Appliance Garage (Countertop Cabinet) for Everyday Items
Appliance garages are a top kitchen renovation trend because they keep daily-use appliances accessible while visually quieting the counter. Think of it as a dedicated “parking spot” with doors that disappear.
Best for: toaster, coffee maker, blender, microwave (in some designs), charging stations
Recommended dimensions:
- Depth: 14–16 inches minimum (18 inches if storing larger espresso machines)
- Height: 16–20 inches interior clearance
- Width: 24–36 inches for a flexible zone
Door styles that work well:
- Tambour doors: great for tight walkways; roll up and out of the way
- Pocket doors: doors slide into the cabinet sides for a seamless open station
- Lift-up doors: modern look; keep hardware minimal
Materials and finishes:
- Interior lining: durable laminate or stainless-steel panel behind heat-producing appliances
- Counter inside garage: quartz or porcelain slab for easy wipe-down and heat resistance
Budget range: $300–$1,200 for cabinet modifications and doors; $1,500–$3,500+ for custom appliance garage with pocket doors, lighting, and dedicated electrical.
2) Pull-Out Appliance Shelf (Appliance Lift) for Heavy Tools
An appliance lift is one of the most ergonomic storage upgrades for homeowners who bake or meal-prep often. It lets you store a stand mixer or food processor in a base cabinet and lift it to counter height without carrying it.
Best for: stand mixer, air fryer, food processor, bread maker
What to look for in a lift mechanism:
- Weight rating: 45–60 lbs is common; choose higher if you own a large mixer
- Soft-close/soft-open action: smoother and safer
- Locking positions: stable use at counter height
Cabinet sizing tips:
- Base cabinet width: 12–18 inches minimum; 18 inches is ideal for larger appliances
- Interior height: measure your appliance height + at least 1 inch for clearance
- Depth: standard 24 inches works well; ensure cord can reach an outlet
Budget range: $150–$500 for the lift hardware; $500–$1,500 installed depending on cabinetry changes and electrical needs.
3) Tall Pantry Cabinet with Appliance “Docking” Shelves
If you want the cleanest counters possible, a tall pantry cabinet can become a multi-appliance hub—especially in larger kitchens or open-concept layouts where visual clutter stands out.
Best for: small appliances used weekly/monthly, plus baking supplies and accessories
Design approach:
- Adjustable shelves: accommodate changing appliances over time
- Pull-out trays: bring heavy items forward without digging
- Integrated outlets: power appliances inside the pantry (ideal for a concealed coffee bar)
Recommended shelf specs:
- Shelf thickness: 3/4-inch plywood or furniture-grade engineered board for strength
- Depth: 16–20 inches interior for most appliances
- Spacing: 10–12 inches for small items; 16–20 inches for larger appliances
Budget range: $800–$2,500 for a quality tall cabinet; $2,500–$8,000+ for custom pantry with pull-outs, lighting, and built-in power.
4) Deep Drawers Over Base Cabinets (Best for Flexible Storage)
Deep drawers are a timeless functionality upgrade and one of the most practical ways to store small appliances. They reduce bending and make it easy to see what you own—especially when paired with drawer peg systems.
Best for: blender, slow cooker, rice cooker, hand mixer, accessories
Recommended drawer dimensions:
- Depth: standard 21 inches (in a 24-inch base cabinet)
- Height: 8–10 inches for compact appliances; 10–12 inches for taller items
- Width: 24–30 inches offers the best flexibility
Design tips:
- Use full-extension glides: 90–100% extension so you can lift safely
- Choose soft-close hardware: protects appliances and cabinetry
- Add non-slip liners: keeps items from shifting
Budget range: $50–$200 per drawer for organizers; $200–$600 per drawer upgrade for quality glides/boxes; more if changing cabinet fronts or layout.
5) Corner Solutions That Actually Get Used
Corner cabinets can be either dead space or a storage powerhouse, depending on the hardware. Avoid deep “caves” that swallow appliances.
Best corner hardware options:
- LeMans-style pull-outs: shelves swing out fully; excellent for bulky appliances
- Blind corner pull-out systems: pull shelves out into the aisle for easy access
- Lazy Susan: budget-friendly, best for lighter items
Budget range: $120–$400 for a Lazy Susan; $600–$1,500+ for premium corner pull-out hardware installed.
Materials and Finish Recommendations (Durability Meets Style)
Best cabinet materials for appliance storage
- Plywood boxes: stronger screw-holding and better long-term durability than particleboard; ideal for heavy appliances
- Furniture-grade engineered panels: stable and cost-effective; choose higher-quality cores in humid climates
- Solid wood fronts: timeless, repairable, and adds value
Heat, steam, and crumbs: choose surfaces that clean easily
- Quartz: low maintenance, stain resistant; great for appliance stations
- Porcelain slab: highly heat resistant and durable; premium option for heavy-use zones
- Laminate: budget-friendly and easy to wipe; keep hot appliances on a heat-safe mat
- Stainless steel panels: ideal as a backsplash inside appliance garages; wipe with microfiber to reduce streaks
Ventilation and electrical considerations
- Add outlets where appliances live: inside appliance garages, pantry stations, or base cabinets (per local code)
- Plan for GFCI: required in many kitchen locations, especially near water
- Manage cords: use grommets, cord clips, or a recessed outlet box to keep stations tidy
Design Approaches That Feel Current (But Won’t Date Quickly)
Concealed coffee and beverage stations
A dedicated coffee station is one of the most requested kitchen organization upgrades. Keep it streamlined with:
- Pull-out drawer for pods/tea: 3–5 inches high
- Mug storage: 12–15 inches shelf height
- Water access: nearby sink or a filtered water dispenser
“Unfussy minimalism” with highly functional storage
Current kitchen design trends lean warm and livable—less sterile, more practical. Matte cabinet finishes, integrated pulls, and fewer countertop items look best when storage is planned around real routines.
Mixed storage: open shelves where it makes sense
Open shelving can work for attractive, lightweight items (mugs, canisters). Avoid storing grease-prone appliances on open shelves near the cooktop—cleaning becomes a chore.
Budget Considerations: Where to Spend and Where to Save
High-impact upgrades under $300
- Drawer liners + peg systems for appliance parts
- Pull-out tray retrofit for one base cabinet
- Cord management clips and a label system for accessories
Mid-range upgrades ($300–$1,500)
- Appliance lift hardware + cabinet modification
- Convert one cabinet section into an appliance garage with a lift-up door
- Install a dedicated coffee station cabinet with lighting
Renovation-level investments ($1,500–$8,000+)
- Custom pantry with pull-outs and integrated outlets
- Full wall of cabinetry with concealed appliance zones
- Reworking layout to add a beverage center or secondary prep area
Common Mistakes to Avoid
- Designing storage without measuring appliances: a 1-inch mistake can make a cabinet unusable.
- Ignoring heat and steam: storing an air fryer in a tight cabinet without ventilation can damage finishes and shorten appliance life.
- Not planning for outlets: relying on visible extension cords undermines even the best kitchen design.
- Overloading shelves: thin shelving bows over time; use 3/4-inch material and proper supports for heavy appliances.
- Creating “black hole” cabinets: deep, fixed shelves lead to forgotten appliances and wasted space—use pull-outs or drawers.
- Placing daily-use appliances too far from workflow zones: keep coffee near mugs and water; keep mixing tools near prep space.
Maintenance and Upkeep: Keep Storage Clean and Working
- Wipe appliance garage interiors weekly: crumbs and coffee grounds accumulate quickly; use mild soap and a damp microfiber cloth.
- Use a heat-safe mat: especially for toaster ovens and air fryers on laminate or inside garages.
- Vacuum cabinet toes and drawer corners monthly: prevents grit from damaging drawer glides.
- Check hinge and glide screws twice a year: heavy appliances cause vibration; tighten as needed.
- Replace shelf liner annually: inexpensive refresh that keeps surfaces looking new.
FAQ: Kitchen Small Appliance Storage
What is the best way to store small appliances without cluttering the counter?
Use a mix of an appliance garage (for daily items) and deep drawers or pull-out trays (for heavier weekly-use appliances). The best kitchen organization plans keep the most-used tools within one step of where you use them.
Are appliance garages worth it in a kitchen renovation?
Yes, especially in open-concept kitchens where countertops are always visible. Appliance garages add a cleaner look while keeping coffee makers and toasters accessible. Choose pocket or tambour doors for easy daily use.
How much space do I need for a coffee station?
Plan for 24–30 inches of counter width and 16–20 inches of vertical clearance depending on your machine. Add storage nearby for mugs, filters/pods, sweeteners, and a small trash pull-out if possible.
Can I store an air fryer in a cabinet?
You can, but don’t operate it inside a closed cabinet. Store it on a pull-out tray or in a garage with adequate clearance and ventilation. Follow the manufacturer’s heat and airflow requirements to avoid damaging cabinetry.
What cabinet hardware is best for heavy appliances?
Look for full-extension, soft-close drawer glides rated for higher loads, and appliance lift mechanisms rated at least 45–60 lbs for stand mixers. Strong hardware prevents sagging and makes access safer.
What’s the most budget-friendly way to improve appliance storage?
Start with one deep drawer organizer system and one pull-out tray in a base cabinet. These two upgrades typically deliver the biggest day-to-day improvement without changing your kitchen layout.
Next Steps: Turn Ideas Into a Storage Plan That Works
Choose the appliances you want on the counter (if any), assign “zones” for coffee, prep, and cooking, then match the storage solution to each zone: an appliance garage for daily routines, deep drawers for flexible storage, and pull-out hardware for anything heavy. If you’re renovating, plan outlets and ventilation early—these details make the finished kitchen feel effortless.
For more kitchen renovation tips, kitchen design trends, and smart organization ideas, explore more guides and inspiration on thedecormag.com.
More Articles
 Best Kitchen Lazy Susan Options - The Decor Mag
 Cheap vs Premium Bedroom: What You’re Really Paying For — A Kitchens Kitchen Specialist’s Analysis
 Best Kitchen Cutting Board Storage - The Decor Mag
 Kitchen Pantry Organization: Pro Tips (2026)
 Kitchen Matte Black Fixture Trends - The Decor Mag
 Best Kitchen Coffee Equipment Storage (2026)
 Kitchen Cabinet Color Trends - The Decor Mag
 How to Design a Kitchen with a Breakfast Bar - The Decor Mag
 Kitchen Textured Cabinet Door Trends - The Decor Mag
 Kitchen Shaker Cabinet Timeless Appeal - The Decor Mag