How to Choose Kitchen Countertop Thickness - The Decor Mag
When homeowners plan a kitchen renovation, they tend to focus on colors, cabinet styles, and appliances—then choose countertops near the end. Thickness often gets treated as a default choice, yet it influences how your kitchen looks, how it functions, and what you’ll spend. The same stone or quartz can read sleek and modern at one thickness, and rich and architectural at another.
Countertop thickness also affects durability, edge profiles, seating comfort at islands, compatibility with sinks and cooktops, and even how easy it is to keep clean. If you’re aiming for a kitchen that feels intentional (not “builder-basic”), choosing the right countertop thickness is one of the highest-impact decisions you can make.
This guide breaks down standard thickness options, how they pair with popular kitchen design trends, and how to match thickness to your layout, material, and budget—so your finished kitchen looks polished and works beautifully day to day.
Standard Kitchen Countertop Thicknesses (and What They Mean)
Most kitchen countertop materials are sold in a few common thicknesses. Your fabricator may also build up edges to create a thicker look without the full material cost.
- 2 cm (about 3/4"): Sleeker, lighter visual profile; may require additional support depending on material and span.
- 3 cm (about 1 1/4"): The most common “standard” for premium stone and quartz in many markets; strong, substantial, and usually needs less added support.
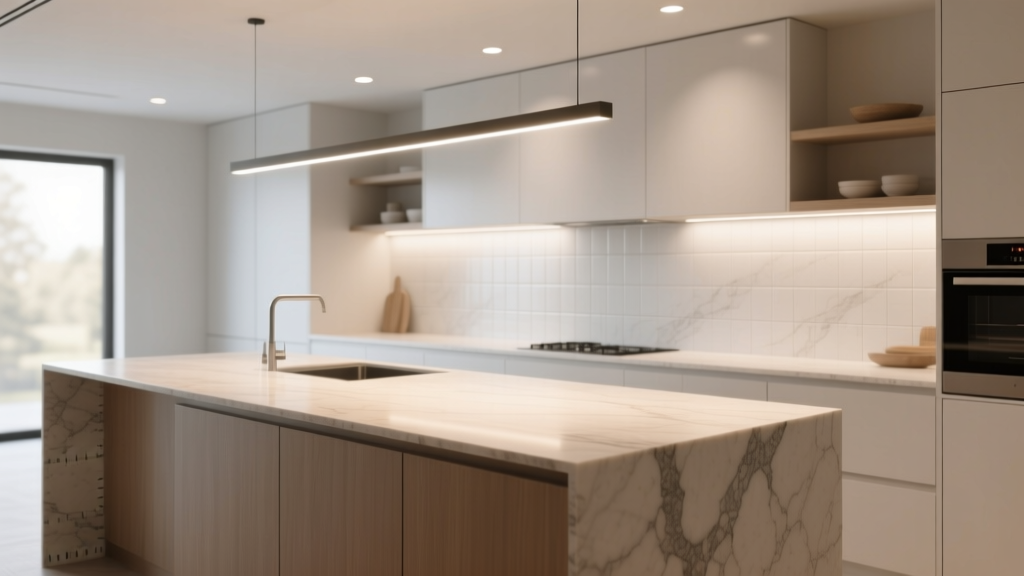
- 4 cm+ (about 1 1/2" to 2"+): Often achieved via mitered edges or laminated buildup; delivers a bold, high-end look, especially for waterfall islands.
Quick visual guide
- 2 cm reads modern, airy, European-inspired, and pairs well with flat-panel cabinets.
- 3 cm reads timeless, balanced, and works with nearly any cabinet door style.
- 4 cm+ reads architectural and luxurious; best when the rest of the kitchen is simplified so it doesn’t feel heavy.
How Thickness Affects Kitchen Design and Function
1) Visual weight and proportion
Thickness changes the perceived proportion of your whole kitchen. A slim countertop can make upper cabinets feel taller and the room feel more open. A thicker counter can anchor the space, especially in large, open-concept layouts.
Practical rule of thumb:
- Choose 2 cm when you want a streamlined, contemporary look or have visually heavy elements (dark cabinets, strong veining, dramatic hardware).
- Choose 3 cm for a classic, balanced look that won’t date quickly.
- Choose 4 cm+ when your island is a focal point and you want that “custom kitchen” presence.
2) Overhangs, seating, and support
Countertop thickness can affect how far you can safely overhang for island seating and where you’ll need brackets or corbels.
- Typical island seating overhang: 12" for standard stools; 15"–18" for deeper seating comfort (often requires support).
- Breakfast bar comfort: Plan ~24"–26" of width per stool.
General guidance: 3 cm slabs typically handle overhangs better than 2 cm, but the real factors are material strength, slab quality, and the presence of steel supports or hidden brackets. Always confirm with your fabricator and installer—especially for quartzite, marble, and large spans.
3) Edge profiles and safety
Edge details look and feel different depending on thickness. A thin slab with a heavy ogee edge can look mismatched; a thick slab with a squared edge feels modern and confident.
- Best edges for 2 cm: eased (slightly softened square), pencil round, small bevel, or a clean mitered build-up for a thicker appearance.
- Best edges for 3 cm: eased, bullnose, bevel, ogee (more traditional), or waterfall edges on islands.
- Family-friendly tip: a small radius or eased edge is kinder to hips and safer for kids than a sharp 90° edge.
4) Sink and cooktop compatibility
Thickness matters for undermount sinks, farmhouse sinks, and flush-mount or induction cooktops.
- Undermount sinks: Work well with both 2 cm and 3 cm, but the reveal and support details differ. Thicker counters can create a deeper, more substantial sink rail look.
- Farmhouse/apron-front sinks: Often benefit visually from 3 cm or a built-up edge so the countertop doesn’t look too thin next to the sink front.
- Flush/flush-mount cooktops: Some installations are easier with certain thicknesses; confirm cutout specs early, especially with porcelain slabs and induction.
Choosing Thickness by Material: What Works Best
Quartz (engineered stone)
Best thickness: 3 cm for most kitchens; 2 cm for sleek, modern designs with proper support.
- Why: Quartz is consistent and strong, great for busy family kitchens and low-maintenance routines.
- Trend pairing: Warm whites, soft greiges, and subtle veining in a 2 cm profile look especially current with flat-panel or slim-shaker cabinets.
- Maintenance: Mild soap and water; avoid harsh chemicals and high heat directly on the surface (use trivets).
Cost range installed: $60–$120+ per sq ft (varies by brand, pattern, edge detail, and region).
Granite
Best thickness: 3 cm for strength and a classic premium look.
- Why: Granite is durable and heat-resistant, with natural variation that adds character.
- Design note: Busy granite patterns can feel visually heavy; pairing them with a thinner-looking edge or simpler backsplash can modernize the look.
- Maintenance: Seal periodically based on stone type and use; wipe spills promptly.
Cost range installed: $50–$120+ per sq ft.
Marble
Best thickness: 3 cm (or a built-up edge for impact), especially for islands or baking stations.
- Why: Marble is timeless and elevates a kitchen instantly, but it’s softer and more porous than granite or quartz.
- Best use: Consider marble for a dedicated pastry area or a statement island if you’re comfortable with patina.
- Maintenance: Seal regularly, use cutting boards, clean acids quickly (lemon, vinegar, tomato sauce can etch).
Cost range installed: $80–$200+ per sq ft.
Quartzite (natural stone)
Best thickness: 3 cm; avoid pushing thin profiles on long spans without engineered support.
- Why: Quartzite offers dramatic natural veining with excellent durability (often stronger than marble).
- Trend pairing: A bold quartzite island with a thicker mitered edge is a standout in 2025 kitchen design, especially with warm wood cabinets.
- Maintenance: Seal; clean gently; avoid abrasive pads.
Cost range installed: $90–$250+ per sq ft.
Porcelain / Sintered Stone Slabs
Best thickness: Often 12 mm (~1/2") or 6 mm (~1/4") depending on application, typically installed over a substrate or with specialized fabrication.
- Why: Highly heat-resistant, UV-stable, and excellent for a modern kitchen aesthetic; also popular for full-height backsplashes.
- Watch-outs: Edge chipping risk if poorly fabricated; choose an experienced installer.
- Maintenance: Easy cleaning; avoid impacts on edges.
Cost range installed: $80–$180+ per sq ft (fabrication can increase cost).
Butcher Block / Wood Countertops
Best thickness: 1 1/2"–2" for a sturdy, furniture-like feel.
- Why: Warm, inviting, and great for creating contrast in a kitchen renovation—especially on islands.
- Design approach: Combine wood on the island with quartz or stone on the perimeter for durability and budget control.
- Maintenance: Regular oiling (or use a sealed finish), wipe spills promptly, avoid standing water near sinks.
Cost range installed: $40–$100+ per sq ft (species and construction matter).
Laminate
Best thickness: Typically 1 1/2" appearance via built-up edge; the surface layer itself is thin over a substrate.
- Why: Budget-friendly, lots of colors, and improved realism in newer patterns.
- Best for: Rental upgrades, secondary homes, laundry/kitchenette spaces, or tight renovation budgets.
- Maintenance: Avoid direct heat; don’t let water sit at seams; use cutting boards.
Cost range installed: $20–$50 per sq ft.
Matching Thickness to Your Kitchen Layout
Galley kitchens
A galley kitchen can feel tighter if every surface looks heavy. A 2 cm quartz or a slim-profile porcelain slab helps keep sightlines open. If you love a thicker look, use it strategically on one focal run.
L-shaped kitchens
L-shaped layouts do well with 3 cm because it feels balanced from every angle. If you’re adding a peninsula, consider a slightly thicker-looking edge on the seating side to visually “finish” the furniture-like element.
U-shaped kitchens
U-shaped kitchens already have a lot of countertop perimeter. Choose thickness that supports function without overpowering the room:
- Use 3 cm for durability and classic proportions.
- If using dramatic stone, keep edges simple to avoid visual clutter.
Kitchens with large islands or waterfall edges
Islands are the centerpiece in many current kitchen design trends—think oversized islands with integrated storage and statement lighting. A mitered 4 cm look (or thicker) can make the island feel custom.
Pro tip: If you’re doing a waterfall edge, ask your fabricator about vein matching and seam placement. A thicker miter can look seamless and high-end, but it requires skilled fabrication.
Budget and Cost Planning: Where Thickness Changes the Price
Countertop thickness affects cost in a few ways:
- Material volume: Thicker slabs (or thicker-looking built-ups) use more material and labor.
- Fabrication time: Miters, waterfall edges, and complex profiles increase shop time.
- Transport and install: Thicker/heavier pieces can require extra labor and handling.
Smart budget strategies
- Use a thicker look only where it matters: Miter the island edge, keep perimeter counters standard.
- Choose simple edges: An eased edge is timeless and typically less expensive than ornate profiles.
- Limit seams: Seams add labor and can be more visible with certain patterns; thicker miters may add seams.
- Mix materials: Quartz perimeter + butcher block island can reduce cost while adding warmth.
Typical add-on costs (varies widely by region):
- Mitered edge buildup for thicker appearance: +$20–$60 per linear foot
- Waterfall edge on an island: +$800–$2,500+ per side depending on material and seams
- Premium edge profiles: +$10–$30 per linear foot
Current Kitchen Design Trends vs. Timeless Choices
- Trend: Slim profiles with minimal edges (2 cm quartz/porcelain) for modern, clutter-free kitchens and integrated backsplashes.
- Trend: Statement islands with thicker-looking mitered edges, waterfall sides, and bookmatched veining.
- Timeless: 3 cm stone or quartz with a simple eased edge—works with shaker, slab, or transitional cabinetry.
- Timeless: Balanced proportions—let one element lead (countertops, cabinetry, or backsplash), not all of them at once.
Common Mistakes to Avoid
- Choosing thickness without considering cabinetry: Slim counters can look odd on ornate, traditional cabinets; extra-thick counters can overwhelm delicate doors and narrow spaces.
- Ignoring support requirements: Overhangs and long spans may need hidden steel supports, especially with 2 cm slabs.
- Overdoing edge details: Elaborate edges can date a kitchen quickly and compete with bold veining.
- Not planning for sink/cooktop specs: Some undermount clips, faucet hole placements, and flush-mount details depend on thickness.
- Forgetting cleanup and durability: A sharp square edge chips more easily; porous stones need sealing; wood needs routine care.
- Skipping a full-size sample review: Thickness changes how veining reads at the edge—ask to see a slab photo and edge mockup.
Practical Selection Checklist (Bring This to Your Fabricator)
- Your kitchen style: modern / transitional / traditional
- Cabinet door style and rail thickness: slim shaker vs standard shaker vs raised panel
- Desired edge profile: eased, bevel, bullnose, ogee, mitered
- Island seating plan: overhang depth (12"–18") and number of stools
- Appliance and sink cut sheets: especially farmhouse sinks and induction cooktops
- Backsplash plan: tile vs full-height slab (thickness can affect trim and alignment)
- Maintenance comfort level: low-maintenance quartz vs patina-friendly marble
- Budget range: include fabrication upgrades like waterfalls or miters
FAQ: Kitchen Countertop Thickness
Is 2 cm countertop thickness strong enough for a kitchen?
Often, yes—especially for quartz and some stones—when properly supported. For long spans, large overhangs, or heavy-use islands, 3 cm is typically the safer, more forgiving choice. Always follow your fabricator’s support requirements.
What’s the most popular countertop thickness for kitchen renovations?
3 cm (1 1/4") is the most common choice for quartz, granite, and quartzite in many renovation markets because it looks substantial and performs well without extra build-up.
How do I get a thick countertop look without paying for a thicker slab?
Ask for a mitered edge (or laminated build-up) that creates a 2"–4" thick appearance along the visible edge while keeping the main slab standard. This adds fabrication cost, but it’s usually less than buying thicker material—when thicker material is even available.
Does thicker countertop mean better quality?
Not automatically. Quality depends on the material grade, fabrication skill, seam placement, and installation. A well-fabricated 2 cm countertop can outperform a poorly installed 3 cm top.
What thickness works best for a waterfall island?
Many homeowners choose a thicker-looking mitered edge (often 4 cm appearance) for a waterfall island because it looks intentional and high-end. Make sure the veining is aligned across the top and down the sides for the best result.
Does countertop thickness affect cleaning and maintenance?
Thickness doesn’t change day-to-day cleaning much, but it can affect edge durability. Sharper edges chip more easily, and complex profiles collect crumbs. A simple eased edge is one of the most practical choices for busy kitchens.
Next Steps: Choosing the Thickness That Fits Your Kitchen
Start by looking at your kitchen as a whole: cabinet style, room size, island plans, and how you live in the space. For most homeowners, 3 cm quartz or stone with a simple eased edge hits the sweet spot for a timeless, durable kitchen design. If you’re chasing a modern look, 2 cm with clean lines can be stunning—just plan support and details carefully. If your island is the star, consider a mitered thicker edge to create that custom, high-end finish.
Gather a few inspiration photos, confirm your overhang and seating needs, and bring appliance and sink specs to your countertop consultation. The right thickness will feel effortless once it’s installed—because it will match your kitchen’s proportions, performance needs, and budget.
For more kitchen renovation ideas, countertop guides, and organization tips, explore the latest inspiration on thedecormag.com.
More Articles
 Kitchen Cabinet Color Trends - The Decor Mag
 Best Kitchens for Functional Design: Layouts, Brands, and Ergonomic Principles That Work Every Day
 Minimalist Kitchen Design Essentials - The Decor Mag
 Best Kitchen Specialty Ingredient Storage - The Decor Mag
 Best Kitchen Oil and Vinegar Storage - The Decor Mag
 Professional Kitchen Design: Tips for 2026
 Smart Kitchen Tech: How to Incorporate in 2026
 Best Kitchen Serving Tray Storage - The Decor Mag
 Kitchen Cabinet Color for Resale (2026)
 How to Incorporate Color in a White Kitchen - The Decor Mag