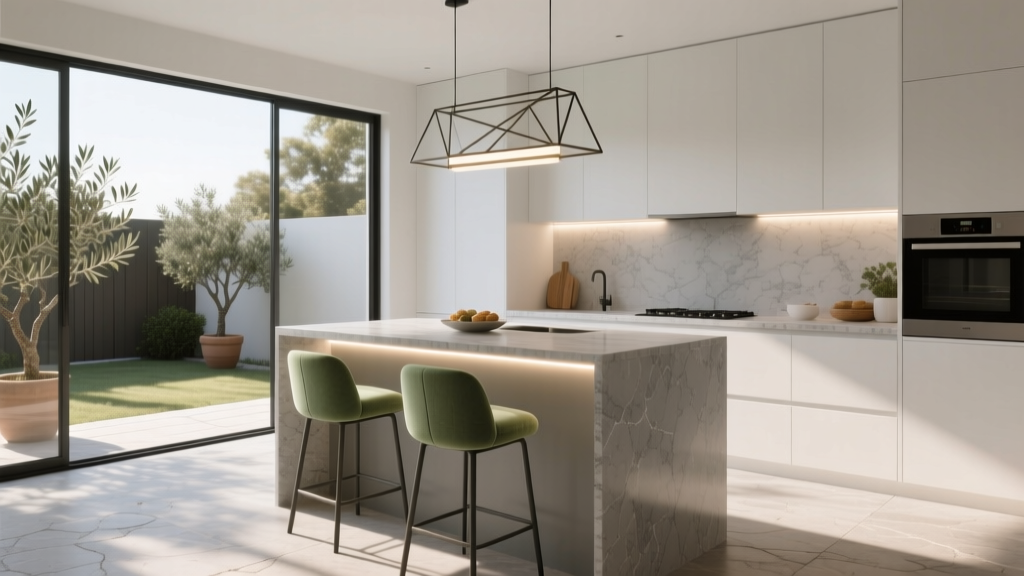
How to Design a Kitchen with a Breakfast Bar - The Decor Mag
A breakfast bar can be the hardest-working feature in a modern kitchen renovation. It’s the place where mornings start (coffee, emails, homework), where guests naturally gather during parties, and where everyday meals happen when a formal dining room feels unnecessary. Done well, it adds seating without sacrificing flow—and it can make even a modest kitchen feel more social and spacious.
But a breakfast bar isn’t a one-size-fits-all add-on. The right design depends on your kitchen layout, how you cook, who uses the space, and how much storage and circulation you can spare. This guide walks through practical measurements, layout options, material choices, cost ranges, and common mistakes—so your breakfast bar looks great and functions beautifully for years.
Start with Function: How Will You Use the Breakfast Bar?
Before choosing countertop materials or bar stools, clarify what you need your breakfast bar to do. This is the difference between a bar that becomes a daily hub and one that turns into clutter storage.
Ask these planning questions
- Is it primarily for quick meals (cereal, sandwiches), or will you use it for full dinners?
- Will it double as a work zone for laptops, kids’ homework, or crafts?
- Do you want guests facing the cook (more social) or facing outward (less intrusive)?
- How many seats do you truly need day-to-day: 2, 3, 4+?
- Do you want storage under/behind the bar (cabinets, wine fridge, bookshelves)?
Design trends in kitchen design and renovation are leaning toward “multifunctional zones”—a breakfast bar that also supports working-from-home, casual entertaining, and organized storage. Aim for a layout that accommodates your real habits, not an aspirational showroom setup.
Key Measurements: Comfort, Clearance, and Seating Spacing
Breakfast bars fail most often because of poor proportions. Use these standard kitchen design measurements as your baseline, then adjust for your space.
Bar height: counter height vs. bar height
- Counter-height breakfast bar: 34–36 inches tall (matches standard countertops). Easiest for all ages; more timeless and accessible.
- Bar-height breakfast bar: 40–42 inches tall. Creates visual separation but can feel bulky and less comfortable for long sits.
Trend watch: Counter-height seating is currently favored in many kitchen renovations because it looks streamlined, works well in open-plan homes, and pairs easily with island prep space.
Overhang depth for knees and comfort
- Minimum overhang: 10–12 inches (tight but workable)
- Comfortable overhang: 12–15 inches (most common)
- Generous overhang: 15–18 inches (best for adults and lingering)
If you plan a 15–18 inch overhang, you’ll likely need support such as corbels, brackets, or concealed steel supports—especially with stone surfaces.
Seating spacing (per person)
- Allow 24 inches of width per stool for comfortable elbow room.
- 30 inches per stool feels roomy and works well for frequent entertaining.
Clearances for traffic flow
- 36 inches minimum walkway behind stools (tight)
- 42 inches comfortable walkway behind stools (recommended)
- 48 inches ideal in busy kitchens or when multiple cooks are present
Also consider appliance clearance. If the breakfast bar is near a dishwasher or oven, plan enough space for doors to open with someone seated.
Stool height basics
- For 34–36 inch counters: 24–26 inch seat height
- For 40–42 inch bars: 28–30 inch seat height
Tip: Aim for 10–12 inches between the seat and the underside of the counter for comfortable legroom.
Choose the Right Layout for Your Kitchen
Your kitchen layout determines whether the breakfast bar should be an island, peninsula, or a wall-mounted ledge. Here are the most practical options for today’s kitchen design.
1) Kitchen island with breakfast bar seating
Best for open-plan spaces and medium-to-large kitchens. Islands can combine prep, storage, and seating in one central feature.
- Pros: Social hub, adds storage, improves workflow when planned well
- Watch-outs: Needs adequate clearance on all sides; can crowd smaller kitchens
Good island sizes:
- Minimum functional: 24" deep x 48" long (limited seating/storage)
- Comfortable: 36"–42" deep x 72"+ long (supports seating + storage)
2) Peninsula breakfast bar (L-shaped or U-shaped kitchens)
A peninsula is often the smartest choice when you want seating but don’t have space for an island.
- Pros: Excellent for small-to-mid kitchens, creates separation from living areas, cost-effective compared to a new island
- Watch-outs: Can create bottlenecks if the walkway is narrow
Peninsulas are also a classic “timeless functionality” move: they preserve a strong kitchen work triangle while adding casual seating.
3) Waterfall edge bar for a modern look
Waterfall countertops (where the material continues down the side) are a current trend, especially with quartz and porcelain slab. They look high-end and clean.
- Pros: Sleek, protects cabinet sides, visually anchors the island
- Watch-outs: Higher cost and more visible seams depending on material
4) Wall-mounted breakfast ledge (small kitchens and apartments)
If your renovation budget or square footage is tight, a wall-mounted ledge can act as a compact breakfast bar without major cabinetry changes.
- Pros: Affordable, space-saving, quick to install
- Watch-outs: Minimal storage; requires sturdy wall reinforcement
Materials and Finishes: Countertops, Cabinetry, and Supports
Material choices affect the look, durability, and maintenance of your breakfast bar. A high-touch surface should handle spills, heat, and daily wear without constant stress.
Countertop material comparisons (best for breakfast bars)
- Quartz: Durable, low maintenance, wide range of colors/patterns. Great for busy families.
Maintenance: Wipe with mild soap; avoid harsh abrasives.
Cost range: $60–$120 per sq. ft. installed (varies by brand and thickness). - Granite: Natural stone with strong resale appeal; heat-resistant.
Maintenance: Seal periodically (often yearly, depending on stone); clean spills promptly.
Cost range: $50–$120 per sq. ft. installed. - Porcelain slab: A fast-rising trend—sleek, stain-resistant, UV-stable, can mimic marble.
Maintenance: Very low; excellent for heavy use.
Cost range: $70–$150+ per sq. ft. installed (fabrication can be higher). - Butcher block: Warm and inviting; perfect for cozy, organic-modern kitchens.
Maintenance: Regular oiling; avoid standing water; use cutting boards.
Cost range: $40–$100 per sq. ft. installed (species and thickness matter). - Laminate: Budget-friendly with many modern designs; easy to clean.
Maintenance: Avoid direct heat; be mindful of seams and water exposure.
Cost range: $20–$50 per sq. ft. installed.
Edges and profiles: style meets practicality
- Eased edge: Clean, modern, and easiest to wipe down.
- Rounded/bullnose: Softer look; family-friendly (fewer sharp corners).
- Mitered edge: Creates a thick, high-end look; often used for waterfall islands.
Supports for overhangs
If your breakfast bar has a deep overhang, build it safely. Requirements vary by material and thickness, but these are common approaches:
- Hidden steel brackets: Minimalist look, strong support for stone.
- Decorative corbels: Traditional style; can limit knee space if oversized.
- End panels/waterfall legs: Clean and sturdy, often used in modern kitchens.
Work with your fabricator or contractor to confirm safe spans—especially for quartz, granite, and porcelain.
Storage and Organization Around the Breakfast Bar
A breakfast bar quickly becomes a drop zone. Plan storage so the surface stays clear and your kitchen organization improves rather than deteriorates.
Smart storage ideas
- Drawer stack near seating: Store napkins, placemats, kids’ cups, and snacks.
- Charging drawer: Keeps phones and tablets off the counter; great for family command centers.
- Open shelving on the guest side: Cookbooks or baskets (avoid clutter—edit regularly).
- Trash/recycling pull-out nearby: Essential if the bar is used for meals and homework.
Keep the bar zone tidy with a simple system
- Limit countertop decor to 1–2 items (a tray, a vase, or a fruit bowl).
- Use a small catchall drawer for pens, scissors, and mail.
- Add stool hooks or a nearby closet for backpacks and tote bags.
Lighting and Power: Make It Feel Designed (Not Added On)
Lighting is one of the most powerful ways to make a breakfast bar feel intentional. It also makes the space more functional for eating, reading, and working.
Lighting recommendations
- Pendant lights: A timeless choice over islands and peninsulas.
Plan: typically 24–30 inches above the counter surface and 30–36 inches between pendants (varies by size). - Recessed lights: Provide even ambient light; pair with pendants for layers.
- Under-counter or toe-kick LED: Trend-forward, adds a soft glow for evenings and improves safety.
Outlets and USB power
If the breakfast bar doubles as a work zone, include power:
- Pop-up outlets or under-counter outlet strips (check local electrical code).
- USB-C charging ports for modern devices.
- Plan cord management so cables don’t drape across seating.
Bar Stools: Comfort, Scale, and Easy Cleaning
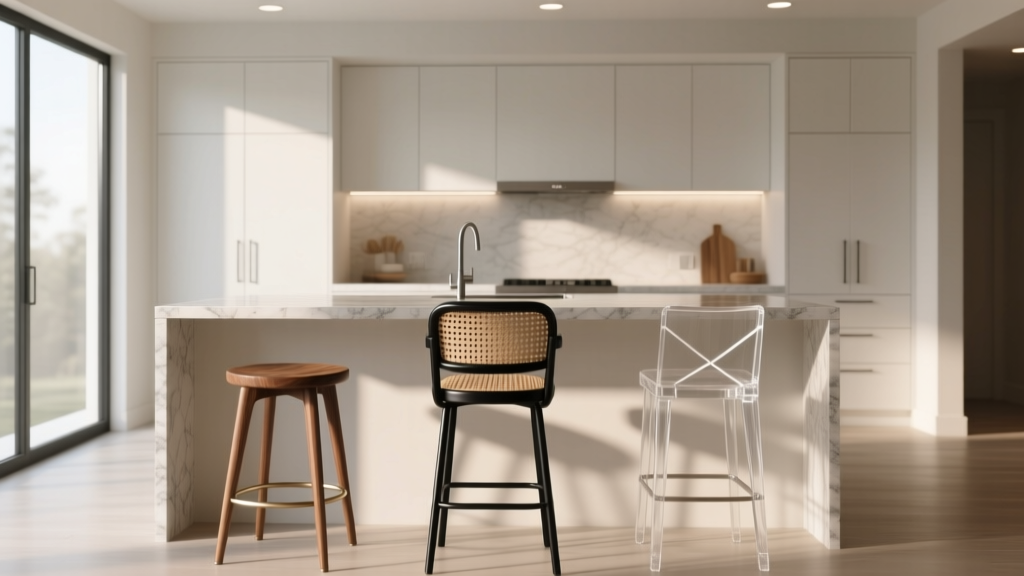
Stools are both furniture and a daily tool. Prioritize comfort and durability over looks alone.
What to look for in breakfast bar seating
- Backrests: More comfortable for long sits; recommended for families.
- Swivel seats: Helpful in tight spaces; make it easier to get in/out.
- Performance fabrics or wipeable materials: Especially if kids use the bar daily.
- Footrests: Essential for comfort, especially at bar height.
Budget range (per stool): $100–$300 for solid options, $300–$800+ for designer or premium craftsmanship. For a cohesive look, choose stools first or at least confirm seat height and width before finalizing your layout.
Budget and Cost Ranges: What a Breakfast Bar Adds to a Renovation
Costs vary widely based on whether you’re adding cabinetry, moving plumbing/electrical, or simply extending a countertop. Here are realistic ranges homeowners encounter during kitchen renovation planning:
- Simple countertop overhang (existing cabinets): $500–$2,500+ (depends on countertop material and support)
- Peninsula addition (base cabinets + countertop): $2,500–$10,000+
- New island with seating and storage: $5,000–$25,000+ (custom cabinetry, electrical, premium counters increase costs)
- Lighting upgrades over bar: $300–$2,000+ (fixtures + installation)
- Bar stools (2–4 stools): $200–$3,200+ total
Where to spend vs. save
- Spend on: durable countertop material, comfortable stools, proper supports, good lighting.
- Save on: decorative panels, trend-only finishes, overly complex edges or detailing.
Common Mistakes to Avoid
These issues show up again and again in kitchen design projects—avoid them early to prevent expensive do-overs.
- Not leaving enough clearance behind stools: If people can’t walk through comfortably, the bar won’t be used.
- Overhang that’s too shallow: A 6–8 inch overhang forces awkward seating and scraped knees.
- Choosing bar height for “drama” over comfort: Bar-height seating can feel less welcoming and less accessible.
- Forgetting storage and outlets: A breakfast bar often becomes a work zone; plan for cords, paper, and snacks.
- Oversized pendants: Fixtures that block sight lines can make the kitchen feel smaller and visually heavy.
- Ignoring maintenance realities: Marble may look stunning, but it can etch and stain quickly in busy households.
FAQ: Designing a Kitchen with a Breakfast Bar
How much space do I need for a breakfast bar?
Plan for 24 inches of counter width per seat and at least 42 inches of clearance behind stools for comfortable circulation. Smaller kitchens can work with 36 inches behind stools, but it will feel tight.
Is a peninsula better than an island for smaller kitchens?
Often, yes. A peninsula adds seating and counter space while keeping the kitchen layout efficient. If your kitchen can’t maintain clear walkways on all sides of an island, a peninsula is typically the better renovation choice.
What’s the best countertop material for a low-maintenance breakfast bar?
Quartz and porcelain slab are top choices for stain resistance and easy cleaning. They’re well-suited to high-traffic kitchens where the breakfast bar is used daily.
Do I need brackets to support a breakfast bar overhang?
It depends on the material, thickness, and overhang depth. As a general rule, deeper overhangs (especially 15–18 inches) often require support such as steel brackets, corbels, or end panels. Confirm with your fabricator and contractor.
How do I keep my breakfast bar from becoming cluttered?
Build in a “landing zone” system: a nearby drawer for mail/chargers, a trash pull-out close by, and a strict limit of 1–2 countertop decor pieces. Kitchen organization improves when every common item has a designated home.
Should my breakfast bar match the rest of the kitchen exactly?
Not necessarily. Many current kitchen design trends favor subtle contrast—like a different island color, a warmer wood tone on the seating side, or distinctive lighting—while keeping the overall palette cohesive.
Next Steps: Plan Your Breakfast Bar Like a Pro
To move from ideas to a renovation-ready plan, focus on three essentials: measure your clearances, choose a layout that supports your daily routine, and invest in durable surfaces and seating. Start by sketching your kitchen footprint, marking appliance swings, and confirming how many seats your household actually uses. Then choose your countertop and stool sizes together so everything fits comfortably.
For more kitchen renovation tips, organization upgrades, and on-trend (but timeless) design ideas, explore the kitchen features and inspiration guides on thedecormag.com.
More Articles
 Open Kitchen Safety Tips: Practical, Evidence-Based Strategies for Modern Home Cooks
 How To Clean Fluted: A Practical, Step-by-Step Guide for Stainless Steel, Copper, and Cast Iron Cookware
 Best Kitchen Stool and Bar Seating Picks - The Decor Mag
 Kitchen Appliances Compared on a Budget: Smart, Reliable Choices Under $300
 How to Plan a Kitchen Renovation on a Budget - The Decor Mag
 Wood and Colors Compared: How Species, Finishes, and Pigments Shape Kitchen Design Decisions
 Best Kitchen Baking Sheet Organization - The Decor Mag
 How to Repair Sustainably: Practical Strategies for Extending the Life of Kitchen Appliances, Cookware, and Fixtures
 Kitchen Terrazzo Countertop Trends - The Decor Mag
 Walk-In Pantry Kitchen Design Ideas (2026)