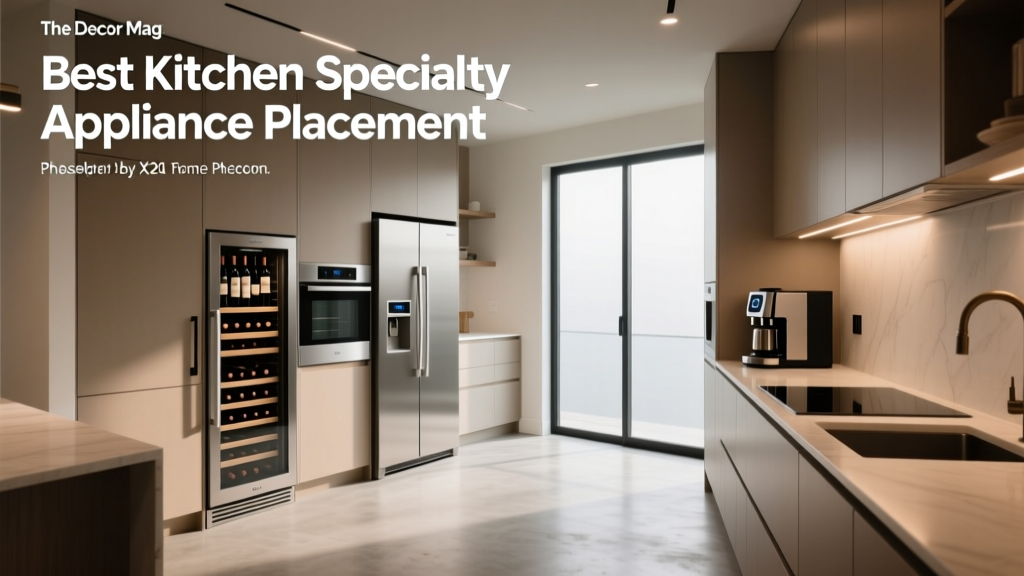
Best Kitchen Specialty Appliance Placement - The Decor Mag
Specialty appliances can make a kitchen feel custom: the espresso machine that replaces daily coffee runs, the steam oven that elevates weeknight meals, the wine fridge that turns entertaining into an effortless habit. Yet these upgrades only feel “high-end” when they’re placed where they work naturally with your routines—otherwise, they become expensive obstacles, cords on countertops, or doors that collide in a traffic jam.
Smart kitchen appliance placement is one of the most overlooked parts of a kitchen renovation. Homeowners often focus on cabinet finishes and countertops first, then realize too late that the microwave blocks a sightline, the air fryer lives under a low shelf with nowhere to vent, or the beverage fridge sits across the room from the glassware. A practical plan considers workflow, clearances, ventilation, electrical capacity, and long-term maintenance—so your dream appliances feel integrated, not improvised.
This guide walks through best practices for placing specialty appliances in today’s kitchens, with specific measurements, layout strategies, material recommendations, and budget-friendly options. You’ll find common mistakes to avoid and actionable next steps to improve organization and functionality—whether you’re planning a full kitchen remodel or simply refining your existing space.
Start With How You Use Your Kitchen: Zones Beat Guesswork
Current kitchen design trends favor “work zones” over the traditional single work triangle—especially in households where multiple people cook, snack, and entertain at the same time. Specialty appliance placement is easiest when you map your habits into zones, then assign appliances accordingly.
Core Kitchen Zones (and what belongs there)
- Prep Zone: main counter space, knives, mixing tools, stand mixer, food processor, scale.
- Cooking Zone: range/cooktop, wall oven(s), steam oven, warming drawer, spice pullouts.
- Cleanup Zone: sink, dishwasher, trash/recycling, compost, drying area.
- Beverage Zone: coffee/espresso, kettle, water filtration, ice maker, beverage fridge, glassware.
- Storage Zone: pantry, freezer drawers, bulk storage, small appliance garage.
- Serving/Entertaining Zone: extra counter, wine storage, bar tools, serving platters.
Practical layout rules that still hold up
- Keep daily-use specialty appliances within 1–3 steps of where you use them most.
- Separate hot and wet tasks: avoid placing heat-producing appliances directly beside a sink unless protected by a splash and proper clearances.
- Plan for doors and drawers: appliance doors, refrigerator swings, and dishwasher openings should not collide in high-traffic paths.
Clearances and Measurements That Prevent Everyday Frustration
Appliances fit on paper and fail in real life when clearances aren’t planned. Use these measurements as a starting point, then confirm manufacturer specs for your exact models.
Countertop and landing space guidelines
- Landing space near cooking: aim for 15–18 inches of counter on at least one side of the cooktop/range (more is better for busy cooks).
- Landing space near wall ovens/steam ovens: plan 15 inches minimum of adjacent counter for safe transfers of hot dishes.
- Microwave landing space: at least 15 inches of counter nearby (especially if not built-in).
Aisles, door swings, and pass-throughs
- Work aisles: 42 inches wide minimum (single cook), 48 inches preferred for multi-cook kitchens.
- Island seating clearance: allow 36–44 inches behind stools for comfortable circulation.
- Appliance door clearance: ensure oven doors can open fully without blocking a primary walkway.
Ventilation and heat management
- Toaster ovens/air fryers: avoid tightly enclosed shelves unless rated for it; many units need 2–4 inches of space around sides/back for airflow.
- Built-in coffee systems/steam ovens: follow manufacturer ventilation requirements precisely to protect cabinetry and warranties.
Where to Put the Most Popular Specialty Appliances
Coffee & Espresso Machines: Build a Beverage Station
A dedicated beverage zone is one of the most requested kitchen renovation upgrades because it reduces morning congestion and keeps the main prep area clear.
Best placements:
- Near the sink for filling water reservoirs and quick rinsing.
- Away from the cooktop to prevent grease buildup on machines and grinders.
- Close to mugs and supplies (upper cabinet, drawer, or open shelf).
Design recommendations:
- Countertop material: quartz is low-porosity and easy to wipe; honed granite hides fingerprints but needs sealing; marble stains easily from coffee/acid and requires diligent care.
- Backsplash: glazed ceramic or porcelain tile is easy to clean; consider a full-height slab for minimal grout maintenance.
- Outlet placement: include at least two dedicated outlets for espresso machine and grinder. A pop-up outlet can keep the wall clean if local codes allow.
Budget range: A simple beverage counter refresh (outlets + shelving + lighting) often runs $500–$2,500. A built-in coffee system and water line can move the range to $3,500–$9,000+ including plumbing/electrical upgrades.
Microwave Placement: Not Over the Range by Default
The over-the-range microwave is common, but it’s not always the best choice for ventilation performance, sightlines, or safety for kids. Today’s kitchen design trends lean toward built-in or drawer microwaves for a sleeker look and better ergonomics.
Top options:
- Microwave drawer in an island or base cabinet: great for accessibility; keep it away from the main sink run to avoid splashes.
- Built-in microwave in a tall cabinet: place the controls at a comfortable height, typically 36–48 inches above the floor depending on user height.
- Under-counter microwave near the snack zone: ideal for families and entertaining.
Budget range: Countertop microwaves are $100–$400. Built-in and drawer models typically run $700–$2,000+, plus cabinetry modifications.
Wine Fridge & Beverage Refrigerator: Close to Where You Serve
If your beverage fridge is across the kitchen from glassware, it will never feel convenient. Place it where people naturally gather—often near the island, dining area, or a bar nook.
Best placements:
- On the perimeter to avoid traffic through the cooking zone.
- Near entertaining storage (glasses, bar tools, napkins).
- Not adjacent to ovens/dishwashers if possible—heat can reduce efficiency.
Material tip: Choose a moisture-resistant toe-kick and durable floor finish nearby; spills are common. Luxury vinyl plank (waterproof) is budget-friendly, while porcelain tile is extremely durable.
Budget range: Undercounter beverage fridges typically cost $500–$2,500. Panel-ready models and custom fronts can push $2,500–$5,000+.
Stand Mixer: Counter, Lift, or Appliance Garage?
Stand mixers are heavy, and moving them frequently is a recipe for back strain and chipped counters. Placement should reflect how often you bake.
- Frequent bakers: keep it on a dedicated counter section in the prep zone, ideally 24–30 inches of uninterrupted counter.
- Occasional bakers: use a mixer lift in a base cabinet to keep counters clear.
- Minimalist counters: consider an appliance garage with a roll-up or pocket door—but allow airflow for any heat-producing devices stored there.
Budget range: A quality mixer lift is often $150–$400 (plus installation). An appliance garage can run $400–$1,500+ depending on cabinet construction and door style.
Air Fryer, Toaster Oven, and Multi-Cooker: Plan for Heat and Steam
These are the most common “floating” appliances that end up cluttering counters. They also produce heat and, in the case of pressure/multi-cookers, steam.
Best placements:
- On a heat-safe counter with open space above (avoid low upper cabinets where heat can discolor finishes).
- In a pull-out shelf designed for appliances, ideally with a strong slide rating (75–100 lbs) and an integrated outlet.
- Near ventilation or away from delicate finishes; grease aerosols from air frying can cling to painted cabinetry.
Material comparison for the “hot appliance” counter:
- Quartz: easy maintenance, but avoid placing very hot pans directly on it—use trivets.
- Porcelain slab: highly heat-resistant and stain-resistant; often pricier, but excellent for appliance-heavy zones.
- Laminate: budget-friendly, but more vulnerable to heat damage and seam swelling.
Ice Maker and Water Filtration: Place Near Entertaining and Cleanup
A dedicated ice maker feels luxurious, but it needs the right support: water line, drain (for many models), ventilation, and service access.
- Best spot: near the beverage zone or bar area, ideally close to a sink run for plumbing efficiency.
- Under-counter placement: plan for venting per the model—some require front ventilation clearance.
- Water filtration: place the dispenser or tap where you fill pots and bottles; many homeowners add a filtered water faucet at the main sink or a secondary prep sink.
Budget range: Undercounter ice makers typically run $1,500–$4,000+ plus plumbing. Under-sink filtration ranges from $150–$1,200 depending on system type and whether you add a dedicated faucet.
Electrical, Plumbing, and Cabinetry Planning (Where Renovations Succeed or Fail)
Electrical: dedicate circuits where needed
- Many specialty appliances draw significant power (espresso machines, steam ovens, microwave drawers). Plan dedicated circuits as required by code and manufacturer specs.
- Use GFCI protection near sinks and wet areas.
- Consider under-cabinet lighting in beverage zones and appliance garages for visibility and a premium feel.
Plumbing: keep wet upgrades efficient
- Group water-reliant appliances (ice maker, coffee system, filtration) near existing plumbing walls when possible to reduce labor costs.
- If adding a pot filler, place it with a clear purpose—helpful for frequent pasta/soup cooking, but not essential for every kitchen.
Cabinetry: choose hardware and interiors that match usage
- Soft-close, full-extension drawers for appliance accessories (pods, filters, blender parts).
- Ventilated cabinet backs for enclosed appliance storage if heat is involved.
- Durable interiors: melamine is wipeable and cost-effective; plywood boxes are sturdier and handle long-term wear better than particleboard in high-moisture zones.
Budget Considerations: Where to Spend vs. Save
A kitchen renovation can balloon quickly when specialty appliances drive cabinet changes and utility upgrades. Use a tiered approach.
High-impact upgrades (often worth the spend)
- Beverage station with proper outlets, storage, and lighting
- Microwave drawer for improved workflow and cleaner sightlines
- Quality ventilation if you cook often (supports cabinets and indoor air quality)
Smart savings (without sacrificing function)
- Choose a countertop microwave hidden in an appliance garage instead of a built-in if budget is tight.
- Use open shelving selectively in the beverage zone to reduce cabinet costs (pair with easy-to-clean surfaces).
- Skip plumbing-heavy features (like an ice maker) unless you’ll use them weekly.
Common Specialty Appliance Placement Mistakes to Avoid
- Overcrowding the main prep counter: If every appliance lives where you chop and mix, cooking becomes stressful fast.
- Ignoring door conflicts: A dishwasher open shouldn’t block access to the refrigerator or a key drawer bank.
- Placing heat-producing appliances under low upper cabinets: repeated heat and steam can warp or discolor finishes.
- Skipping landing space: Wall ovens and microwaves without nearby counter space create safety hazards.
- Underestimating electrical needs: sharing circuits can lead to nuisance tripping and limits future upgrades.
- Choosing trendy placement over timeless workflow: A dramatic built-in look is great—until it disrupts how you cook daily.
Maintenance Advice: Keep Specialty Zones Looking New
- Control grease: Place air fryers and toaster ovens away from porous grout and use a wipeable backsplash (gloss tile or slab).
- Protect finishes: Use a small tray under coffee tools to catch drips; it prevents staining and simplifies cleanup.
- Ventilate enclosed storage: Don’t run hot appliances in tight cabinets unless the cabinet is designed for it.
- Seal natural stone: If you use granite, marble, or quartzite, follow a sealing schedule suited to the stone type and finish.
- Plan service access: For built-in appliances, confirm you can remove them without dismantling half your cabinetry.
FAQ: Kitchen Specialty Appliance Placement
Where should a microwave go in a modern kitchen?
For most renovations, a microwave drawer in an island or a built-in unit in a tall cabinet offers the best blend of clean design and usability. Aim for comfortable control height and include nearby landing space (about 15 inches) for hot dishes.
Is it okay to keep an air fryer in an appliance garage?
Only if the cabinet is designed for heat and airflow. Many air fryers require a few inches of clearance around the unit and open space above. A pull-out shelf with ventilation and a dedicated outlet is a safer approach than running it behind closed doors.
How much space do I need for a coffee station?
Plan for at least 24–36 inches of counter width for a coffee maker/espresso machine plus accessories. Include storage for mugs, beans/pods, and a small knock box or waste bin if you use an espresso setup.
Should a wine fridge go next to the oven?
It’s better to avoid it. Heat from ovens (and sometimes dishwashers) can make a beverage fridge work harder and reduce efficiency. Place it in an entertaining zone on the perimeter when possible.
What’s the best height for a built-in wall oven with a steam oven companion?
Many homeowners prefer the primary oven with the rack area around 30–36 inches from the floor for safer lifting. Exact placement depends on user height and the appliance stack; follow manufacturer guidance and keep a nearby landing surface.
Do specialty appliances increase home value?
They can—when thoughtfully integrated. Buyers respond best to functional upgrades like beverage zones, quality ventilation, and well-planned storage. Overly niche appliances can be less compelling if they reduce cabinet space or disrupt workflow.
Actionable Next Steps for Your Kitchen Upgrade
- List your top 5 specialty appliances and rank them by weekly use.
- Assign each appliance to a zone (prep, beverage, cooking, entertaining) and identify the closest storage it needs.
- Measure clearances for door swings, aisle widths, and landing areas—especially around ovens, dishwashers, and refrigerators.
- Confirm utilities early: check electrical load, outlet locations, and any plumbing needs before finalizing cabinetry.
- Choose materials that match the appliance behavior: heat-resistant surfaces near hot appliances; low-porosity counters near coffee and wine.
For more practical kitchen renovation guidance, smart organization ideas, and layout inspiration, explore additional kitchen design articles at thedecormag.com.
More Articles
 Kitchen Hidden Appliance Drawer Ideas - The Decor Mag
 Kitchen Backsplash Ideas That Stand Out - The Decor Mag
 Kitchen Plaster Range Hood Organic Look - The Decor Mag
 Best Kitchen Pantry Door Ideas - The Decor Mag
 Kitchen Style & Function: Design Tips (2026)
 Kitchen Drawer Organization That Lasts (2026)
 Friendly vs. Solutions: A Practical, Kitchen-Tested Comparison of Two Leading Countertop Materials
 How to Incorporate Color in a White Kitchen - The Decor Mag
 Create Care and Maintenance: A Practical, Brand-Specific Guide for Modern Kitchens
 The Actually For Checklist: A Precision-Driven Kitchen Readiness System for Home Cooks and Professionals