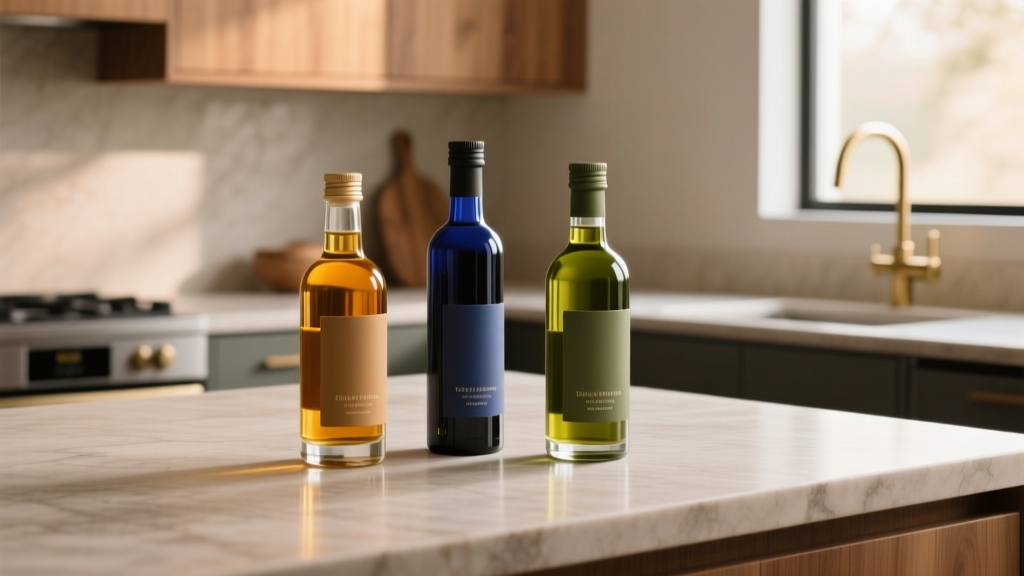
Best Kitchen Specialty Cooking Oil Storage - The Decor Mag
Specialty cooking oils—extra virgin olive oil, avocado oil, toasted sesame, walnut, chili oil, truffle oil—bring restaurant-level flavor into everyday meals. They’re also one of the easiest pantry categories to waste. Light, heat, oxygen, and sloppy storage shorten shelf life, dull flavor, and can even create sticky messes that attract dust and pests. For homeowners upgrading their kitchens, oil storage is a small design choice with outsized impact on organization, workflow, and countertop calm.
Thoughtful specialty cooking oil storage sits at the intersection of kitchen design and daily habits. A great setup keeps oils protected (cool, dark, stable), accessible at the right station (prep and cooking), and easy to maintain (wipeable surfaces, drip control). Whether you’re planning a full kitchen renovation or simply refreshing your organization, the best solution usually combines smart cabinet hardware, the right containers, and a layout that matches how you cook.
This guide covers practical, design-forward ways to store specialty oils—complete with measurements, materials, cost ranges, common mistakes, and trend-aware recommendations that still prioritize timeless functionality.
What Specialty Oils Need to Stay Fresh
Before choosing a drawer insert or a pull-out cabinet, it helps to understand what oils are “asking for.” Most premium oils degrade fastest when exposed to:
- Heat (especially near the range, oven venting, or sunny windows)
- Light (direct sunlight and strong under-cabinet lighting)
- Oxygen (frequent opening, half-empty bottles, loose caps)
- Time (stockpiling too many varieties at once)
Best placement rule of thumb
- Store oils in a cool, dark cabinet ideally 3–6 feet away from the cooktop.
- Avoid cabinets directly above the range (heat plume) and open shelving near windows.
How long do common oils typically last?
- Extra virgin olive oil: best within 3–6 months after opening for peak flavor
- Nut oils (walnut, hazelnut): 2–4 months; refrigerate for longer life
- Sesame oil: 6–12 months depending on refinement
- Infused oils: check labels; many are best used within 1–3 months once opened
Plan Oil Storage Around Kitchen Zones
Current kitchen design trends emphasize “zones” (prep, cook, clean, store). Specialty oils belong in the prep-to-cook pathway, not necessarily right next to the burners. During a kitchen renovation, you can build a storage plan that feels custom without adding much cost.
Recommended zone layout
- Primary oil storage: a base cabinet or pantry section near prep space
- Daily-use oils: a small subset stored closer to the cooktop in a protected pull-out or drawer
- Backup bottles: pantry or secondary storage, away from heat and light
Practical measurements to design for
- Most 16–17 oz oil bottles are 10–12 inches tall; some are taller.
- Plan for 12–14 inches of vertical clearance in cabinets or pull-outs.
- Allow 3–3.5 inches of width per bottle (more for square/ceramic bottles).
- For a drawer solution, choose a drawer with 4–6 inch interior height if bottles will lay flat in cradles, or 10–12 inches if bottles stand upright.
Best Oil Storage Options (From Most Renovation-Friendly to Most Custom)
1) Base Cabinet Pull-Out for Oils (Best for accessibility)
A narrow pull-out cabinet—often used for spices—works beautifully for oils, especially in today’s streamlined kitchen organization plans.
Design specs that work:
- Width: 6", 9", or 12" pull-outs (9" is a sweet spot for many kitchens)
- Height clearance: 12–14" per shelf if storing bottles upright
- Shelf edge: at least 2" rail to prevent tipping
- Placement: near prep zone, not directly next to the range
Material recommendations:
- Powder-coated steel (durable, wipeable, modern; great for renovation longevity)
- Maple or birch wood with a sealed finish (warm, classic; avoid unfinished wood due to oil stains)
Budget range:
- Retrofit pull-out hardware: $120–$350
- New cabinet pull-out unit installed: $300–$900+ depending on brand and labor
Why homeowners love it: You see everything at once, bottles stay upright, and it frees countertop space—one of the top goals in kitchen renovation planning.
2) Deep Drawer with Adjustable Dividers (Best for modern kitchens)
Deep drawers are a leading kitchen design trend because they reduce bending and make storage visually tidy. With dividers, oils can be stored upright (preferred) or in angled/flat cradles.
What to look for:
- Drawer depth: 18–21" standard; deeper drawers fit more bottles without stacking
- Non-slip liner: prevents glass from shifting
- Adjustable dividers: keep categories separated (olive oils, finishing oils, high-heat oils)
Material comparison:
- Bamboo dividers: affordable, sustainable look; needs occasional wiping and drying
- Acrylic dividers: sleek and easy to clean; can scratch but stays stain-free
- Metal dividers: durable, premium feel; pairs well with contemporary cabinetry
Budget range:
- DIY drawer dividers/liners: $25–$120
- Custom drawer insert system: $150–$500+
3) Pantry “Oil Library” Shelf (Best for collectors and specialty cooks)
If you keep multiple oils, a pantry shelf setup is the most protective—cooler, darker, and away from cooking heat. Think of it as an oil library: organized, labeled, and easy to audit so bottles don’t expire.
Ideal shelf setup:
- Shelf depth: 10–12" (deep enough for bottles, shallow enough to prevent lost items)
- Shelf height spacing: 12–14" for upright storage
- Use risers: 2–4" step risers help you see shorter bottles behind taller ones
Budget range:
- Risers and bins: $20–$80
- Pantry shelving updates (materials + labor): $200–$1,500+ depending on scope
4) Countertop Oil Station (Best when done intentionally)
Leaving oils on the counter is common—but not always best for freshness. If you love the look (and the convenience), treat it like a designed station with protection built in.
Make it work with these rules:
- Keep 1–2 daily oils out; store the rest away.
- Use a tray with a raised lip (at least 0.5") to catch drips.
- Place it away from direct sunlight and not right next to the cooktop.
- Choose dark glass or stainless dispensers to reduce light exposure.
Budget range:
- Simple tray + dispensers: $30–$120
- Premium stainless or ceramic dispensers: $40–$120 each
Best Containers and Materials for Specialty Cooking Oil
For kitchen organization that lasts, containers matter as much as cabinet layout. The goal: reduce light exposure, prevent drips, and make pouring consistent.
Material comparisons
- Dark glass (amber/green): strong light protection, neutral, classic; can break if dropped.
- Stainless steel: excellent light protection, modern, durable; choose food-grade interior and quality spouts.
- Ceramic: good light protection and decorative; can chip, and some glazes are harder to inspect for residue.
- Clear glass: looks beautiful but offers poor light protection; better for oils you use quickly or keep in a dark cabinet.
- Plastic: lightweight but can absorb odors and may not be ideal for long-term oil quality; best for short-term or travel.
Spouts, caps, and drip control
- Choose self-closing pour spouts or tight-fitting caps to reduce oxygen exposure.
- Avoid leaky “open” spouts for long-term storage; they invite dust and oxidation.
- Look for a non-drip spout design or add drip collars if you notice mess.
Labeling that looks good (and prevents waste)
- Label with oil type and purchase/open date.
- Use waterproof labels or a paint pen for wipeable surfaces.
- Keep a simple system: “Daily,” “Finishing,” “High Heat,” “Specialty.”
Design Approaches That Elevate Oil Storage
Integrate oils into a “Cooking Command Center”
A popular renovation approach is creating a compact cluster for cooking essentials: oils, salt, pepper, and frequently used spices. Pair a pull-out with a drawer below for tools (tongs, thermometer, microplane).
Recommended combo:
- 9" base pull-out for oils + vinegars
- Top drawer with spice drawer insert
- Second drawer with cooking tools
Use wipeable, oil-resistant surfaces
Oil drips happen. Design for easy cleanup:
- Shelf liners: clear, wipeable EVA or silicone liners in pull-outs and drawers
- Sealed wood: if you love wood inserts, choose factory-sealed or polyurethane-coated
- Matte finishes: hide minor smudges better than high-gloss
Match storage style to kitchen aesthetic
- Modern kitchens: stainless dispensers, minimalist labels, deep drawers with clean dividers
- Transitional kitchens: sealed wood pull-outs, amber bottles, a simple tray station
- Classic kitchens: pantry shelf organization with uniform dark glass bottles and discreet labels
Budget Planning: What’s Worth Spending On
For homeowners prioritizing kitchen renovation ROI, oil storage upgrades can be surprisingly cost-effective.
- $25–$120 (Quick win): liners, dividers, labels, tray, a single quality dispenser
- $120–$350 (High impact): retrofit pull-out in an existing base cabinet
- $350–$900+ (Renovation add-on): new narrow pull-out cabinet, upgraded hardware, custom inserts
Where to splurge: smooth full-extension slides (soft-close if possible), sturdy pull-out frames, and drip-resistant containers.
Where to save: labels, liners, and risers—these can look polished without premium pricing.
Maintenance: Keep It Clean, Fresh, and Safe
- Wipe bottle necks weekly to prevent sticky buildup that attracts dust.
- Clean trays and liners monthly with warm water and a degreasing dish soap; dry fully before reinstalling.
- Check for rancidity: crayons/waxy smell, bitter or flat taste—discard if off.
- Rotate stock: move older bottles to the front every time you shop.
- Keep infusions safe: for homemade garlic/chili infusions, follow food-safety guidance and refrigerate; when in doubt, don’t store long-term.
Common Mistakes to Avoid
- Storing oils above the stove: heat accelerates oxidation and shortens shelf life.
- Using clear glass on a sunny counter: light damage happens faster than many people realize.
- Buying too many “specialty” bottles at once: an overfilled pantry leads to expired, unused oils.
- Keeping oils next to spices without spill protection: one leak can ruin labels and create a sticky mess.
- Ignoring bottle height in cabinet planning: a pull-out that’s 1" too short becomes instantly frustrating.
- Using open pour spouts for long storage: they invite dust and air exposure.
FAQ: Specialty Cooking Oil Storage
Should I refrigerate olive oil?
Refrigeration can extend life, but it often causes cloudiness and solidification (which reverses at room temperature). For most kitchens, a cool, dark cabinet is ideal. Refrigerate if your kitchen runs hot year-round or you store olive oil for long periods.
How far should oils be from the cooktop?
Aim for 3–6 feet away and not directly above the range. If you want convenience, keep only a small daily-use bottle in a protected drawer or pull-out near the cooking zone.
Are oil dispensers better than original bottles?
They can be—if they’re dark glass, stainless, or ceramic with a tight cap and a non-drip spout. If you use oil slowly, the original dark bottle stored in a cabinet may preserve freshness better than a dispenser that gets opened constantly.
Can I store oils and vinegars together?
Yes, in most cases. Store them upright in a pull-out with a liner or tray to catch drips. Keep strong-smelling vinegars tightly sealed and consider grouping by use (salad station vs cooking station).
What’s the best cabinet type for oil storage in a kitchen renovation?
A narrow base pull-out (6"–12") near the prep zone is one of the most functional upgrades. Pair it with a nearby drawer for spices and tools to create a cohesive cooking workflow.
How do I prevent oily residue in drawers and pull-outs?
Use wipeable liners, choose non-drip spouts, and keep bottles on a tray or in a bin with a solid base. Wipe necks regularly—most buildup starts there.
Next Steps: Build a Storage Setup That Fits How You Cook
Start by taking inventory: list your oils, measure the tallest bottle, and decide which two you reach for weekly. Then choose a storage strategy that matches your kitchen layout—pull-out, deep drawer, pantry shelf, or a small countertop station—and add the protective details that keep oils fresh (dark storage, drip control, and easy-clean materials).
If you’re planning a kitchen renovation, flag oil storage early in your cabinet plan. A 9" pull-out or a well-designed deep drawer costs far less than major layout changes, yet it delivers daily convenience and a more organized kitchen.
For more practical renovation advice, kitchen organization ideas, and cabinetry trends that stand the test of time, explore more inspiration on thedecormag.com.
More Articles
 Kitchen Warm Neutral Cabinet Colors - The Decor Mag
 Best Kitchens for Functional Design: Layouts, Brands, and Ergonomic Principles That Work Every Day
 How to Design a Kitchen for Entertaining - The Decor Mag
 Kitchen Textured Cabinet Door Trends - The Decor Mag
 Kitchen Countertop Edge Profiles: Best Choices (2026)
 How to Choose the Right Kitchen Hood Vent - The Decor Mag
 Best Kitchen Compost Bin Options - The Decor Mag
 Pantry Organization: Fresh Produce & BBQ Storage (2026)
 Kitchen Leaded Glass Cabinet Doors - The Decor Mag
 Kitchen Matte Black Fixture Trends - The Decor Mag