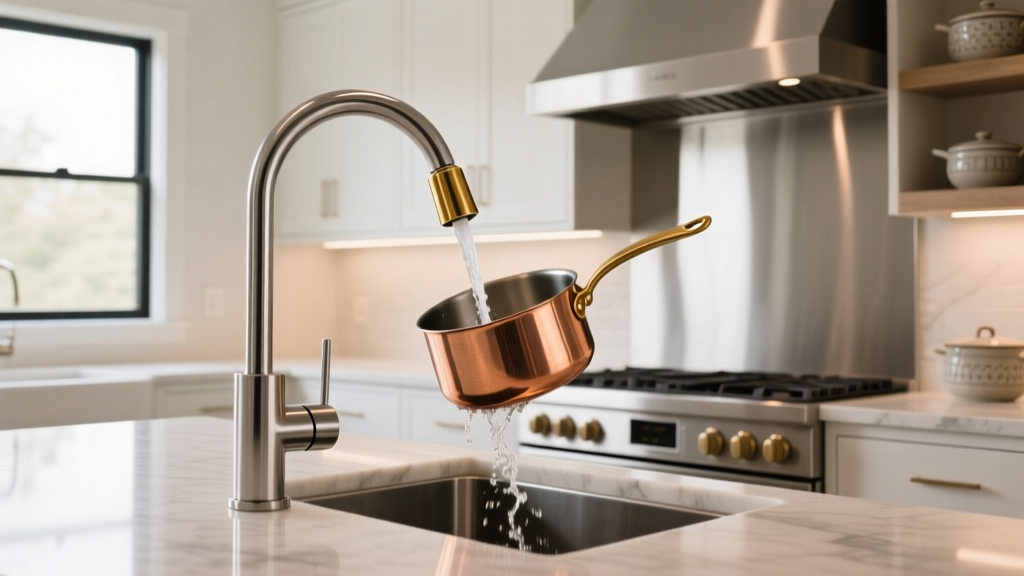
Kitchen Pot Filler Faucet Guide - The Decor Mag
A kitchen renovation is full of big decisions—cabinetry, countertops, lighting, appliances. A pot filler faucet can feel like a small add-on by comparison, yet it has an outsized impact on day-to-day convenience. If you cook often, carry heavy stockpots, or simply want a more efficient workflow at the stove, this single fixture can reduce lifting, spills, and back-and-forth trips to the sink.
Pot fillers have also become a design-forward upgrade. In today’s kitchens—where clean lines, mixed metals, and chef-inspired details are trending—a well-chosen wall-mount pot filler reads like a professional touch. Done right, it supports timeless functionality: shorter steps, safer movement, and a more organized cooking zone.
What Is a Pot Filler Faucet (and Who Benefits Most)?
A pot filler faucet is a swing-arm faucet installed near your cooktop or range, designed to fill pots directly where you cook. Most models fold back against the wall and extend outward via one or two pivoting arms for reach and flexibility.
Best fit for:
- Frequent cooks who regularly boil pasta, blanch vegetables, or make soups and stocks
- Homes with large ranges (30–48 inches) where the cooking zone is a focal point
- Households wanting better ergonomics—less carrying heavy water-filled pots from sink to stove
- Renovations that already involve opening walls for plumbing/electrical updates
When it may not be worth it:
- If you rarely boil large pots or mostly use an electric kettle/instant pot
- If your range is on an island (not impossible, but typically more expensive and complex)
- If your budget is tight and you’d get more impact from improved lighting, storage, or ventilation
Pot Filler Pros, Cons, and Realistic Expectations
Advantages
- Convenience: Fill stockpots and pasta pots without crossing the kitchen.
- Safer lifting: Carrying a heavy, sloshing pot is a common source of spills and strain.
- Cleaner workflow: Keeps the sink area free for prep and cleanup while you cook.
- Elevated design: Adds a “custom kitchen” detail that pairs well with statement ranges and backsplash tile.
Tradeoffs
- Not a drain: Pot fillers don’t drain like a sink. Overfilling still makes a mess—often near heat.
- More plumbing connections: More joints can mean more leak risk if installed poorly.
- Water quality still matters: If your tap water is hard, you may see mineral buildup on the spout and handle.
Planning Your Kitchen Layout: Placement, Height, and Reach
Good placement is the difference between “why didn’t we do this sooner?” and “we never use it.” The goal is easy access without interfering with cooking or cleaning.
Ideal location
- Wall-mounted behind the range/cooktop is the most common and cost-effective setup.
- Position it so the arms can reach front and back burners without crossing over open flames.
- If you have a slide-in range, consider how the faucet aligns with the backsplash and the range’s rear controls.
Recommended mounting height (practical ranges)
- Typical: 18–24 inches above the cooktop surface
- For taller stockpots: Up to 24–30 inches above the cooktop (as long as the reach still hits the burners)
Keep enough clearance so you can place a pot under the spout without awkward angling. If your backsplash includes a ledge or thick trim, account for that depth.
Reach and arm length
Most pot fillers offer a reach between 18 and 24 inches when fully extended. Measure from the wall to:
- The center of your front burner
- The center of your back burner
- The far edge of your largest pot
Select an arm length that comfortably reaches the center of the largest burner you use for boiling (often front-right or front-left).
Clearance tips
- Try to avoid placing the spout directly over the hottest burner zone where steam rises most aggressively.
- Make sure folded arms don’t hit cabinet trim, a range hood skirt, or a backsplash shelf.
- If you have a high-output gas range, confirm the faucet won’t sit in a constant plume of heat.
Plumbing Considerations: Water Line, Shutoff, and Safety
A pot filler is a plumbing fixture, not just decor. The right rough-in plan prevents future headaches.
Hot vs. cold water
- Cold water only is most common and typically recommended. Hot water lines can increase mineral scaling and aren’t necessary for filling pots you’ll heat anyway.
- If you want warm water for faster boiling start times, discuss with your plumber—local code and practical risks vary.
Dedicated shutoff valve
Plan for an accessible shutoff valve, ideally in a nearby cabinet. Many pot fillers have two valves (one at the wall, one at the spout). Even so, a proper in-cabinet shutoff is smart for maintenance or emergencies.
Pipe sizing and pressure
- Many installs use 1/2-inch supply. Confirm with your plumber based on your home’s pressure and fixture requirements.
- If your kitchen already struggles with low flow at peak times, consider pressure testing before adding another fixture.
Water filtration and scale
- If you have hard water, consider a whole-home softener or a targeted filtration approach to reduce spotting and mineral buildup.
- Choose finishes that hide water spots better (brushed nickel, brushed stainless) if you don’t want to wipe it constantly.
Materials and Finishes: What Holds Up Best in a Cooking Zone
A pot filler sits near heat, steam, grease, and splatter. Material quality and finish durability matter more here than at a bar sink.
Best body materials
- Solid brass: Excellent durability and corrosion resistance; common in premium faucets.
- Stainless steel (304): Strong, modern look, and generally resistant to corrosion; great for contemporary kitchens.
- Zinc alloys (budget models): Less durable; can wear faster in high-heat, high-moisture zones.
Finish comparisons (design + maintenance)
- Brushed nickel: Timeless, forgiving with fingerprints and spots; works in transitional kitchens.
- Polished chrome: Bright and classic; shows water spots more, but easy to clean.
- Matte black: Trend-forward and bold; can show mineral deposits as light specks if water is hard.
- Brushed brass / champagne bronze: Warm, upscale; pairs beautifully with natural stone and off-white cabinetry.
- Unlacquered brass (living finish): Develops patina; gorgeous in curated, European-inspired kitchens, but requires comfort with change over time.
Current trends that still feel timeless
- Mixed metals: Pot filler in brushed brass with stainless appliances, or black with warm hardware—intentional contrast.
- Statement backsplash: A pot filler centered on handmade tile or slab stone becomes a focal point.
- Minimal silhouettes: Slim arms and clean joints that read modern without looking harsh.
Product and Design Recommendations (What to Look For)
Rather than chasing a specific model, shop by performance features and installation reliability.
Key features worth paying for
- Dual shutoff (two-handle design): Helps reduce the chance of drips at the spout.
- High-quality ceramic disc valves: Smoother operation and better longevity.
- 360-degree swivel at joints: Easier positioning over different burners.
- Sturdy wall bracket and tight tolerances: Minimizes wobble when extended.
Spout style recommendations
- Aerated stream: Reduces splashing in shallow pots (check that it doesn’t restrict flow too much).
- Straight, open flow spout: Often fills faster; can splash more if water pressure is high—best with deeper pots.
Design approach: match or contrast?
- Match the main faucet if you want a cohesive, calm kitchen design—especially in smaller spaces.
- Contrast the pot filler when your range wall is the “moment” (custom hood, special tile, or pro-style range).
Cost Ranges and Budget Planning
Pot fillers range from modest upgrades to premium statements. Here’s a practical budgeting snapshot for kitchen renovations.
Typical cost ranges
- Faucet itself: $150–$400 (entry level), $400–$900 (midrange), $900–$2,000+ (premium/designer)
- Professional installation (existing water line nearby): $300–$800
- Installation with new line through wall (common in remodels): $800–$2,500+
- Backsplash repair/tile work: $200–$1,500+ depending on material and scope
Budget strategy that works
- If you’re opening the wall for electrical or venting anyway, adding the water line is typically more cost-efficient.
- Spend more on valve quality and body material than on ornate styling.
- If you must cut costs, choose a solid midrange faucet and keep the backsplash design straightforward around the penetration point.
Maintenance and Cleaning: Keep It Looking Sharp
Pot fillers sit in a splatter zone. A simple care routine prevents buildup and finish damage.
Weekly quick clean
- Wipe with a soft microfiber cloth and warm water.
- Use a mild dish soap if there’s grease residue.
- Dry the finish to reduce spotting, especially on chrome and black.
Dealing with mineral deposits
- Use a 50/50 mix of water and white vinegar on a cloth (not sprayed directly), then rinse and dry.
- Avoid abrasive pads or harsh cleaners that can dull plated finishes.
- For stubborn scale on aerators, remove and soak if the design allows—follow manufacturer instructions.
Drip prevention
- Turn off both valves (if your model has two).
- If dripping persists, plan on replacing cartridge/valve components—another reason to buy from reputable brands with available parts.
Common Mistakes to Avoid
- Installing without an accessible shutoff: Makes maintenance stressful and costly.
- Mounting too high: Forces you to lift heavy pots higher to fill—undoing the ergonomic benefit.
- Choosing a short reach: A pot filler that can’t comfortably reach your main boiling burner won’t get used.
- Centering on the range instead of the burner: Burner layout varies; measure for real use, not symmetry alone.
- Buying ultra-budget materials: Heat/steam exposure can accelerate wear and wobble.
- Forgetting the backsplash plan: Tile patterns, slab veining, and grout lines matter—align the faucet placement with the layout before rough-in.
- Ignoring vent hood capture: Poor ventilation increases grease film on everything near the stove, including your pot filler.
FAQ: Kitchen Pot Filler Faucets
Do pot filler faucets leak more than regular faucets?
They can if installed poorly or if the valve quality is low, mainly because there are more joints and moving parts. Choosing solid brass construction, ceramic disc valves, and using a licensed plumber with a proper shutoff valve reduces risk significantly.
Should a pot filler have hot water?
Most homeowners choose cold only. You’ll heat the water in the pot anyway, and cold supply helps reduce mineral scaling and complexity. Hot water can make sense in specific setups, but it’s not a must-have for function.
How far should a pot filler reach?
Aim for a reach that comfortably hits the center of the primary boiling burner—often requiring 18–24 inches. Measure from the wall to your burner centers before purchasing.
Can I install a pot filler on an island?
Yes, but it’s usually more expensive. Island installs require bringing a water line up through the floor and typically using a deck-mount or a specially planned mounting solution. Budget more for plumbing labor and consider how you’ll protect the fixture from splatter and clutter.
What finish is easiest to keep clean?
Brushed nickel and brushed stainless are the most forgiving for fingerprints and water spots. Polished chrome looks crisp but shows spotting more. Matte black can show mineral residue as light specks in hard-water areas.
Is a pot filler still a good idea in a small kitchen?
It can be, especially if the sink is far from the range or if the kitchen layout creates traffic conflicts. If your sink is already steps from the stove, you may get more value from storage upgrades, task lighting, or a better vent hood.
Next Steps: How to Decide and Plan with Confidence
If a pot filler supports how you actually cook, it’s one of those kitchen upgrades that quickly becomes “normal”—in the best way. Start by measuring your burner layout and confirming where the faucet should land on the backsplash. Then align finish and style with your overall kitchen design: modern, transitional, farmhouse, or classic.
- Measure wall-to-burner distances and decide on reach (typically 18–24 inches).
- Choose placement (usually 18–24 inches above the cooktop) and confirm clearance with hood/backsplash details.
- Set a budget including faucet, plumbing, and backsplash patching (often $650–$3,500+ all-in).
- Select materials (solid brass or stainless) and a durable finish that suits your maintenance tolerance.
- Hire a pro for rough-in and installation, and insist on an accessible shutoff valve.
For more kitchen renovation inspiration—layout planning, backsplash ideas, cabinet trends, and smart organization—explore the latest guides and design features on thedecormag.com.
More Articles
 Kitchen Backsplash Pattern Scale: How to Choose (2026)
 Kitchen Subway Tile Alternatives - The Decor Mag
 How to Start Bedroominspiration: A Practical, Space-Smart Guide for Real Homes
 Kitchen Backsplash Ideas That Stand Out - The Decor Mag
 Kitchen Countertop Edge Profiles: Best Choices (2026)
 Statement Kitchen Lighting Design (2026)
 Kitchen Sink Styles and Materials Compared - The Decor Mag
 Kitchen Cabinet Interior Finish: Best Choices (2026)
 Kitchen Wood Beams Ceiling Design - The Decor Mag
 Kitchen Cabinet Color Trends - The Decor Mag