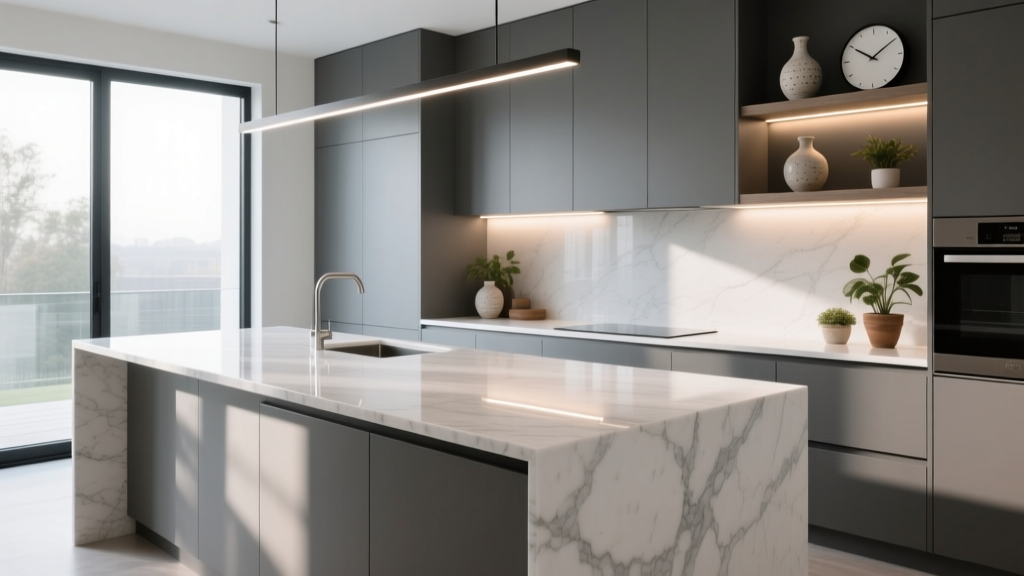
Kitchen Waterfall Island Design Ideas - The Decor Mag
A kitchen island can be the workhorse of a renovation—extra prep space, more storage, better traffic flow, and a natural place for people to gather. A waterfall island takes that functionality and adds a clean, architectural finish by carrying the countertop material down one or both sides to the floor. The result looks custom, intentional, and polished, even in modest-size kitchens.
Homeowners are choosing waterfall countertops for more than looks. The wrapped edge can protect cabinetry from scuffs, visually “anchor” the island, and create a cohesive focal point that elevates the entire kitchen design. When planned well, it also supports timeless functionality: comfortable seating, smart electrical placement, durable surfaces, and easy-to-clean details that matter every day.
This guide covers practical kitchen waterfall island ideas—materials, layouts, current design trends, measurements, cost ranges, maintenance, and the common mistakes that can undermine an otherwise beautiful remodel.
What Is a Waterfall Island (and Why Homeowners Love It)?
A waterfall island is an island where the countertop extends vertically down the side panel(s), creating a continuous “slab” look. You’ll see it most often on the seating end, but it can wrap one side, two sides, or even three (though that’s typically a luxury upgrade).
Benefits beyond style
- Durability: The waterfall side protects the island end from chair bumps, vacuum dings, and high-traffic wear.
- Easier cleaning: Fewer seams and trim pieces on the island end means fewer grime traps.
- Visual calm: A continuous surface reduces visual clutter—especially helpful in open-concept kitchens.
- Design flexibility: Works with modern, transitional, and even updated traditional kitchens when paired with the right cabinetry and hardware.
Design Planning: Layouts That Make a Waterfall Island Work
Waterfall panels add thickness and depth, so planning the island footprint early is key. Start with the “must-haves”: clear walkways, seating comfort, and appliance access.
Recommended clearances and key measurements
- Walkway clearance: 42 inches minimum around the island; 48 inches is ideal in busy kitchens or where multiple cooks work together.
- Seating clearance behind stools: 36 inches minimum from island edge to wall or cabinetry; 44 inches feels more comfortable for pass-through traffic.
- Counter overhang for seating: 12 inches standard; 15 inches for extra comfort. For 15 inches, confirm bracket support with your fabricator.
- Seating width per person: 24 inches per stool (30 inches if you want elbow room).
- Island size guidance: Practical minimum is roughly 24 x 48 inches; many family kitchens land in the 36 x 84-inch range (space permitting).
- Counter heights: 36 inches for standard; 42 inches for bar height (bar height is less common in current kitchen design trends).
Popular waterfall island layouts
- One-sided waterfall (most common): Wrap the seating end only. Best for budget, keeps the “slab moment,” and preserves cabinet access on other sides.
- Two-sided waterfall: Wrap both ends for a more sculptural look. Ideal in large open kitchens where the island is seen from multiple angles.
- Waterfall + storage wall: Use the waterfall end to frame open shelves or a wine cubby on the back side (great for entertaining zones).
- Waterfall on the working side: Less common, but useful if the island end takes abuse (kids’ backpacks, pet bowls, frequent traffic).
Best Materials for Waterfall Countertops: Pros, Cons, and Real-World Use
Material choice is where your waterfall island design becomes either effortlessly livable—or surprisingly high-maintenance. Consider your cooking habits, cleanup style, and tolerance for patina.
Quartz (engineered stone): the practical favorite
- Best for: Busy households, low maintenance, consistent patterning.
- Pros: Non-porous, stain-resistant, no sealing required, huge range of styles (marble-look, concrete-look, solid colors).
- Cons: Can be damaged by high heat; use trivets for hot pans. Visible seams may occur depending on slab size and pattern.
- Cost range: $60–$120 per sq. ft. installed (premium designs can be higher).
- Tip: Ask for a mitered edge to create a thick, high-end look (often 2–3 inches thick appearance) without the full slab thickness cost.
Porcelain slab: sleek, heat-friendly, and trend-forward
- Best for: Modern kitchens, high-heat cooking, minimalist looks.
- Pros: Excellent heat resistance, UV stable (good near big windows), very stain resistant.
- Cons: Edge chipping can happen if corners aren’t eased; fabrication requires specialized skill.
- Cost range: $70–$140+ per sq. ft. installed.
- Tip: Choose a slightly softened edge (not razor-sharp) and discuss corner detailing to reduce chips over time.
Natural stone (marble, quartzite, granite): timeless with caveats
- Best for: Homeowners who love natural movement and don’t mind maintenance.
- Marble: Beautiful veining; more prone to etching and staining. Expect patina.
- Quartzite: Often harder and more stain resistant than marble; still needs sealing. Verify the slab (some are softer than marketed).
- Granite: Durable and varied; can read busy in some patterns but works well in classic kitchens.
- Cost range: $70–$200+ per sq. ft. installed depending on rarity and thickness.
- Tip: For a waterfall edge, request careful vein matching so the pattern flows from top to side—this is where natural stone looks most luxurious.
Butcher block waterfall: warm, budget-friendly, and cozy
- Best for: Adding warmth to contemporary kitchens, softer visual style, DIY-friendly renovations.
- Pros: Warm look, quieter feel, often lower cost; can be refinished.
- Cons: Needs regular oiling or sealing; vulnerable to standing water and stains if not protected.
- Cost range: $40–$100 per sq. ft. installed (species and thickness drive price).
- Tip: Use a durable finish (water-resistant hardwax oil or a well-applied polyurethane if you prefer a sealed surface) and wipe spills quickly.
Style Ideas: Waterfall Island Designs That Feel Current (and Still Timeless)
1) Marble-look quartz + warm wood cabinets
This is a leading kitchen design trend because it balances clean surfaces with inviting texture. Pair a white or softly veined quartz waterfall with rift-sawn oak or walnut cabinetry for a high-end, calming kitchen renovation look.
- Recommended palette: Soft white, warm wood, brushed nickel or champagne bronze hardware.
- Great for: Transitional to modern spaces.
2) Waterfall island with fluted or reeded panels
Add a vertical reeded panel to the back of the island and frame it with waterfall sides. This keeps the slab moment while introducing depth and shadow—ideal for open kitchens where the island is a focal point.
- Design approach: Use the waterfall on the ends, then a contrasting texture in the center back.
- Best materials: Quartz or porcelain with a subtle pattern so the texture can shine.
3) Dark, moody waterfall for contrast
Charcoal quartz, soapstone-look surfaces, or dark granite can ground a bright kitchen and hide everyday smudges better than pure white.
- Works well with: White perimeter cabinets, warm brass accents, and layered lighting.
- Tip: Choose a honed or matte finish for a softer, more forgiving surface.
4) Waterfall island with a built-in banquette or end seating
If your kitchen layout is tight, an end-mounted bench or banquette can replace multiple stools and create a cozy breakfast nook feel without sacrificing walkways.
- Planning tip: Allow 18–20 inches seating depth and at least 24 inches width per person.
- Comfort tip: Add a foot rail for taller seating and avoid sharp countertop corners near pathways.
5) Waterfall + statement lighting + simple cabinets
If your island slab has dramatic veining or a bold color, keep cabinet door styles simple (flat-panel or slim shaker). This prevents visual competition and helps the waterfall edge read as intentional, not busy.
Edge Details, Seams, and Support: The Technical Choices That Matter
A waterfall island is only as good as its fabrication details. Discuss these items before templating.
Edge profiles that look best on waterfall islands
- Mitered edge: Creates a thick, luxe appearance; ideal for quartz, porcelain, and stone.
- Eased edge: Slightly softened; modern, reduces chipping risk on corners.
- Ogee/bullnose: More traditional; can look heavy on waterfalls unless the kitchen style is classic.
Seam placement and vein matching
- Ask for vein direction planning: The best waterfalls “wrap” visually from the top to the side.
- Understand your slab limits: Large islands may require seams depending on slab size and material availability.
- Budget for premium fabrication: Waterfalls usually require more labor than a standard island top.
Overhang support
- 12-inch overhang: Often supported without brackets (confirm with fabricator and stone thickness).
- 15-inch overhang: Commonly needs hidden steel brackets or corbels.
- Waterfall panel is not a bracket: Don’t assume the side panel supports a long overhang unless engineered for it.
Budget and Cost Ranges for a Waterfall Island
Costs vary by region, labor, and material tier. The waterfall component adds square footage and fabrication complexity, so it’s helpful to plan with realistic ranges.
Typical price drivers
- Material type and thickness (2cm vs 3cm; porcelain slab thickness options)
- Mitered edges and vein matching (labor intensive)
- Number of waterfall sides (one vs two vs three)
- Island size and slab yield (whether you need an extra slab)
- Demolition, electrical, and plumbing changes (if adding prep sink or outlets)
Realistic budget snapshots (installed)
- Budget-friendly waterfall (laminate-look not recommended; butcher block or entry quartz): $2,000–$5,000
- Mid-range quartz waterfall island: $4,500–$9,000
- Premium stone or porcelain with mitered edges and vein matching: $8,000–$18,000+
Budget tip: If you love the waterfall look but need to rein in costs, do a single-sided waterfall on the most visible end and use a matching panel or cabinetry on the other end.
Storage and Organization Ideas to Pair with a Waterfall Island
Because the waterfall side can limit access on that end, plan storage so it stays functional.
High-function island storage upgrades
- Deep drawers (10–12 inches tall) for pots, pans, and small appliances
- Pull-out trash and recycling near prep zones (double bin if possible)
- Vertical tray dividers for baking sheets and cutting boards
- Hidden outlet drawer for charging and appliance storage (check local electrical codes)
- Microwave drawer in the island to free up wall space (ideal height depends on user; often 24–30 inches from floor to bottom of unit)
Maintenance and Cleaning: Keep the Waterfall Looking Crisp
Everyday care by material
- Quartz: Mild soap + water; avoid abrasive pads. Wipe spills promptly, especially coffee and wine.
- Porcelain: Generally easy care; use non-abrasive cleaners. Protect sharp corners from impacts.
- Natural stone: Use pH-neutral stone cleaner. Seal on the schedule recommended by your fabricator (often annually, but depends on stone type).
- Butcher block: Wipe dry after cleaning. Re-oil as needed (often monthly in dry climates; less if sealed).
Detail that prevents long-term grime
- Specify a slight reveal or clean caulk line where the waterfall panel meets the floor if your installer recommends it for movement.
- Use a corner radius or softened edge on high-traffic corners to reduce chips and bruises.
Common Mistakes to Avoid with Waterfall Island Design
- Ignoring walkway clearance: A waterfall island that crowds the room will feel stressful fast. Keep 42–48 inches around key paths.
- Choosing a high-maintenance stone without a realistic lifestyle plan: If you’ll resent sealing or babying the surface, choose quartz or porcelain.
- Skipping vein matching: A disjointed pattern at the waterfall edge can look accidental. Ask to review the layout before fabrication.
- Overdoing bold materials: Dramatic stone + busy backsplash + ornate lighting can compete. Let one element lead.
- Forgetting outlets and lighting: Islands need power for daily living. Plan outlets early and consider under-counter lighting for ambience.
- Not planning stool spacing: Cramming in “one more seat” often backfires. Use 24–30 inches per stool.
FAQ: Kitchen Waterfall Island Design
Does a waterfall island work in a small kitchen?
Yes—if clearances are respected. In smaller kitchens, a one-sided waterfall on the seating end is usually the best choice. Keep at least 42 inches of walkway and consider a slimmer island (for example, 24–30 inches deep) if space is tight.
Is a waterfall countertop more expensive than a standard island top?
Typically, yes. You’re adding material square footage and fabrication labor (especially for mitered edges and vein matching). A waterfall feature can add 20–40% to the island countertop portion of the budget depending on material and detailing.
Which material is best for a low-maintenance waterfall island?
Quartz is the easiest for most households due to its non-porous surface and wide style range. Porcelain is also low-maintenance and more heat-friendly, but fabrication quality matters.
How do I prevent chipping on a waterfall edge?
Choose a slightly softened edge (eased), avoid sharp corners in high-traffic paths, and confirm the installer will reinforce mitered corners properly. Porcelain and some stones benefit from thoughtful corner detailing.
Can I do a waterfall island with seating for four?
Often, yes—if the island is long enough. Plan 24 inches per stool (or 30 inches for extra comfort). For four seats, target at least 96 inches of seating run for comfortable spacing, depending on stool width and end conditions.
Should the waterfall match the backsplash or the perimeter countertops?
Matching the perimeter countertops is the most cohesive and timeless option. If you want a statement, use the waterfall as the feature and keep the backsplash simpler (classic subway, slab backsplash, or a quiet texture).
Next Steps: How to Choose Your Waterfall Island Design
- Measure and map clearances (42–48 inches around the island; 36+ inches behind stools).
- Pick a material based on lifestyle (quartz for low maintenance, porcelain for heat resistance, stone for natural character).
- Decide on one-sided or two-sided waterfall based on visibility and budget.
- Confirm fabrication details: mitered edge, seam placement, vein matching, corner easing.
- Plan power and storage early so the island improves kitchen organization, not just aesthetics.
A well-designed kitchen waterfall island should feel as good on a busy weekday as it looks on a Saturday night. For more kitchen renovation inspiration, layout ideas, and organization upgrades, explore additional guides and design features on thedecormag.com.
More Articles
 The Ultimate Sustainable Kitchen Guide: Practical, Proven, and Planet-Positive Actions
 Best Kitchens for Functional Design: Layouts, Brands, and Ergonomic Principles That Work Every Day
 Best Kitchen Lighting for Function & Style (2026)
 Kitchen Hidden Appliance Drawer Ideas - The Decor Mag
 Walk-In Pantry Kitchen Design Ideas (2026)
 Kitchen Curved Island Design Trends - The Decor Mag
 Kitchen Statement Range as Focal Point - The Decor Mag
 How to Design a Kitchen for Aging in Place - The Decor Mag
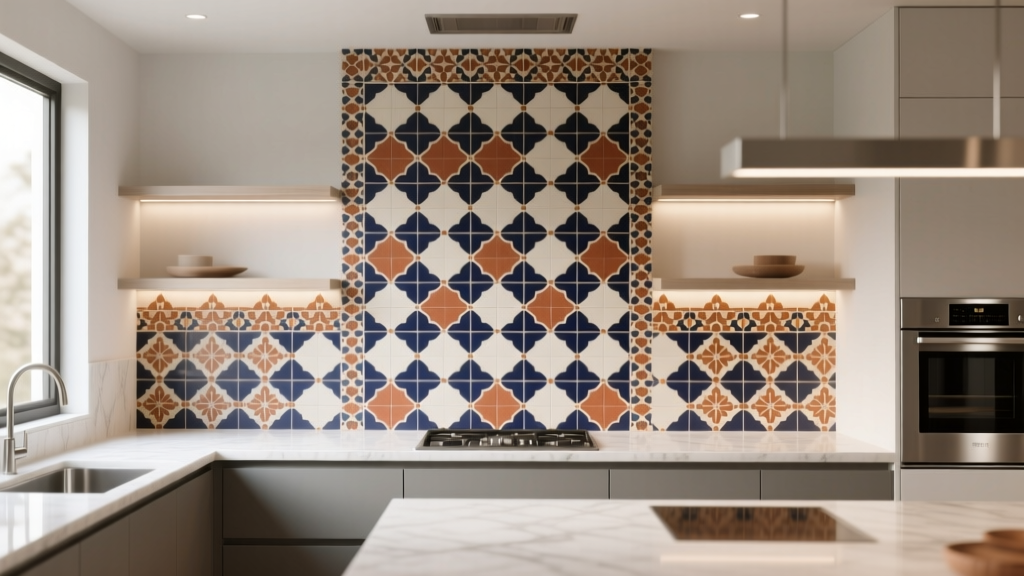 Kitchen Zellige Tile Backsplash Guide - The Decor Mag
 The Wood Checklist: A Practical Guide for Selecting, Verifying, and Maintaining Hardwood Countertops, Cutting Boards, and Butcher Blocks