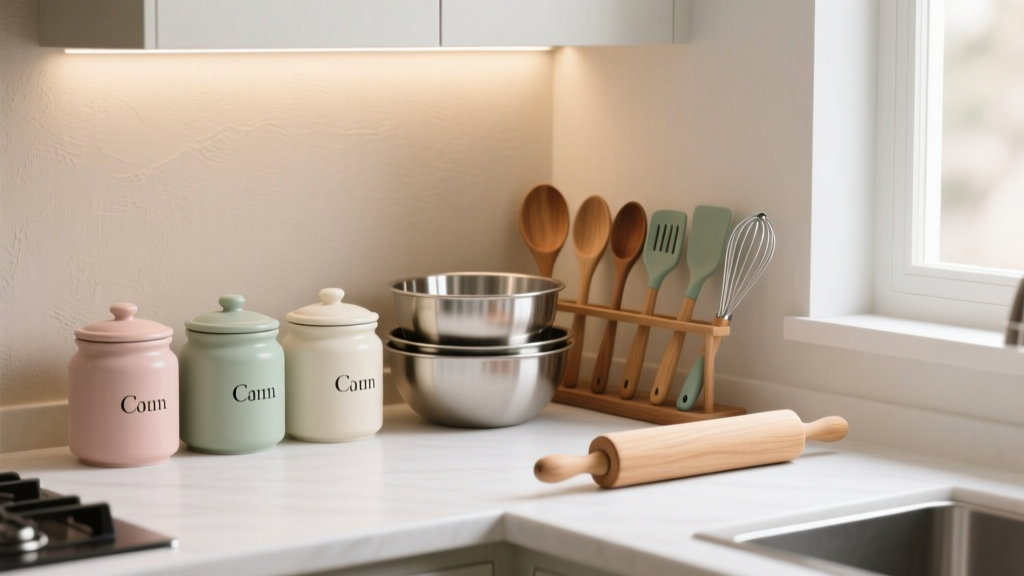
Best Kitchen Baking Supply Organization - The Decor Mag
When homeowners renovate a kitchen, they often plan for cooking—then realize baking has entirely different needs. Baking supplies are a mix of bulky equipment (mixers, sheet pans), fragile tools (glass measuring cups), small essentials (tips, cutters), and ingredients that behave best when stored correctly (flour, sugar, chocolate). Without a dedicated organization strategy, these items end up scattered across multiple cabinets, creating clutter and slowing down everything from weeknight muffins to holiday cookie marathons.
The good news: the best kitchen baking supply organization doesn’t require a massive kitchen. It requires smart kitchen design—zone planning, the right cabinet hardware, a few measurements, and storage materials that protect food quality. Whether you’re planning a full kitchen renovation or upgrading one drawer at a time, the approaches below blend current kitchen design trends (hidden storage, efficient work zones, clean-lined cabinetry) with timeless functionality principles.
Start With a Baking Zone: The Foundation of a Functional Kitchen Layout
Organization works best when it’s built around how you move. A dedicated baking zone keeps tools, ingredients, and workspace in one predictable area—reducing steps and preventing “where did I put the vanilla?” moments.
Where to place the baking zone
- Near the oven for sheet pans, cooling racks, and oven mitts.
- Near the refrigerator if you frequently bake with butter, eggs, or chilled doughs.
- Away from the cooktop if possible to avoid grease and heat affecting flour and sugar storage.
Ideal work surface measurements
- Counter length: Aim for 36–48 inches of uninterrupted counter for rolling dough and staging pans.
- Counter depth: Standard 25–26 inches works; if remodeling, 27–30 inches provides extra elbow room for stand mixer use.
- Landing zones: Leave 15 inches of counter next to the oven or wall oven for hot trays.
Best layout choices for bakers
- L-shaped kitchens: Excellent for creating a corner baking zone with nearby pantry storage.
- U-shaped kitchens: Strong workflow; just avoid corner cabinet “black holes” by adding pull-outs.
- Kitchen island baking station: Trending and practical—especially with drawer storage and a dedicated mixer lift.
Design Storage Around Your Baking Categories
Before buying bins, group your baking items into categories and assign each a home. This keeps organization sustainable—especially for families or shared kitchens.
Core categories to plan for
- Dry ingredients: flour, sugar, brown sugar, cocoa, baking powder/soda, chocolate chips
- Tools: measuring cups/spoons, spatulas, whisks, pastry brushes, bench scraper
- Small specialty items: piping tips, cookie cutters, food coloring, sprinkles
- Equipment: stand mixer, food processor, hand mixer, scale
- Bakeware: sheet pans, muffin tins, cake pans, loaf pans, cooling racks
- Decorating: turntable, piping bags, offset spatulas, cake boards
Cabinet and Drawer Solutions That Actually Work
Smart cabinetry is where kitchen renovation investments pay off. The right interior accessories can turn standard boxes into purpose-built storage.
1) Deep drawers for heavy baking gear (the modern must-have)
Deep drawers are a top kitchen design trend because they’re more accessible than base cabinets. For baking, they’re ideal for mixers, bowls, and bulk ingredients.
- Best sizes: 10–12" tall drawers for stand mixer accessories; 12–15" for the mixer itself (depending on model).
- Recommended features: full-extension slides, soft-close hardware, and non-slip drawer liners.
- Pro tip: Store your stand mixer on a pull-out shelf or mixer lift if it lives in a base cabinet. Typical mixer lift capacity ranges 40–60 lbs.
Cost range: Adding drawer bases during a remodel typically runs $250–$800+ per cabinet (varies by brand and finish). Aftermarket roll-out shelves: $80–$250 each plus installation.
2) Vertical storage for sheet pans and cutting boards
Sheet pans stacked flat become a clanging tower. Vertical dividers keep pans tidy and easy to grab.
- Best location: a 9–12" wide cabinet near the oven, or a base cabinet with vertical slots.
- Divider spacing: plan 2–3 inches per slot for sheet pans and racks; 3–4 inches for cutting boards and muffin tins.
- Material choice: finished wood dividers look seamless; powder-coated metal dividers are durable and wipeable.
Cost range: simple rack inserts $25–$75; custom cabinet divider systems $150–$400+.
3) A baking drawer for tools (measured and mapped)
One well-planned drawer can remove 80% of countertop clutter.
- Best drawer depth: 18–21" deep for spatulas and whisks.
- Use a two-layer system: a shallow top tray for small tools, deeper space below for bowls or towels.
- Recommended layout: keep measuring tools and scale closest to your baking counter.
Product approach: Use adjustable drawer dividers (bamboo, maple, or recycled plastic) rather than fixed trays so the drawer can evolve with your habits.
4) A pull-out pantry or pantry wall for dry goods (best for renovation planning)
For serious bakers, a pantry wall is a standout kitchen renovation upgrade. It supports bulk storage without crowding everyday cooking staples.
- Pull-out pantry width: 6–12" works well for spices, extracts, and small jars; 15–24" for canisters and bins.
- Shelf depth: 10–12" is ideal for visibility; deeper shelves encourage overbuying and forgotten items.
- Labeling strategy: consistent, waterproof labels plus clear containers for quick inventory checks.
Cost range: pantry pull-outs $200–$800+; a built-in pantry wall in a remodel can range $1,500–$6,000+ depending on size, doors, and interior fittings.
Best Materials for Baking Supply Storage (and Why They Matter)
Ingredient containers: glass vs. plastic vs. metal
- Glass: Non-porous, doesn’t absorb odors, looks premium on open shelving. Heavier and breakable. Best for flour, sugar, chocolate, and display-friendly storage.
- Food-safe plastic: Lightweight and budget-friendly. Choose BPA-free, thick-walled containers to prevent warping. Best for bulk storage and households with kids.
- Stainless steel: Durable and light-protective, but you lose visibility. Best for specialty flours or ingredients sensitive to light.
Practical capacity guide:
- 5 lb flour bag: container capacity ~3–4 quarts
- 5 lb sugar bag: container capacity ~3 quarts
- 10 lb flour: container capacity ~6–7 quarts
Shelving and interiors: wood, melamine, wire
- Plywood cabinet boxes: Stronger long-term than particleboard; better for heavy drawers and mixer storage.
- Melamine interiors: Easy to wipe clean—great for baking zones where flour dust is common.
- Wire shelving: Affordable but can feel flimsy and may snag labels; better for utility pantries than primary kitchen cabinets.
Countertop and Surface Ideas for Bakers
Your countertop choice affects comfort and performance. Trending kitchens lean toward quartz for durability, but bakers often love a dedicated pastry surface.
Best countertop options for baking
- Quartz: Low maintenance, consistent look, resists stains. Can feel slightly “grabby” for dough unless lightly floured.
- Granite: Natural cool surface, good for pastry. Needs periodic sealing.
- Butcher block (in a baking zone): Warm, classic, and forgiving on dishes. Requires oiling and careful moisture management.
- Marble insert or slab: Ideal for pastry; a timeless luxury. Etches easily with acids and needs attentive care.
Budget idea: If a full marble counter isn’t realistic, add a marble pastry board that stores vertically near sheet pans.
Organization Products Worth Buying (and What to Skip)
Best product picks for baking supply organization
- Airtight canisters with gasket seals for flour and sugar (square shapes maximize shelf space).
- Stackable bins for sprinkles, chocolate, and small packaged items.
- Lazy Susans for extracts, food coloring, and small bottles (10–12" diameter fits many standard cabinets).
- Adjustable drawer dividers for tools and measuring sets.
- Sheet pan organizer with vertical slots.
- Under-shelf baskets (in pantries) for napkins, cupcake liners, or parchment.
Products to be cautious with
- Overly specialized organizers that only fit one brand or size (they become clutter fast).
- Open baskets for flour/sugar in humid climates—ingredients clump and attract pests.
- Too many mismatched bins—visual noise makes a kitchen feel messier, even when organized.
Cost range: A solid refresh with containers and dividers often lands around $80–$250. A fully coordinated pantry system with premium canisters and pull-outs can reach $300–$900+.
Maintenance and Cleaning: Keep the System Working
- Wipe flour dust weekly from shelves and drawer edges using a microfiber cloth (dry first, then lightly damp).
- Check seals monthly on flour and brown sugar containers; replace cracked gaskets.
- Freeze specialty flours or nuts if you buy in bulk and bake occasionally (prevents rancidity).
- Label with dates on baking powder, yeast, and nuts—freshness impacts results.
- Use shelf liners in ingredient drawers; replace or wash seasonally to keep everything crisp.
Budget Planning: What to Upgrade First
If you’re organizing without renovating (most impact for the least cost)
- Consolidate ingredients into airtight containers and label them.
- Dedicate one drawer to baking tools with dividers.
- Add a vertical pan organizer near the oven.
- Install a roll-out shelf for heavy appliances.
Typical budget: $100–$350, depending on container quality and whether you add roll-outs.
If you’re renovating (where smart design pays off)
- Prioritize deep drawers in the baking zone base cabinets.
- Add a pantry wall or tall pantry cabinet if your current kitchen lacks dry storage.
- Plan dedicated electrical outlets for the stand mixer (and consider an appliance garage if you prefer hidden counters).
- Upgrade hardware to full-extension, soft-close slides—especially for heavy ingredient drawers.
Typical budget impact: $500–$3,500+ in cabinet and hardware upgrades inside a larger kitchen renovation budget.
Common Mistakes to Avoid
- Storing flour next to the cooktop: grease and heat shorten shelf life and attract grime.
- Ignoring drawer weight limits: ingredient drawers get heavy fast—use quality slides and avoid overloading.
- Using deep, dark corner cabinets without pull-outs: items disappear and duplicates multiply.
- Organizing by “where it fits” instead of by task: baking works best when the zone is cohesive.
- Buying containers before measuring shelves: always measure interior cabinet width/depth/height first.
- Open shelving for everyday baking ingredients: it looks pretty, but requires frequent dusting and can invite pests if not sealed.
FAQ: Kitchen Baking Supply Organization
How do I organize baking supplies in a small kitchen?
Build a micro baking zone: one drawer for tools, one deep drawer or lower cabinet for ingredients, and a vertical rack for sheet pans. Use stackable, square airtight containers to maximize shelf space, and store rarely used decorating items in a labeled bin on a higher shelf.
What’s the best way to store flour and sugar long-term?
Use airtight containers with gasket seals and keep them in a cool, dry cabinet away from the cooktop. In humid climates, consider smaller containers you refill from a bulk bin so the everyday container isn’t constantly exposed to moisture.
Are pull-out shelves worth it for baking equipment?
Yes—especially for stand mixers, food processors, and heavy bowls. Full-extension roll-outs reduce lifting strain and make it more likely you’ll use the tools you own rather than leaving them buried.
What cabinet features should I request during a kitchen renovation if I bake often?
Ask for deep drawer bases in the baking zone, vertical tray dividers near the oven, a tall pantry cabinet or pantry wall, and full-extension soft-close hardware. If your mixer is heavy, consider a mixer lift or an appliance garage with an outlet.
Should I use open shelving for baking items?
Open shelving works best for a curated set of attractive, sealed canisters and frequently used cookbooks. For most everyday baking supplies, closed storage stays cleaner and protects ingredients from light, dust, and humidity.
Next Steps: Create a Baking Zone That Feels Effortless
Start by measuring your available cabinets and drawers, then assign each baking category a specific home. Upgrade the “pain points” first—usually sheet pan storage, ingredient access, and heavy-appliance retrieval. If a kitchen renovation is on your horizon, plan your baking zone early so cabinet types, outlets, and countertop choices support how you really use the space.
For more kitchen design, renovation planning, and organization ideas that blend beauty with daily function, explore the latest inspiration on thedecormag.com.
More Articles
 Kitchen Warm Neutral Cabinet Colors - The Decor Mag
 Best Kitchen Cleaning Supply Storage - The Decor Mag
 Kitchen Island Prep Stations: Summer Party Command Center
 Kitchen to Outdoor Flow Design (2026)
 Statement Kitchen Lighting Design (2026)
 Meal Prep Kitchen Design: Functional Ideas (2026)
 Kitchen Soapstone Countertop Guide - The Decor Mag
 Best Kitchens for Functional Design: Layouts, Brands, and Ergonomic Principles That Work Every Day
 Heirloom Kitchen Design: Timeless Ideas for 2026
 Kitchen Reeded Glass Cabinet Ideas - The Decor Mag