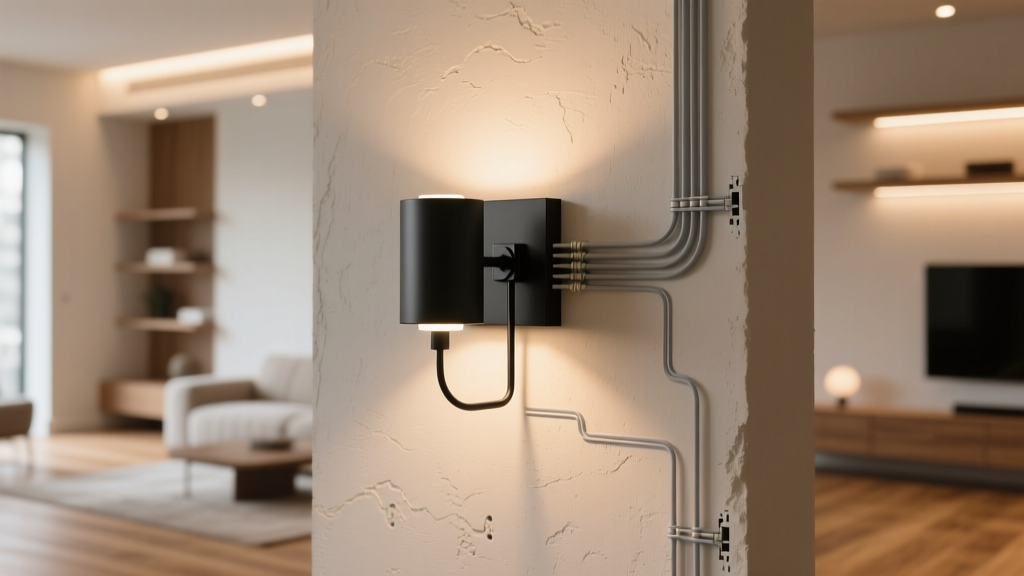
Best Wall Sconce Wiring Options - The Decor Mag
Wall sconces are one of those living room upgrades that look “designer” but can be surprisingly practical. They free up surface space on end tables, add layered lighting (which instantly makes a room feel more inviting), and help you highlight architectural details, artwork, or that reading corner you’ve been meaning to use more. The catch: the right look depends heavily on the right wiring choice.
Whether you own your home or rent your apartment, you have more wall sconce wiring options than you might think—from fully hardwired fixtures to sleek plug-in sconces and renter-friendly battery models. This guide breaks down the best wall sconce wiring options, when each makes sense, and how to choose the one that fits your living room layout, budget, and style goals.
You’ll also get design-forward placement tips, real-world scenarios, common mistakes to avoid, and a short FAQ so you can move forward confidently—without turning your living room project into a construction zone.
Why Wiring Choice Matters for Living Room Wall Sconces
Wiring affects more than installation. It impacts the overall look (clean and built-in vs. casual and flexible), how you control the light (switch, dimmer, remote), and how well sconces integrate with your existing living room design.
- Aesthetics: Hidden wiring gives a polished, high-end feel. Visible cords can work too—if styled intentionally.
- Function: If you use sconces for reading, dimming and reachability matter.
- Flexibility: Renters often need reversible, low-damage solutions.
- Budget: Electrical work can cost more than the fixture. Choosing the right wiring option keeps your project realistic.
Option 1: Hardwired Wall Sconces (Built-In and Seamless)
Hardwired sconces connect directly to your home’s electrical system behind the wall. This is the most “architectural” look and a favorite in both timeless interiors and current trends like warm minimalism, organic modern, and tailored transitional living rooms.
Best for
- Homeowners planning a longer-term upgrade
- Living rooms where you want a clean wall with no visible cords
- Symmetrical installs (flanking a fireplace, TV wall, or sofa)
- Homes already wired for sconces or with accessible studs
What it costs
- Sconce fixture: $60–$400 each (designer and artisan pieces can run $500–$1,200+)
- Electrician install: $150–$350 per sconce if wiring is straightforward; $300–$800+ if new wiring, switch work, or tricky wall access is required
Design tips for hardwired sconces
- Height matters: A reliable range is 60–66 inches from the floor to the center of the sconce for ambient lighting. For reading near seating, aim for 42–48 inches above the seat cushion height (often landing around 54–60 inches from the floor depending on furniture).
- Spacing: When flanking a focal point (fireplace, artwork, TV), start with 6–12 inches from the edge of the feature and adjust to fit the scale of the wall.
- Bulb warmth: For living rooms, choose 2700K for cozy warmth; 3000K if you want a slightly cleaner, more modern look.
- Dimmers are the upgrade: Pair hardwired sconces with a dimmer switch for true layered lighting—especially helpful in open-concept living room layouts.
Real-world scenario
You’ve got a living room with a fireplace and built-ins, but overhead lighting feels harsh. Adding hardwired sconces on either side of the fireplace (centered at 64 inches) creates a soft glow at night and makes the whole wall feel intentionally designed—without needing extra floor lamps.
Option 2: Plug-In Wall Sconces (Flexible, Budget-Friendly, and Stylish)
Plug-in sconces mount to the wall and run power through a cord to a nearby outlet. They’re ideal when you want the wall sconce look without opening walls. This option is huge right now because it fits the way people actually live—mixing rentals, frequent furniture rearranging, and quick upgrades.
Best for
- Renters and commitment-shy decorators
- Living rooms with accessible outlets near the intended sconce placement
- Reading nooks, sofa corners, and accent lighting behind seating
- Testing placement before committing to hardwire
What it costs
- Sconce fixture: $40–$250 each
- Cord cover kit (paintable): $10–$30
- Optional smart plug or inline dimmer: $15–$50
How to make plug-in sconces look built-in
- Choose a cord cover: Look for a paintable PVC or plastic raceway with adhesive backing.
- Run the cord straight down: A clean vertical line reads more intentional than a zigzag.
- Paint to match the wall: Use the same wall paint for a near-invisible finish.
- Hide the outlet zone: Place a slim console table, closed cabinet, or tall plant near the outlet if the layout allows.
Design tips for plug-in sconces in living rooms
- Balance your lighting: If you have one plug-in sconce in a corner, consider a second light source on the opposite side (a floor lamp or another sconce) to avoid a lopsided feel.
- Pick the right shade style: For glare control near seating, look for opaque or linen shades rather than clear glass.
- Go cordless-looking: Choose sconces with a backplate large enough to hide mounting hardware and visually anchor the fixture.
Product recommendation ideas (style-forward and practical)
- Adjustable swing-arm plug-in sconce: Great for reading next to a sectional or lounge chair.
- Picture-light style plug-in: Ideal over a gallery wall or a large framed print.
- Plug-in globe sconce with frosted glass: A current trend that still feels timeless, especially in brass or matte black.
Real-world scenario
You rent a condo with one ceiling light and no overhead wiring near the sofa. A pair of plug-in sconces mounted behind the end tables gives you flattering ambient light for evenings, plus frees up table space for books and decor. Add an inline dimmer so movie nights feel cozy instead of clinical.
Option 3: Battery-Powered (Rechargeable) Wall Sconces (Renter MVP)
Battery-operated wall sconces have improved dramatically. Many now use rechargeable lithium batteries, remote controls, dimming, and warm LED output. They’re a smart solution when you can’t run cords, don’t have outlets where you need them, or want a truly no-wiring install.
Best for
- Renters who can’t drill extensively or modify wiring
- Homes where outlets are poorly placed
- Accent lighting in low-traffic areas
- Temporary styling for events, staging, or seasonal refreshes
What it costs
- Battery sconce: $25–$150 each (premium designer-like options can be $150–$300+)
- Recharge cycle habits: Most need charging every 1–6 weeks depending on brightness and usage
What to look for
- Warm color temperature: Aim for 2700K to keep your living room lighting soft.
- Brightness range: Look for 150–300 lumens for accent lighting; 300–600 lumens if you want it to function more like a real lamp.
- Mounting method: Some use screws (more secure), others use heavy-duty adhesive plates (more rental-friendly).
- Remote + timer: Timers are great for “always welcoming” evening ambiance.
Real-world scenario
Your living room has a perfect blank wall behind the sofa, but there’s no outlet nearby—and you don’t want cords draped down the wall. Two rechargeable sconces centered at 64 inches add a soft glow that highlights your art and makes the room feel finished. You recharge once a month, and it’s done.
Option 4: Hardwire-to-Plugin Conversion (A Smart Hybrid)
Some sconces are designed to be hardwired, but can be converted to plug-in with a conversion kit (or vice versa). This is a useful approach if you want a specific designer-looking fixture but need flexible installation right now.
Best for
- Renters who plan to buy a home soon and want fixtures they can take with them
- Homeowners who want to “try before they commit” to hardwiring
- Anyone who found the perfect sconce but it’s not sold in plug-in form
Budget range
- Conversion kit: $15–$40
- Professional help (optional): $75–$200 depending on complexity
Tip: Always check the manufacturer’s instructions. Not every fixture is safe or suitable for conversion, and wiring modifications should follow local electrical code.
Choosing the Right Wiring Option for Your Living Room Layout
Use this quick decision guide
- You own and want a polished, built-in look: Choose hardwired.
- You rent or want flexibility and easy updates: Choose plug-in.
- No outlet nearby and you want zero cords: Choose battery-powered.
- You love a fixture but need options later: Consider conversion.
Placement cheat sheet (living room favorites)
- Flanking a fireplace or TV wall: 60–66 inches to center; keep both sides symmetrical.
- Behind a sofa (to frame artwork): Place sconces 8–12 inches outside the art frame edges, or align to sofa ends for structure.
- Reading corner: Choose an adjustable sconce; mount so the light hits your book/shoulder area without shining into your eyes.
Design Trends That Pair Beautifully with Wall Sconces
- Soft, warm metals: Aged brass, brushed bronze, and champagne tones add warmth without looking flashy.
- Plaster and ceramic sconces: Sculptural and organic—great for quiet luxury and Mediterranean-inspired living room decor.
- Artful, oversized backplates: A statement even when the light is off (especially on large blank walls).
- Mixed materials: Think wood + metal, ribbed glass + brass, or linen shades with matte black arms.
Timeless principle to keep you grounded: choose sconce shapes that echo what you already have. If your living room has a lot of curves (round coffee table, arched mirror), a globe or curved arm feels cohesive. If your space is more tailored (boxy sofa, clean-lined console), go for cylindrical shades and straight arms.
Common Mistakes to Avoid
- Mounting too high (or too low): Sconces that float near the ceiling look accidental. Stick to the 60–66 inch center-height range unless you have a specific reason.
- Skipping dimming: Living rooms need flexibility. If you can’t add a wall dimmer, use smart bulbs, smart plugs, or inline dimmers.
- Choosing exposed clear glass near seating: It can create glare and feel harsh at night. Frosted glass or fabric shades are friendlier.
- Undersizing the fixture: Tiny sconces can disappear on a large wall. As a rule of thumb, in bigger living rooms, look for sconces that project 6–10 inches from the wall and have enough visual weight to hold their own.
- Ignoring cord management (plug-ins): A visible dangling cord can undermine the whole look—use a cord cover and paint it.
- Forgetting the switch plan (hardwired): Decide how you’ll control the light before installation. Wall switch, dimmer, or smart control should be part of the plan, not an afterthought.
Step-by-Step: Planning a Wall Sconce Upgrade Without Regrets
- Identify the goal: Ambient glow, reading light, accent lighting for art, or all three.
- Measure your wall and furniture: Note ceiling height, sofa height, and outlet placement.
- Pick wiring type based on constraints: Rent vs. own, outlet locations, how permanent you want it.
- Mock it up: Use painter’s tape to outline the backplate and mark center height. Live with it for a day.
- Choose bulbs thoughtfully: Warm (2700K), high CRI (90+) for flattering light that makes textiles and wall colors look their best.
- Install or schedule help: If you’re hardwiring, hire a licensed electrician for safe, code-compliant work.
FAQ: Wall Sconce Wiring Options for Living Rooms
Are plug-in wall sconces bright enough for a living room?
Yes—especially if you choose the right bulb and shade. For cozy ambient lighting, aim for 450–800 lumens per sconce (often an LED equivalent of 40W–60W), and add a dimmer or smart bulb so you can adjust brightness.
What height should wall sconces be in a living room?
A dependable standard is 60–66 inches from the floor to the center of the fixture. If the sconce is meant for reading near seating, you may go slightly lower so the light lands where you need it rather than above eye level.
Can renters install wall sconces without damaging walls?
Many renters use plug-in sconces with minimal screw holes, or battery-powered sconces with adhesive mounting plates. If you drill, use appropriate anchors and keep the hardware so you can patch neatly at move-out.
Do hardwired sconces require a wall switch?
Not always, but it’s the most convenient option. Hardwired sconces can be controlled by a wall switch, a dimmer, or a smart switch. Some models also have a built-in on/off switch on the fixture, though that’s less convenient for paired sconces.
How do I hide the cord on a plug-in sconce?
Use a paintable cord cover (raceway), run it in a straight vertical line, and paint it to match the wall color. This single step makes plug-in sconces look far more intentional and “finished.”
What’s the best bulb color for living room sconces?
Most living rooms look best with 2700K (warm white) for a relaxing glow. If your space is modern and you prefer a slightly cleaner tone, 3000K can still feel warm without looking yellow.
Next Steps: Choose Your Wiring, Then Style Your Light
Start by deciding whether you want the seamless look of hardwired sconces, the flexibility of plug-in sconces, the convenience of battery-powered options, or a hybrid conversion approach. Then measure your wall, plan your sconce height (60–66 inches is a great anchor), and prioritize dimming so your living room lighting can shift from bright and functional to warm and intimate in seconds.
If you’re ready for more placement ideas, lighting layouts, and living room decor inspiration, explore more guides and real-home makeovers on thedecormag.com.
More Articles
 Industrial Chic Living Room Inspiration - The Decor Mag
 Living Room Curated Collections Display - The Decor Mag
 Living Room Organic Modern Style - The Decor Mag
 Living Room Relaxed Sophistication Guide - The Decor Mag
 Global Living Room Decor: Stylish Ideas (2026)
 Comfortable Seating for Aging Bodies: Sofas & Chairs (2026)
 Living Room Jewel Tone Inspiration - The Decor Mag
 Living Room Warm vs Cool Tone Balancing - The Decor Mag
 Best Chandelier Styles for Living Rooms - The Decor Mag
 How to Style a Living Room with Dark Walls - The Decor Mag