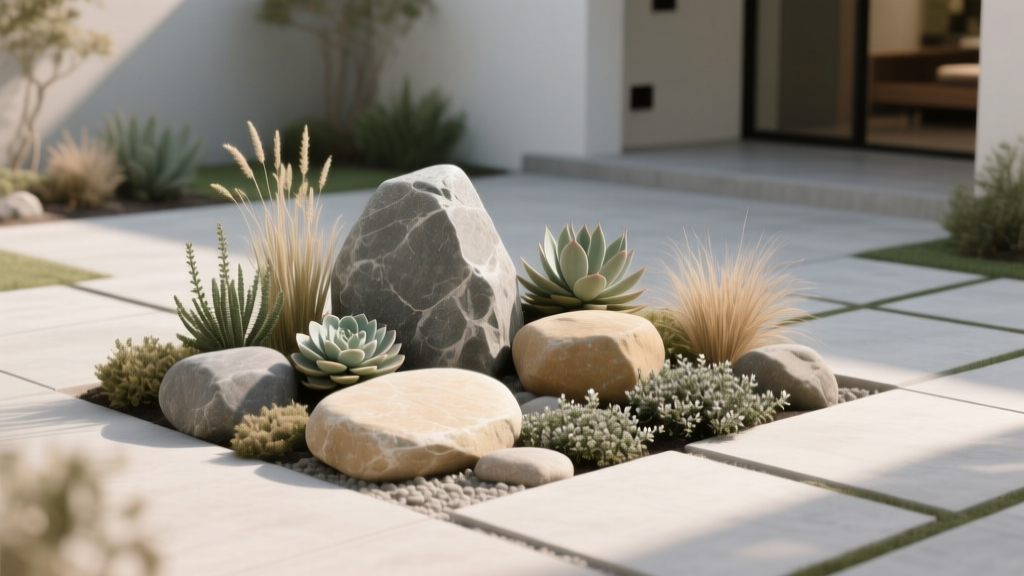
How to Create a Rock Garden - The Decor Mag
A great outdoor living space isn’t only about a bigger patio or a new pergola—it’s about creating a landscape that feels intentional in every season. Rock gardens do exactly that. They add structure, texture, and year-round interest in a way that looks designed, not “planted and forgotten.” Whether your yard is sunny and dry, shaded and sloped, or somewhere in between, a well-planned rock garden can become the most visually striking feature in your landscape design.
Rock gardens also solve common homeowner headaches. They’re ideal for tricky areas where grass struggles (slopes, thin soil, hot corners by hardscaping), they pair beautifully with patios and walkways, and they can be surprisingly low-maintenance once established. Best of all, they create that curated, resort-like feeling—layered stone, sculptural plants, and inviting outdoor seating—without requiring constant watering or weekly pruning.
Below is a practical, designer-approved guide to planning, building, and styling a rock garden that elevates your outdoor living space—complete with plant suggestions, material recommendations, budget ranges, and the most common mistakes to avoid.
What Makes a Rock Garden Work (It’s More Than Just Rocks)
The most successful rock garden designs feel like a natural extension of the surrounding landscape. Think of it as a small “ecosystem” built on three pillars:
- Stone structure: boulders, cobbles, gravel, or flagstone create the bones of the design.
- Planting strategy: low-growing, drought-tolerant, and textural plants soften edges and add color.
- Flow and livability: clear sightlines, pathways, and seating that connect the rock garden to patio living.
Step 1: Choose the Right Location and Purpose
Start with how you want the space to function. A rock garden can be a focal point you admire from a deck, a transition between a patio and lawn, or a solution for a slope that’s hard to mow.
Best places for a rock garden
- Along a patio edge to soften hardscaping and create a layered border.
- On slopes for erosion control and a terraced, architectural look.
- Near walkways and entry paths for curb appeal and low-maintenance landscaping.
- In sunny, dry zones where turf and thirsty plants struggle.
- In view of outdoor seating so the garden becomes part of your outdoor living “room.”
Quick planning checklist
- How many hours of sun does the area get in summer?
- Does water pool there after rain?
- Will you view it from indoors, a patio, or a main path?
- Do you need it to hide utilities, define a boundary, or reduce mowing?
Step 2: Pick a Rock Garden Style That Matches Your Home
Aligning your rock garden with your home’s architecture makes the whole landscape feel cohesive—especially around patios, outdoor kitchens, and seating areas.
Popular rock garden design approaches
- Alpine-inspired: layered stone with small, colorful plants tucked into crevices; perfect for slopes.
- Modern minimalist: fewer, larger boulders; clean gravel; sculptural plants like agave (warm climates) or ornamental grasses.
- Desert/xeriscape: gravel mulch, warm-toned rock, drought-tolerant shrubs, succulents, and strong silhouettes.
- Woodland rock garden: mossy stones, ferns, and shade perennials for north-facing yards or under trees.
- Coastal/riverbed: smooth river rock with drifts of grasses and a dry creek bed look for drainage-friendly landscapes.
Step 3: Select Rocks and Materials (What to Buy, What to Avoid)
Materials determine the vibe and the maintenance. A rock garden near a patio should look intentional—not like leftover stone dumped in a corner.
Recommended rock types and where they shine
- Boulders (12–36+ inches): anchor points and focal stones; great for slopes and modern landscapes.
- Fieldstone: natural, irregular shapes; works beautifully in cottage and woodland settings.
- Flagstone: ideal for stepping stones, small terraces, or seating pads within the garden.
- River rock: smooth, rounded stones; best for dry creek beds and drainage zones.
- Decomposed granite (DG): a patio-friendly, walkable surface; excellent for paths that connect to outdoor seating areas.
- Gravel (3/8" or pea gravel): great as a mulch layer to reduce weeds and splashing soil.
Material tips for a designer finish
- Choose one “primary” stone color that matches or complements your home’s exterior and patio materials.
- Mix sizes, not colors: a consistent palette looks upscale; variation in scale looks natural.
- Use edging where it matters: steel edging or stone edging keeps gravel tidy along walkways and patio borders.
Budget ranges (typical homeowner costs)
- DIY small rock garden (50–120 sq. ft.): $300–$1,200 (gravel, a few boulders, plants)
- Medium rock garden (120–300 sq. ft.): $1,200–$4,000 (more boulders, edging, better soil prep)
- Large or terraced rock garden with steps/paths: $4,000–$12,000+ (stone delivery, equipment, possible professional help)
Step 4: Prepare the Site (Drainage Is Everything)
Rock gardens thrive when roots stay healthy and water moves through the soil. Poor drainage is the fastest way to end up with rot, weeds, and shifting stone.
Basic site prep steps
- Outline the shape with a hose or marking paint. Curves look natural; straight lines feel modern.
- Remove sod and weeds down 4–8 inches (deeper if you’re building a path base).
- Improve drainage by amending soil with gritty material:
- Washed sand (coarse)
- Small gravel
- Expanded shale (excellent for clay soils)
- Install weed barrier selectively: Use it under gravel paths, but avoid fabric under planted areas where you want plants to spread and self-seed naturally. A thick gravel mulch and good planting density often work better.
- Create micro-contours: Small mounds and shallow swales make the garden feel natural and help with water movement.
Step 5: Build Your Layout Like a Pro
The difference between a “rock pile” and a rock garden is composition. Use a simple design formula: anchor stones + supporting stones + planting pockets.
Layout formula for a natural look
- Start with 3–5 anchor boulders (larger than you think you need). Place them first.
- Bury each boulder 1/3 to 1/2 so it looks like it emerged from the ground, not placed on top.
- Angle stones slightly in the same direction to mimic natural geology.
- Create planting pockets between stones using a gritty soil mix.
- Add gravel mulch around plants to unify the design and reduce weeds.
Patio-friendly upgrades for outdoor living
- Stepping stones or a DG path through the garden to connect patio zones.
- A small seating pad (flagstone or compacted DG) for a bistro set or lounge chair.
- Low-voltage landscape lighting to highlight boulders and create nighttime ambiance.
Step 6: Choose Plants That Love Rock Garden Conditions
Plant choice should match sun exposure, drainage, and your desired maintenance level. The best rock garden plants are resilient, textural, and scale-appropriate (avoid plants that outgrow the stones in two seasons).
Go-to rock garden plants for sun (many climates)
- Sedum (stonecrop): dependable, colorful, and drought-tolerant.
- Sempervivum (hens and chicks): perfect for crevices; evergreen rosettes.
- Creeping thyme: fragrant, pollinator-friendly, softens edges near patios.
- Lavender (compact varieties): Mediterranean feel and great scent for outdoor seating areas.
- Artemisia: silver foliage that looks stunning against dark rock.
- Ornamental grasses: blue fescue, little bluestem (movement and winter interest).
Rock garden plants for shade or dappled light
- Ferns (compact types): soften stone edges in woodland landscapes.
- Heuchera (coral bells): colorful foliage, great near shaded patios.
- Hosta (smaller varieties): bold texture; pair with mossy stones.
- Ajuga: groundcover with spring flowers; great for erosion control.
- Moss (where climate allows): for a serene, Japanese-inspired look.
Climate-smart suggestions
- Hot/dry climates: agave, aloe (where hardy), yucca, lantana, salvias, desert marigold; use gravel mulch and drip irrigation.
- Cold/snowy climates: prioritize hardy alpine plants, creeping phlox, dwarf conifers; avoid tender succulents unless protected.
- Humid climates: choose plants with good airflow (grasses, salvias) and avoid overly dense plantings that trap moisture.
Design tip: repeat plants for a cohesive look
Instead of buying 20 different plant varieties, choose 5–7 and repeat them in drifts. This reads as professional landscape design and looks great from a patio or window.
Step 7: Add Furniture and Finishing Touches for Patio Living
Rock gardens become truly impactful when they’re tied into outdoor living. Think about how you’ll use the view—morning coffee, evening conversation, winter interest from indoors.
Furniture that complements a rock garden
- Powder-coated aluminum lounge chairs: sleek, weather-resistant, modern.
- Teak or acacia bistro sets: warm wood tones look beautiful against stone.
- Concrete or stone side tables: echo the garden materials and feel grounded.
- Outdoor benches (wood or metal): place facing a focal boulder grouping or seasonal blooms.
Lighting and decor that elevate the space
- Low-voltage uplights aimed at anchor boulders for dramatic nighttime texture.
- Path lights along stepping stones to improve safety and ambiance.
- A simple water element (small bubbling urn) near seating for soothing sound—especially effective in warm months.
Seasonal Planning for Year-Round Interest
- Spring: add bulbs tucked between stones (where appropriate) and early bloomers like creeping phlox.
- Summer: rely on drought-tolerant color (lavender, sedum blooms, salvias) and keep pathways clear for entertaining.
- Fall: ornamental grasses and seed heads bring movement and warm tones; consider adding a fire pit nearby for shoulder-season patio living.
- Winter: evergreen structure matters—dwarf conifers, grasses left standing, and strong stone composition keep the garden attractive even under frost or snow.
Maintenance: Keep It Low-Stress, Not Neglected
A rock garden can be low-maintenance, but it’s not zero-maintenance. Plan for a simple routine that protects your investment.
Easy maintenance schedule
- Weekly (growing season): quick weed check, especially after rain.
- Monthly: trim back aggressive groundcovers, sweep gravel back into place near edges.
- Seasonally:
- Spring: top up gravel mulch where thin; divide/relocate plants as needed.
- Summer: check drip lines; water deeply but infrequently to encourage deep roots.
- Fall: remove leaf buildup that can smother small plants.
- Winter: avoid piling salted snow onto the garden; use pet- and plant-safe de-icers near paths.
Common Rock Garden Mistakes to Avoid
- Using rocks that are too small: tiny stones read as “gravel patch.” Anchor boulders create the designed look.
- Placing boulders on top of soil: they look unnatural and shift over time. Bury them partially.
- Ignoring drainage: poor drainage leads to root rot and unstable stone placement.
- Too many plant varieties: it becomes visually chaotic and harder to maintain.
- Skipping edging near patios and walkways: gravel migrates and the space looks messy fast.
- Over-mulching with bark: bark breaks down and looks out of place in many rock garden styles; gravel mulch is typically cleaner and longer-lasting.
FAQ: Rock Garden Design and Installation
How deep should a rock garden be?
Plan for 4–8 inches of excavation for most rock gardens. If you’re installing a DG path or setting larger stones, you may need deeper excavation and a compacted base.
Do I need landscape fabric under a rock garden?
It depends. Fabric works well under gravel paths to separate soil and stone. Under planted areas, it can make planting and long-term growth harder. Many designers prefer a thick gravel mulch layer plus diligent weeding during the first season.
What are the best low-maintenance plants for a sunny rock garden?
Sedum, hens and chicks, creeping thyme, lavender (compact varieties), and blue fescue are reliable favorites. Choose plants suited to your climate zone and soil drainage.
How do I keep weeds out of a rock garden?
Start with thorough site prep (remove roots), add a 1.5–3 inch gravel mulch layer, plant densely, and pull weeds early before they seed. A quick weekly walk-through is more effective than occasional big cleanups.
Can I build a rock garden on a slope?
Yes—slopes are often ideal. Use larger anchor boulders, terrace subtly where needed, and choose erosion-control plants like creeping thyme, ajuga (shade), or low ornamental grasses. Consider professional help for steep slopes or heavy boulder placement.
What’s the most budget-friendly way to start?
Begin with a small area near the patio (where you’ll enjoy it most), use locally sourced stone, and focus on 2–3 anchor rocks plus a few hardy groundcovers. You can expand the rock garden over time as budget allows.
Next Steps: Build a Rock Garden That Elevates Your Outdoor Living
Choose a visible location, pick a stone palette that matches your home and patio design, and start with a simple layout: a few partially buried anchor boulders, supporting stone, and repeated plant groupings. Add a path, lighting, or a small seating moment, and your rock garden becomes part of your everyday outdoor living—beautiful in summer, structured in winter, and welcoming year-round.
For more landscaping ideas, patio living inspiration, and outdoor design guides, explore the latest on thedecormag.com.
More Articles
 Premium Alternatives to Paint: Durable, Sustainable, and Aesthetic Solutions for Outdoor Living Surfaces
 Best Outdoor Cushion Fabric Choices - The Decor Mag
 Ultimate Style Guide: Designing Outdoor Living Spaces That Reflect Your Personality and Elevate Everyday Life
 Best Outdoor Bar Cheese Board Display - The Decor Mag
 Best Outdoor Bar Tool Storage Ideas - The Decor Mag
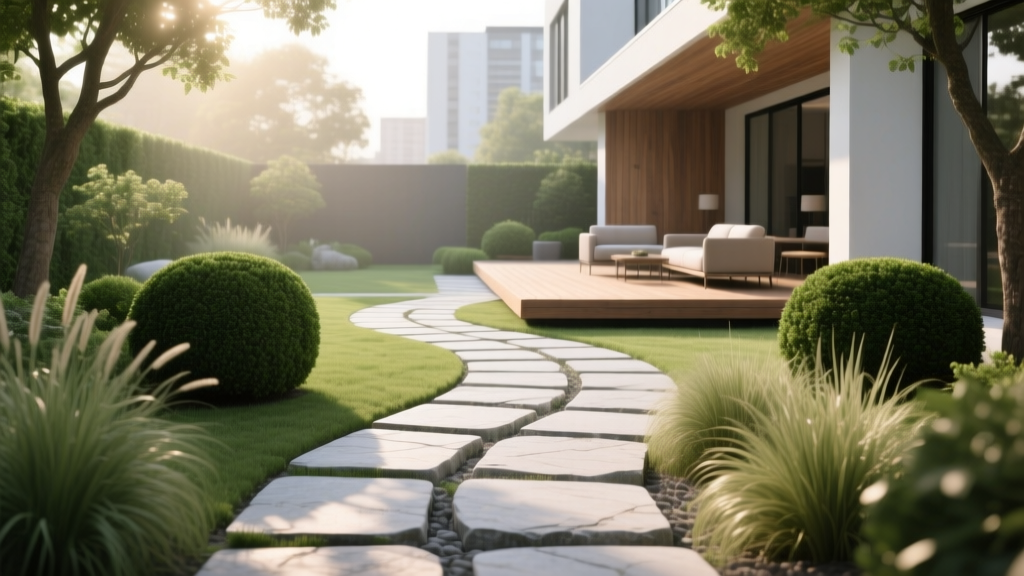 How to Design a Garden Pathway - The Decor Mag
 Garden Room and Greenhouse Design - The Decor Mag
 Outdoor Kitchen Side Burner Setup - The Decor Mag
 How to Design a Sensory Herb Garden - The Decor Mag
 Outdoor Kitchen Gas Line Planning - The Decor Mag