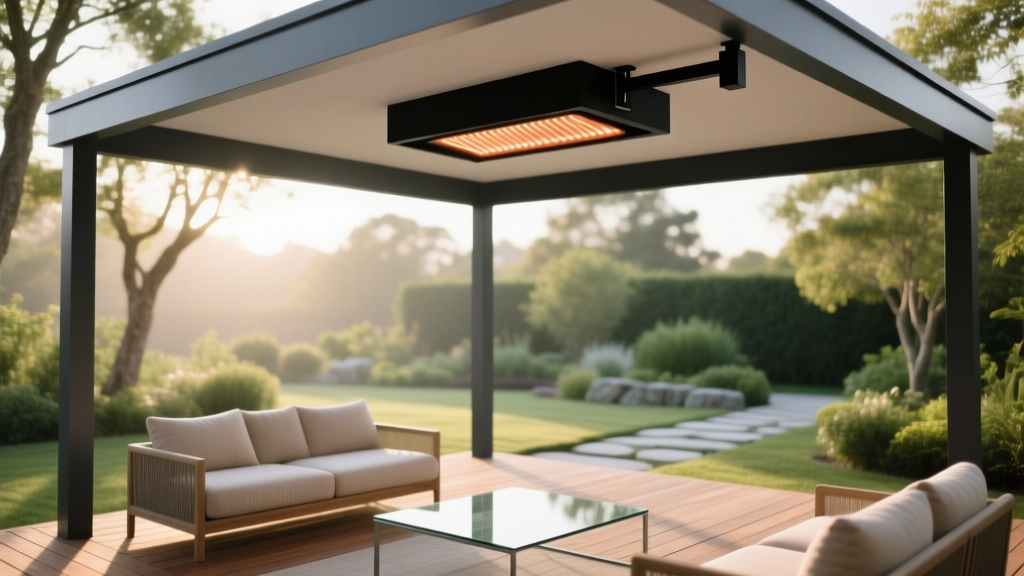
Outdoor Pavilion Infrared Heater Mount - The Decor Mag
A pavilion is one of the best upgrades you can make to an outdoor living space. It creates a “room” in the landscape—structured, inviting, and flexible enough for everything from summer dinners to fall movie nights. But when the temperature drops, that beautiful covered space can go unused unless you plan for warmth.
An outdoor pavilion infrared heater mount is the difference between a pavilion that looks great and one that truly performs. Infrared heaters provide clean, immediate, targeted heat—perfect for covered patios, pergolas, and pavilions where you want comfort without smoke, bulky fire pits, or constant fuel management.
This guide breaks down where and how to mount an infrared heater in a pavilion, how to integrate it into your patio design, what materials work best, and which mistakes to avoid—so you can create a cozy, stylish outdoor room that earns its keep in every season.
Why Infrared Heating Works So Well Under a Pavilion
Infrared (radiant) heaters warm people and objects directly rather than trying to heat all the air under a roof. That’s ideal for outdoor living spaces where breezes are common and ceilings may be high.
- Fast comfort: You feel warmth in minutes, great for impromptu gatherings.
- Zone heating: Aim heat where you sit, dine, or lounge instead of warming the whole yard.
- Cleaner ambiance: No smoke, ash, or open flame competing with your outdoor furniture layout.
- Design-friendly: Sleek ceiling and beam mounts keep walkways clear and preserve a refined pavilion aesthetic.
Choosing the Right Pavilion Infrared Heater Mount Style
1) Ceiling Mount (Best for a Finished Outdoor Room Look)
Ceiling mounting keeps the heater visually minimal and evenly distributes warmth over seating or dining zones. This is a go-to choice for homeowners building a polished patio living area with layered lighting and a clean ceiling line.
Ideal for: Dining tables, conversation sets, outdoor kitchens with bar seating.
2) Beam or Joist Mount (Great for Open-Rafter Pavilions)
If your pavilion has exposed beams, a beam mount can look intentional—almost like a built-in architectural feature. It also allows precise placement so the heat lands exactly where you want it.
Ideal for: Pergola-style pavilions, rustic timber structures, open-air lounge areas.
3) Wall/Posts Mount (When the Ceiling Height Is Too High)
For taller pavilion roofs, mounting to a post, header, or perimeter beam can keep the heater at an effective height while directing heat inward toward seating.
Ideal for: High gables, cathedral pavilion ceilings, pavilions with ceiling fans.
4) Recessed Mount (High-End, Ultra-Clean Finish)
Recessed installations hide the heater body within a finished ceiling. This looks incredible in modern outdoor living designs, but it requires careful planning for framing, clearance, and ventilation.
Ideal for: New pavilion builds or major renovations with tongue-and-groove ceilings.
Placement That Feels Like a Designer Planned It (Because You Did)
Infrared heaters are most comfortable when they’re aligned with how your outdoor room is used. Before mounting anything, map out your “activity zones” under the pavilion.
Start With These Layout Principles
- Heat the people, not the walkway. Center the heater over seating or dining, not in the middle of circulation paths.
- Match the heater to the zone size. A large pavilion often needs two smaller heaters rather than one oversized unit.
- Angle matters. Adjustable brackets allow you to aim warmth at a sofa or table—especially helpful in breezy climates.
- Keep sightlines clean. Align heaters parallel with beams or the pavilion ridge so they look intentional, not tacked on.
Suggested Mount Locations by Pavilion Use
- Outdoor dining pavilion: Mount centered above the table lengthwise, or use two heaters spaced evenly for 8–10+ person tables.
- Lounge pavilion: Place over the primary seating group (sofa + chairs). Consider two zones if you have a second seating nook.
- Outdoor kitchen pavilion: Prioritize bar seating and prep zones where people stand still. Avoid placing directly above grills or high-heat appliances.
- Hot tub pavilion: Mount to a perimeter beam aimed toward the entry/bench area rather than directly overhead.
Materials and Mount Hardware That Hold Up Outdoors
The best outdoor design choices look good now and stay safe and attractive for years. Your heater mount should be selected for corrosion resistance, stability, and compatibility with your pavilion structure.
Recommended Mount and Fastener Materials
- 304 or 316 stainless steel: Best for coastal or humid climates; resists corrosion and staining.
- Powder-coated steel: Durable and budget-friendly; choose a high-quality coating and inspect annually.
- Marine-grade fasteners: Essential near salt air; prevents rust streaks on painted beams and wood ceilings.
Pavilion Ceiling/Beam Considerations
- Wood (cedar, redwood, pressure-treated framing): Strong and common. Use structural blocking where needed and seal exposed wood.
- Aluminum pavilions: Clean and modern, but you must mount into approved structural points—often requires manufacturer-approved brackets.
- Composite ceiling panels: Great for low maintenance; confirm heat clearance requirements and avoid direct contact with heater housings.
Design tip: Match the heater finish to the pavilion palette—matte black for modern, bronze for traditional, stainless for contemporary coastal. A coordinated finish makes the heater feel like part of the architecture.
Infrared Heater Mounts That Complement Outdoor Furniture and Decor
Heating is functional, but it also changes how you furnish the pavilion. When the space is comfortable in cooler months, you can invest in more “living room” elements outdoors—textures, layered lighting, and accessories that feel intentional.
Furniture Recommendations for a Warm, Use-All-Year Pavilion
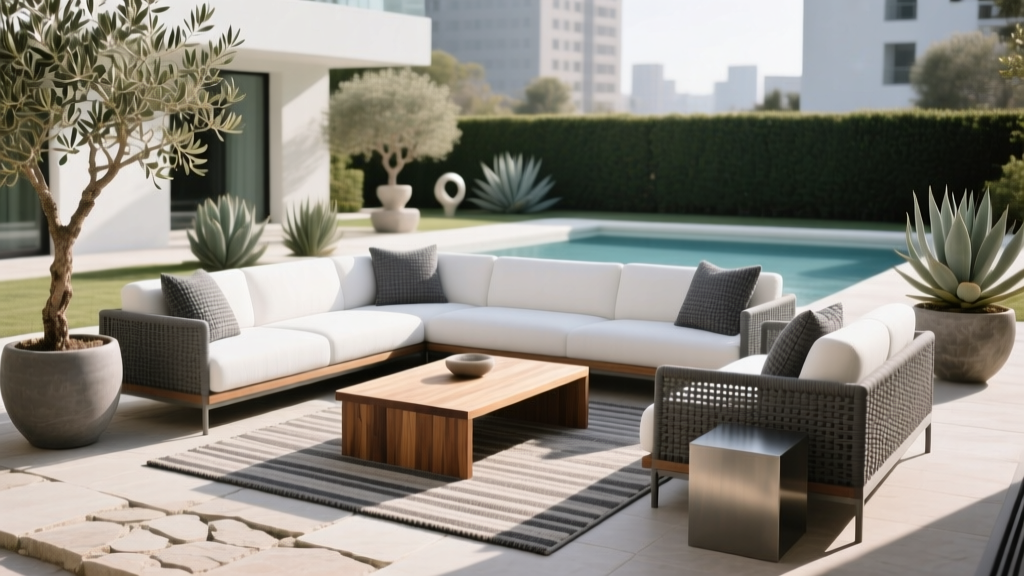
- Modular outdoor sectional: Creates a cozy, enclosed seating zone under radiant heat. Look for quick-dry cushions and solution-dyed acrylic fabrics.
- Teak or powder-coated aluminum dining set: Both are durable, patio-friendly, and easy to style across seasons.
- Outdoor swivel chairs: Perfect under infrared heat—guests can rotate toward warmth, conversation, or the yard view.
- Low coffee table + side tables: Helps keep drinks and blankets within reach during chilly evenings.
Textiles and Accessories That Make the Heat Feel Even Better
- All-weather rug: Adds warmth underfoot and visually anchors the seating layout.
- Throw blankets in performance fabrics: Store in a deck box or outdoor cabinet for shoulder-season nights.
- Soft lighting: Pair heaters with dimmable sconces, warm LED string lights, or a statement pendant rated for damp locations.
Landscaping Around the Pavilion: Plants That Make It Feel Like a Retreat
A well-heated pavilion becomes a destination—so the surrounding landscape should support the vibe: sheltered, lush, and seasonal.
Plant Ideas That Elevate Pavilion Patio Living
- Evergreen structure: Boxwood, inkberry holly, dwarf yaupon, or juniper for year-round greenery and a “room-like” enclosure.
- Ornamental grasses: Feather reed grass or switchgrass for movement and fall/winter interest around the pavilion perimeter.
- Fragrant accents (near seating): Lavender (drier climates), rosemary, jasmine (warm climates), or gardenia (humid regions).
- Container statements: Tall planters with olive (mild climates), bay laurel, or dwarf conifers for a structured look.
- Climbers for posts: Star jasmine, climbing roses, or clematis (choose based on sun exposure and region).
Practical note: Keep vines and foliage trimmed back from heater zones and mounting locations to maintain clearance and reduce debris.
Climate and Seasonal Considerations for Year-Round Outdoor Living
Windy or Exposed Yards
- Use multiple heaters to create overlapping warmth zones.
- Add outdoor curtains or wind screens on one or two sides of the pavilion.
- Position seating away from prevailing wind directions; use shrubs or fencing as windbreaks.
Cold Winters
- Choose higher-output heaters and focus on tight seating groupings rather than widely spaced furniture.
- Consider a ceiling fan rated for damp locations (set to reverse, low speed) to gently push warm air down—only if compatible with heater placement and local codes.
- Use winter containers (dwarf conifers, red twig dogwood branches) to keep the pavilion area visually lively.
Coastal or Humid Regions
- Prioritize 316 stainless hardware and corrosion-resistant finishes.
- Rinse exterior surfaces seasonally; salt and moisture shorten the life of exposed metal.
- Choose mildew-resistant cushion fabrics and ventilated storage.
Maintenance Checklist: Keep Your Heater and Mount Looking Sharp
- Monthly during heavy use: Wipe down heater housing (when cool) and check for dust buildup.
- Seasonally: Inspect brackets, fasteners, and any swivels/tilt joints for loosening or corrosion.
- Before winter: Confirm all clearances are maintained—no new decor, branches, or curtains drifting into the heat zone.
- Annually: Have electrical connections checked if you notice flickering, delayed start, or unusual sounds (use a licensed electrician).
Budget Ranges: What to Expect for a Pavilion Infrared Heater Mount Setup
Costs vary by pavilion size, ceiling height, electrical access, and whether you’re adding one heater or creating multiple comfort zones.
- Budget-friendly: $200–$600 for a basic infrared heater + standard mount hardware (DIY-friendly if electrical is already in place and local codes allow).
- Mid-range outdoor room upgrade: $700–$2,000 for a quality heater, upgraded bracket/finish, and professional installation or added electrical work.
- High-end pavilion heating plan: $2,000–$6,000+ for multiple heaters, recessed mounting, new circuits, integrated lighting controls, and a cohesive patio design refresh.
Design value tip: If you’re choosing between upgrading furniture or adding heat, prioritize the heater first. A comfortable pavilion gets used more often—then the furniture investment makes sense.
Common Mistakes to Avoid
- Mounting too high: Heat becomes less effective. Aim for manufacturer-recommended mounting heights and real-world seating zones.
- Ignoring clearance requirements: Infrared heaters need safe distances from ceilings, beams, curtains, plants, and furniture.
- Heating the wrong spot: A heater centered in the pavilion may miss the seating area if furniture is off to one side.
- Underestimating wind: Breezy patios often need two heaters or a windbreak strategy.
- Using indoor-rated components outdoors: Choose outdoor-rated heaters, mounts, and electrical fittings suitable for damp/wet locations as required.
- Skipping the “visual plan”: Exposed conduit, mismatched finishes, and awkward placement can make a beautiful pavilion feel cluttered.
FAQ: Outdoor Pavilion Infrared Heater Mounts
What’s the best place to mount an infrared heater in a pavilion?
Over the primary seating or dining zone, aligned with the pavilion beams or ceiling lines. If your pavilion is large, plan for two smaller heaters aimed at where people sit rather than one unit centered in open space.
Can I mount an infrared heater on a wood beam?
Yes, if the beam is structural and you follow the heater’s clearance requirements and mounting instructions. Use appropriate fasteners and add blocking if needed to prevent movement over time.
Do I need more than one heater for my pavilion?
Often, yes—especially for wide pavilions, windy yards, or seating layouts with multiple zones. Two heaters can provide more even comfort and better control than one oversized unit.
Are infrared heaters safe for covered patios and pavilions?
They can be, when installed correctly with proper clearances and outdoor-rated electrical components. Follow the manufacturer’s requirements and consider professional installation for wiring and placement.
Will an infrared heater work in winter?
Yes. Infrared heat can be very effective in cold weather because it warms people and surfaces directly. In very windy conditions, add wind screens or curtains and focus heat on tighter seating groupings.
How do I make the heater look like part of the pavilion design?
Match the heater finish to your pavilion hardware (black, bronze, or stainless), mount it parallel with beams for clean sightlines, and pair it with coordinated lighting so the ceiling looks intentionally planned.
Your Next Steps: A Pavilion That Feels Warm, Inviting, and Fully Finished
- Sketch your pavilion layout and mark seating/dining zones.
- Choose a mount style (ceiling, beam, wall/post, or recessed) that suits your structure and design aesthetic.
- Select corrosion-resistant materials and a finish that matches your pavilion palette.
- Plan for seasonal comfort: wind screens, layered lighting, and cozy outdoor textiles.
- Install with proper clearances and outdoor-rated electrical components—bring in a licensed professional when needed.
A well-mounted infrared heater transforms a pavilion into a true four-season outdoor living room—ready for crisp fall dinners, winter stargazing, early spring coffee, and every summer evening in between.
For more outdoor design, landscaping ideas, and patio living upgrades, explore the latest inspiration on thedecormag.com.
More Articles
 Best Outdoor Dining Chair Cushions - The Decor Mag
 Outdoor Kitchen Sink Apron Front Ideas - The Decor Mag
 Outdoor Kitchen Storage Cabinet Guide - The Decor Mag
 How to Design a Mediterranean Courtyard - The Decor Mag
 Outdoor Fireplace and Fire Pit Ideas - The Decor Mag
 How to Create a Night Blooming Garden - The Decor Mag
 Outdoor Kitchen Rotating Grill Basket - The Decor Mag
 Best Outdoor Lounge Furniture Picks - The Decor Mag
 Upcycled Garden Planters for Balconies (2026)
 Practical Aging Safety Tips for Outdoor Living Spaces