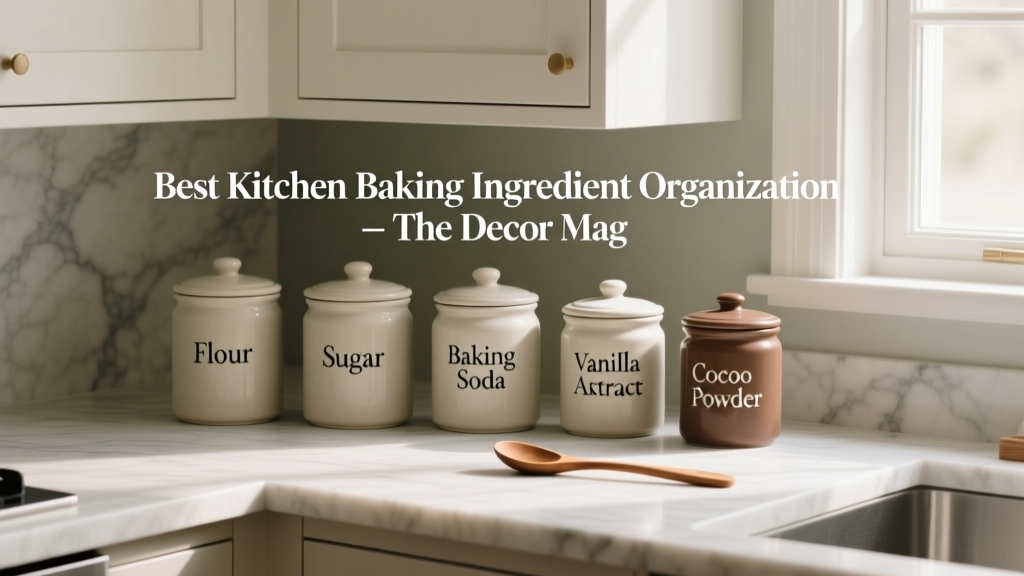
Best Kitchen Baking Ingredient Organization - The Decor Mag
Baking is one of those kitchen rituals that feels effortless only when your space is set up for it. When flour lives in three half-open bags, vanilla is buried behind spices, and brown sugar has turned into a brick, even a simple batch of cookies becomes a scavenger hunt. The right baking ingredient organization doesn’t just look neat—it saves time, reduces waste, and makes your kitchen feel more generous and calm.
For homeowners planning a kitchen renovation (or simply refining what they already have), organizing baking ingredients is a high-impact upgrade because it touches layout, storage design, lighting, and daily workflow. The best systems balance current kitchen design trends—like streamlined pantries, integrated drawers, and clean countertop aesthetics—with timeless functionality principles: easy access, clear visibility, and simple maintenance.
This guide walks through practical storage zones, ideal measurements, material choices, and cost ranges—plus common mistakes that trip up even well-designed kitchens.
Start With a Baking Zone: The Layout That Makes Organization Stick
Organization lasts when it matches how you cook. Instead of scattering ingredients across the kitchen, create a dedicated “baking zone” anchored near your main prep surface.
Where to place the baking zone
- Best location: Between your pantry storage and primary prep counter, ideally within 3–6 feet of where you mix and measure.
- Nice-to-have adjacency: Near the stand mixer cabinet (if you have one) and close to the oven, without blocking traffic.
- Avoid: Putting baking staples above the cooktop—heat and grease accelerate staleness and create sticky containers.
Zone planning: a simple, renovation-friendly map
- Top-access daily drawer (measuring tools, small packets, yeast)
- Ingredient drawer or pull-out (flour, sugar, cocoa, oats)
- Mixing/assembly counter (minimum 30 inches of clear counter; 36 inches is better)
- Appliance storage (mixer, food scale)
- Backstock zone (bulk flour, extra chocolate chips)
Choose the Right Storage Type for Each Ingredient
Baking ingredients behave differently. Flour absorbs odors and moisture, brown sugar hardens, nuts go rancid, and sprinkles migrate everywhere. Matching storage to the ingredient improves freshness and keeps your kitchen renovation choices working long-term.
Best containers for baking staples (with material comparisons)
-
Glass canisters (borosilicate or thick soda-lime glass)
- Pros: Odor-resistant, easy to sanitize, looks timeless in open shelving.
- Cons: Heavier; can chip on stone counters; not ideal for deep drawers if you’re worried about breakage.
- Best for: Sugar, flour, cocoa, oats, sprinkles you want visible.
-
Clear BPA-free plastic (Tritan-style)
- Pros: Lightweight, budget-friendly, great for kids’ snack/baking zones.
- Cons: Can scratch; may hold odors over time (especially vanilla sugar or spices).
- Best for: All-purpose flour, powdered sugar, chocolate chips, baking soda.
-
Stainless steel tins
- Pros: Blocks light; durable; great for pantry shelves.
- Cons: You can’t see contents; requires clear labeling.
- Best for: Nuts, specialty flours, cocoa, tea/coffee near baking.
-
Silicone-sealed lids (regardless of container material)
- Pros: Helps maintain freshness; reduces pantry pests.
- Best for: Flour, brown sugar, powdered sugar, cornmeal.
Capacity guide: containers that fit real baking habits
- All-purpose flour: 4–5 quart container fits a standard 5 lb bag (look for 4.7–5.2 qt).
- Granulated sugar: 4 quart container fits a 4 lb bag.
- Brown sugar: 2–3 quart container; choose a strong seal to prevent hardening.
- Powdered sugar: 2–3 quart container (it’s bulky).
- Chocolate chips/chunks: 1.5–2 quart container per variety if you bake often.
- Nuts: Store in 1–2 cup jars and keep extras in the freezer for freshness.
Smart Cabinetry for Baking Ingredients: Drawers Beat Upper Cabinets
One of the biggest kitchen design upgrades for bakers is moving ingredients into drawers or pull-outs. You see everything at once, items stay contained, and you don’t need to lift heavy bins above shoulder height.
Recommended drawer dimensions and specs
- Deep drawer for canisters: 10–12 inches interior height is ideal for 4–5 qt containers.
- Drawer width: 24–30 inches works well for a dedicated baking drawer; 36 inches is great if you bake frequently.
- Full-extension slides: Choose 90–100 lb rated slides for heavy flour/sugar canisters.
- Soft-close hardware: Helps prevent flour “puffs” and container tipping.
Best layouts for ingredient storage
- Base pull-out pantry (9–15 inches wide): Great for narrow spaces; dedicate to baking extracts, food coloring, small bags.
- Drawer stack near prep counter: Top drawer: tools; middle: ingredients; bottom: backstock or mixing bowls.
- Walk-in pantry zone: Use consistent container sizes on adjustable shelves; include a small counter shelf for staging ingredients.
Labels, Visibility, and a System You Can Maintain
The most stylish pantry trends—minimal labels, matching jars, neutral palettes—only work when the system stays readable. Baking requires precision, so clarity matters.
Labeling best practices
- Label both the front and top if containers live in drawers (top labels are the secret to fast access).
- Include expiration or “opened” date for yeast, baking powder, and specialty flours.
- Use water-resistant labels (vinyl or oil-resistant) so they survive wipe-downs.
Visibility upgrades that feel like a renovation
- Under-shelf LED lighting in a pantry: makes labels and levels easy to read.
- Clear risers for small baking items (sprinkles, extracts) so nothing hides behind taller bottles.
- Lazy Susans for extracts and colors: choose 10–12 inch diameter for standard pantry shelves.
Countertop Strategy: Keep Only the “Daily Baking Trio” Out
Current kitchen design trends favor calm countertops, and for good reason: clear space makes kitchens feel larger and more luxurious. For baking, keep only what you use constantly—and store it intentionally.
What earns countertop space
- Salt cellar (with a lid)
- Utensil crock (if it’s part of your baking routine)
- Stand mixer (only if you use it weekly; otherwise, consider an appliance garage or lift)
Appliance storage options (with cost range)
- Appliance garage (cabinet with pocket/bi-fold door): $500–$2,500+ depending on cabinetry brand and electrical needs.
- Mixer lift in base cabinet: $150–$400 hardware plus install; check weight rating and clearances.
- Dedicated mixer cubby in pantry: Often a low-cost addition during a renovation if planned early.
Budget Breakdown: What Baking Ingredient Organization Really Costs
You can build a high-functioning baking organization system at many budget levels. The key is spending where it affects daily use: drawer hardware, container seals, and the layout near your prep area.
Budget-friendly refresh: $50–$250
- Assorted containers (plastic or mixed materials): $30–$150
- Labels + marker or label maker tape: $10–$40
- Risers and bins: $10–$60
Mid-range upgrade: $250–$900
- Matching canister set with airtight lids: $80–$300
- Drawer organizers (bamboo or washable plastic): $30–$150
- Pull-out inserts or roll-outs for existing cabinets: $150–$450
Renovation-level organization: $900–$5,000+
- New base cabinets with deep drawers and premium slides: $1,500–$4,000+ (varies widely by region and cabinet line)
- Pantry build-out with adjustable shelves + lighting: $800–$3,000+
- Appliance garage or mixer lift integration: $300–$2,500+
Practical Tips for Freshness, Pest Prevention, and Maintenance
Keep ingredients fresh longer
- Flour: Store in airtight containers; for longer storage, keep backup flour in the freezer. Let it come to room temp before baking for consistent results.
- Brown sugar: Airtight container; consider a terracotta sugar saver. Avoid storing near the oven or dishwasher heat vents.
- Nuts and whole grains: Refrigerate or freeze to prevent rancidity.
- Yeast and baking powder: Store in a cool, dark area; label with “opened” date.
Easy cleaning routine (5–10 minutes monthly)
- Empty one drawer/shelf at a time.
- Vacuum crumbs and flour dust (hand vac works well).
- Wipe surfaces with mild dish soap solution; dry fully.
- Wipe container exteriors—especially lids and rims where sticky residue builds.
Material care: what to avoid
- Wood/bamboo organizers: Don’t soak; wipe and dry. Oil lightly if they look dry (check manufacturer guidance).
- Plastic containers: Avoid abrasive scrubbers that cloud the surface; hand-wash lids to protect seals.
- Glass: Check lid gaskets periodically; replace if they loosen or crack.
Common Mistakes to Avoid
- Buying containers before measuring cabinets and drawers. Measure interior height and depth first; remember drawer sides and rails reduce usable space.
- Storing heavy items on upper shelves. Flour and sugar should live at waist height in drawers or low shelves to prevent spills and strain.
- Mixing too many container shapes. Uniform footprints stack and line up better, making even small pantries feel custom.
- Skipping top labels for drawer storage. If you can’t read it at a glance, it won’t stay organized.
- Over-decanting everything. Decant staples you use often; keep specialty items in original packaging inside labeled bins if you rarely use them.
- Designing a pantry without enough depth strategy. Deep shelves need risers, bins, or pull-outs—or items will disappear to the back.
FAQ: Kitchen Baking Ingredient Organization
Should I decant flour and sugar into containers or keep them in the bag?
Decanting into airtight containers is usually best for freshness, pest prevention, and day-to-day speed. If you prefer keeping original packaging for brand/lot details, place the bag inside a sealed bin and label the outside.
What’s the ideal pantry shelf depth for baking ingredients?
A shelf depth of 12–14 inches is easiest to manage. Deeper shelves (16–20 inches) work if you add pull-out trays or use bins so items don’t get lost in the back.
How do I organize ingredients if I don’t have a pantry?
Use a 10–12 inch deep drawer for canisters, add a 9–12 inch pull-out next to the range or fridge if space allows, and dedicate one upper cabinet to backstock in labeled bins. A slim rolling cart can also serve as a baking station in tight kitchens.
Are glass containers better than plastic for a kitchen renovation pantry?
Glass is more odor-resistant and feels more premium for open shelving. Plastic is lighter, less breakable, and often more affordable. Many homeowners use a hybrid: glass for countertop or open shelves, plastic for deep drawers and everyday use.
How do I prevent brown sugar from hardening?
Use a truly airtight container (a gasketed seal helps), store it away from heat, and consider a terracotta sugar saver. If it hardens, soften with a slice of bread or a damp paper towel in the container for several hours (remove once softened).
What’s the most renovation-friendly upgrade for better organization?
Adding deep base drawers with full-extension slides near your main prep counter is one of the biggest improvements for baking organization. If you’re not changing cabinets, install roll-out trays in an existing base cabinet.
Next Steps: Build Your Baking Organization Plan
Start by measuring your existing storage (interior drawer heights, shelf depths, and the distance to your main prep counter). Then choose one of two paths: a quick refresh with a consistent container set and labels, or a renovation-level baking zone with deep drawers, pull-outs, and lighting. Aim for a system that keeps your core ingredients within arm’s reach of where you mix, weigh, and portion.
If you’re planning a kitchen renovation, bring these priorities to your cabinet design meeting: a dedicated baking drawer stack, full-extension hardware rated for heavy loads, and a pantry layout that supports visibility. You’ll feel the difference every time you bake.
For more kitchen design, renovation, and organization ideas, explore the latest inspiration on thedecormag.com.
More Articles
 Smart Kitchen Tech: How to Incorporate in 2026
 Kitchen Backsplash Pattern Scale: How to Choose (2026)
 Kitchen Waterfall Island Design Ideas - The Decor Mag
 Best Kitchen Prep Bowl Collection Display - The Decor Mag
 Kitchen That Inspires Cooking: Design Ideas (2026)
 Kitchen Pantry Organization That Saves Time
 Best Kitchen Plate Rack Display Options - The Decor Mag
 Best Kitchen Cutting Board Storage - The Decor Mag
 Kitchen Integrated Look Appliance Paneling - The Decor Mag
 Best Kitchen Trash and Recycling Drawer - The Decor Mag