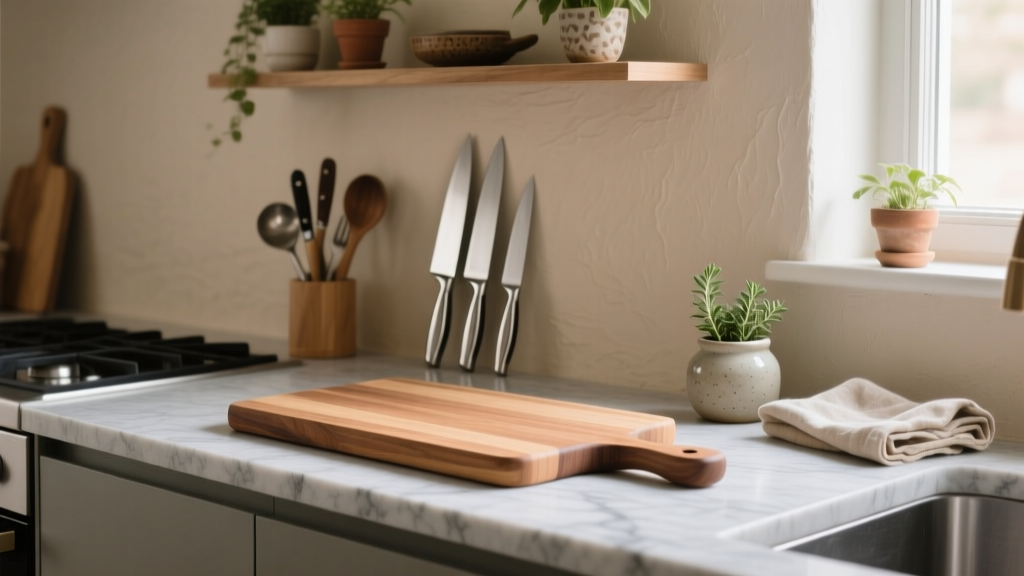
Best Kitchen Cutting Board Care Products - The Decor Mag
A cutting board is one of those humble kitchen essentials that quietly influences everything: how clean your prep zone feels, how long your knives stay sharp, and how polished your countertops look day to day. If you’re planning a kitchen renovation—or simply trying to elevate a hardworking space—caring for cutting boards is an easy win with outsized impact. Well-maintained boards look better on open shelving, perform better at the sink or island, and reduce the “mystery smells” that can linger in busy kitchens.
Today’s kitchens lean into a blend of timeless functionality and design-forward organization: oversized islands, appliance garages, integrated trash pull-outs, and streamlined prep stations. Cutting boards are central to that workflow, and the right care products help them last for years (sometimes decades). Whether you love the warmth of end-grain walnut, rely on dishwasher-safe composites, or keep color-coded plastic boards for food safety, this guide breaks down the best cutting board care products—plus practical routines, cost ranges, and common mistakes to avoid.
Why Cutting Board Care Matters in a Well-Designed Kitchen
Kitchen design trends prioritize clean sightlines and clutter-free counters, but a board that’s warped, stained, or cracking quickly undermines that “new-kitchen” feeling. Maintenance is also performance:
- Hygiene: Proper cleaning tools reduce bacterial buildup, especially in knife grooves.
- Longevity: Conditioning oils and waxes prevent drying, splitting, and warping in wood boards.
- Knife protection: Stable, properly maintained boards help prevent edge damage from excessive hardness or uneven surfaces.
- Kitchen organization: A consistent care routine supports a dedicated prep zone (sink + board + compost/trash), which is a hallmark of smart renovation layouts.
Know Your Board: Material Comparisons and What They Need
Wood (Maple, Walnut, Cherry, Beech)
Wood boards are a favorite in timeless kitchens because they feel warm, look elevated on countertops, and are gentler on knives than stone or glass. End-grain boards (the “checkerboard” look) self-heal better than edge-grain boards and are popular for large island prep areas.
- Best care: Food-grade mineral oil + board cream (oil/wax blend)
- Avoid: Dishwasher, prolonged soaking, harsh bleach solutions
- Typical thickness: 1.25–2.5 inches (thicker boards resist warping)
Bamboo
Bamboo is technically a grass and tends to be harder than many woods. It’s budget-friendly and looks modern, but its hardness can be slightly tougher on knives, and it benefits from regular conditioning.
- Best care: Mineral oil + wax cream; gentle hand wash
- Avoid: Over-saturation with water, aggressive scrubbing that frays fibers
Plastic (Polypropylene)
Plastic boards are practical for raw proteins and quick sanitation. Many are dishwasher-safe, making them ideal for households prioritizing food safety and speed. They do scar more readily, so regular replacement is part of the plan.
- Best care: Dishwasher + occasional deodorizing/sanitizing treatments
- Avoid: Deeply gouged boards (they’re hard to truly clean)
Composite/Richlite/Epicurean-Style Boards
Composite boards are sleek, slim, and often dishwasher-safe—great for minimal, contemporary kitchen design. They’re a smart fit for tight prep zones, appliance garages, or secondary workstations.
- Best care: Dishwasher; occasional light sanding if recommended by manufacturer
- Avoid: Extended exposure to high heat near ranges
Glass, Stone, Marble, Granite (Display-Only)
These look beautiful in a styled kitchen but are generally poor for knife edges. Consider them serving boards or pastry slabs rather than daily cutting surfaces.
- Best use: Cheese, charcuterie, dough rolling (with mat), decor
- Avoid: Chopping and slicing with quality knives
Best Cutting Board Care Products (What to Buy and Why)
1) Food-Grade Mineral Oil (The Daily Driver for Wood)
Mineral oil is the foundation of wood board care. It’s odorless, stable (won’t go rancid like many cooking oils), and affordable.
- Best for: Maple, walnut, cherry, beech, bamboo
- How often: Weekly for new boards for the first month, then every 3–4 weeks (or whenever the surface looks dry)
- Cost range: $8–$20 for 12–16 oz (often lasts 6–18 months)
Tip: For a large end-grain board around 18" x 24", plan on 1–2 tablespoons per coat. Apply generously, let it soak for at least 4 hours (overnight is ideal), then buff dry.
2) Board Cream (Oil + Wax Blend for a Polished Finish)
Board creams—usually mineral oil with beeswax or carnauba wax—add a soft sheen and extra water resistance. They’re a favorite for homeowners who keep boards visible on countertops or open shelves.
- Best for: Wood and bamboo boards that you want to look “furniture-finished”
- How often: Every 4–8 weeks, or after deep cleaning
- Cost range: $10–$25 for 4–8 oz
Design note: If your renovated kitchen features a walnut island top or wood accents, a well-conditioned walnut board echoes those tones and elevates the overall palette.
3) Gentle Dish Soap + Non-Abrasive Scrubbers (For Everyday Cleaning)
You don’t need harsh cleaners for routine cleanup. A mild dish soap, warm water, and a soft scrubber keep boards clean without damaging the surface.
- Best for: All board types (follow manufacturer guidance for composites)
- Cost range: $5–$15 for soap; $5–$12 for scrubbers/brushes
Practical measurement: Choose a brush with a head around 2–3 inches wide to get into knife grooves quickly, especially on end-grain boards.
4) Cutting Board Scraper (Fast Cleanup, Less Water)
A bench scraper or dedicated board scraper removes sticky dough, minced aromatics, and residue without excessive rinsing—ideal for wood boards that you want to keep dry.
- Best for: Wood boards, pastry boards, large prep boards on islands
- Cost range: $6–$18
5) Odor and Stain Fighters: Baking Soda, Lemon, Coarse Salt
For garlic/onion smells or mild staining, pantry staples work surprisingly well and fit a clean, low-chemical kitchen routine.
- Best for: Wood and plastic (spot test as needed)
- Cost range: $2–$8
- Sprinkle 1–2 tablespoons baking soda on the board.
- Rub with half a lemon or a damp cloth.
- Rinse quickly and dry immediately (especially for wood).
6) Sanitizing Options: Diluted Bleach or Hydrogen Peroxide (Use Carefully)
For plastic boards used with raw proteins, periodic sanitizing can be helpful. For wood, stick to gentle cleaning and thorough drying; aggressive chemical sanitation can be too harsh and may degrade the surface.
- Best for: Plastic boards (especially color-coded sets)
- Cost range: $3–$10
Safe approach: Use a diluted bleach solution (common guidance is 1 tablespoon per gallon of water) for plastic, then rinse and air-dry. Always follow product labels and local food safety recommendations.
7) Sandpaper + Finishing Kit (For Restoring Wood Boards)
If your board has raised grain, shallow cracks, or stubborn stains, light sanding can bring it back. This is a great “mini-renovation” project that keeps your kitchen looking fresh.
- Best for: Wood boards (especially thick end-grain)
- What to buy: 120, 180, and 220 grit sandpaper; optional sanding block
- Cost range: $8–$25 total
Process tip: Sand with the grain (or evenly across end-grain), wipe away dust, then apply mineral oil and finish with board cream.
8) Board Feet/Non-Slip Mats (Stability and Countertop Protection)
In kitchen remodel planning, stability is a safety and workflow issue. A sliding board is frustrating on quartz or polished concrete counters.
- Best for: Large boards used on islands and perimeter counters
- Options: Silicone non-slip mat, damp towel under board, rubber feet kits
- Cost range: $6–$30
Layout note: If you’re designing a prep station, allow at least 24 inches of uninterrupted counter width for a primary board and ingredients, and aim for 15–18 inches depth of clear working space in front of small appliances.
Recommended Cutting Board Care Routine (Simple and Renovation-Friendly)
Daily (2–3 minutes)
- Scrape debris into compost/trash.
- Wash with mild soap and warm water (no soaking for wood).
- Dry immediately with a towel, then stand board on edge to air-dry fully.
Monthly (10–15 minutes)
- Deep clean with coarse salt + lemon or baking soda paste.
- Oil wood boards; buff dry after soaking.
- Check for wobble; add a non-slip mat or replace feet.
Seasonal (30–60 minutes)
- Light sanding for wood boards if roughness or stains persist.
- Replace heavily gouged plastic boards (especially raw meat boards).
- Refresh your organization: assign boards to zones (protein, produce, bread).
Budget Guide: What You’ll Spend
- Starter care kit ($15–$35): Mineral oil + soft scrubber + scraper
- Complete care kit ($35–$75): Mineral oil + board cream + scraper + brush + non-slip mat
- Restoration kit ($50–$120): Complete kit + sandpaper set + replacement rubber feet + optional deodorizing supplies
Renovation mindset: If you’re investing in upgraded countertops and cabinetry, a $40–$60 care setup is a low-cost way to keep the “new kitchen” look consistent across daily-use items.
Common Cutting Board Care Mistakes to Avoid
- Using cooking oils (olive, avocado, etc.) on wood: They can oxidize and turn rancid, creating sticky buildup and odors.
- Soaking wood boards: Water intrusion causes warping, splitting, and raised grain.
- Putting wood boards in the dishwasher: High heat + long moisture exposure is a fast track to cracks.
- Ignoring deep grooves in plastic: Once heavily scarred, replacement is often safer than “extra cleaning.”
- Storing boards flat when damp: Trapped moisture encourages odor and can cup the board.
- Chopping on glass/stone: It dulls knives quickly and can create a noisy, harsh prep experience.
Kitchen Design + Organization Tips for Cutting Board Storage
Modern kitchen design trends emphasize purposeful zones. Treat cutting boards like part of your prep architecture:
- Vertical storage near the prep sink: Use a divider in a base cabinet or a dedicated tray slot. Allow 2–3 inches per board for easy grab-and-go.
- Island prep station: Keep your primary board within 36 inches of the sink and trash pull-out for efficient workflow.
- Drawer organization: Deep drawers (10–12 inches high) can store boards flat with a liner—only if boards are fully dry.
- Open-shelf styling: Display one beautiful wood board; store high-sanitizing boards (plastic) out of sight for a cleaner look.
FAQ: Cutting Board Care Products
What oil is best for a wooden cutting board?
Food-grade mineral oil is the most reliable choice because it’s stable (won’t go rancid), widely available, and easy to apply. For extra water resistance and a nicer finish, follow with a board cream (mineral oil + beeswax/carnauba wax).
How do I know when my cutting board needs oil?
If the board looks dull, feels dry, or absorbs water quickly (darkening immediately under a droplet), it’s time to oil. In most homes, that’s every 3–4 weeks after the initial break-in period.
Can I use vinegar to clean a cutting board?
Vinegar can help with odors on some surfaces, but frequent use on wood may be overly drying and can affect certain finishes. For wood, mild soap and prompt drying are best; for deodorizing, try lemon + salt or baking soda.
How often should I replace plastic cutting boards?
Replace them when deep grooves and rough scars develop—especially if used for raw meat. In a busy household, that might be every 6–18 months depending on thickness, dishwasher use, and knife habits.
Is an end-grain cutting board worth it?
For homeowners who cook often and want a premium, renovation-ready prep experience, yes. End-grain boards are thicker, more stable, and typically kinder to knives. Expect higher upfront cost, but long-term durability is excellent with regular oiling.
What’s the best way to dry a cutting board?
Towel-dry immediately, then stand it on edge with airflow on both sides. Avoid laying it flat on a wet counter or against a backsplash where moisture can linger.
Next Steps: Build a Cutting Board Care Kit That Fits Your Kitchen
Start by matching care products to your board materials: mineral oil and board cream for wood, dishwasher + occasional sanitizing for plastic, and a scraper to reduce water exposure on your primary prep board. Add one organization upgrade—like vertical storage by the sink or a non-slip mat on the island—to improve daily workflow in a way that complements your kitchen renovation goals.
For more practical kitchen design, renovation planning, and organizing ideas that make everyday cooking feel effortless, explore the latest guides and inspiration on thedecormag.com.
More Articles
 How to Design a Kitchen with a Breakfast Bar - The Decor Mag
 Best Kitchen Colander Storage Solutions - The Decor Mag
 Meal Prep Kitchen Design: Functional Ideas (2026)
 How to Design a Kitchen with a Scullery - The Decor Mag
 Kitchen Style & Function: Design Tips (2026)
 Kitchen Cabinet Depth Standards (2026)
 Sleep FAQ Answered: Science-Backed Answers from a Kitchen Specialist and Culinary Consultant
 Best Kitchen Faucet Styles for 2026 - The Decor Mag
 How to Repair Sustainably: Practical Strategies for Extending the Life of Kitchen Appliances, Cookware, and Fixtures
 Kitchen Fluted Wood Range Hood Cover - The Decor Mag