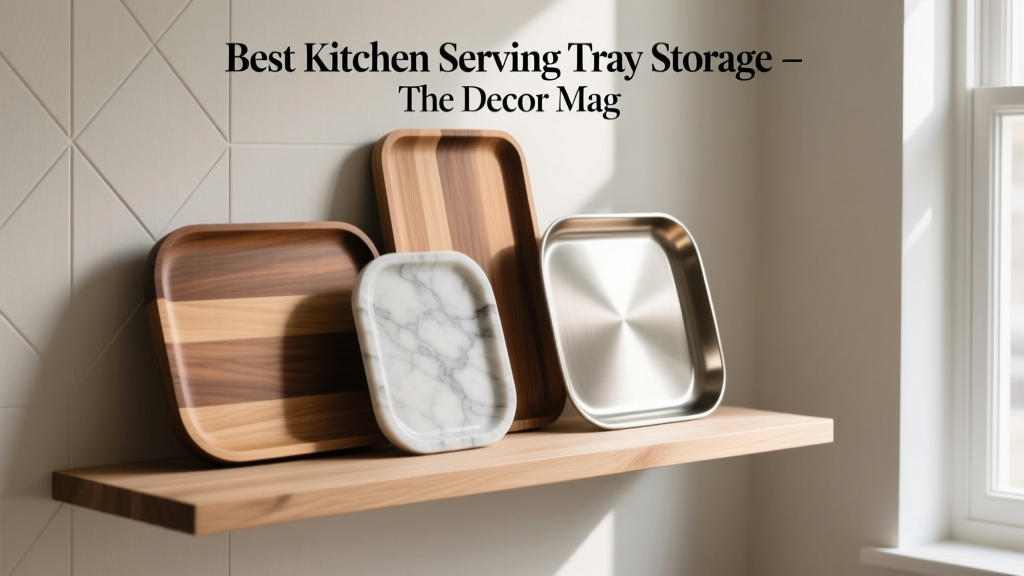
Best Kitchen Serving Tray Storage - The Decor Mag
Serving trays are one of those kitchen essentials you don’t think about until they become a daily nuisance. They’re large, often awkwardly shaped, and prone to sliding into a messy stack that clatters every time you open a cabinet. In a well-designed kitchen, tray storage is more than an organizational detail—it affects workflow, safety, and how “finished” your kitchen feels.
If you’re planning a kitchen renovation or upgrading your storage, dedicating a specific home for serving trays (along with cutting boards, sheet pans, and platters) is one of the easiest ways to make the space feel custom. The best kitchen serving tray storage solutions blend timeless functionality—easy access, protected finishes, minimal noise—with current kitchen design trends like hidden organization, slimmer cabinetry, and multi-purpose zones near the pantry, coffee bar, or entertaining area.
This guide walks through practical layouts, recommended dimensions, material options, and cost ranges so you can choose a solution that fits your kitchen size, budget, and style—whether you’re renovating from scratch or improving what you already have.
Why Dedicated Serving Tray Storage Improves Everyday Kitchen Function
When trays are stored correctly, your kitchen works better. You reduce cabinet clutter, avoid damage to finishes, and keep entertaining pieces ready to grab. It also prevents the common “domino effect” where trays fall forward and scratch each other—or worse, chip dishes nearby.
- Faster prep and serving: Trays, boards, and platters are visible and accessible.
- Less wear and tear: Vertical dividers reduce scraping and edge damage.
- Quieter cabinets: Proper separators stop banging and shifting.
- Cleaner look: Organized storage supports a streamlined, renovated feel.
Best Places to Store Serving Trays in a Kitchen Layout
1) Vertical Cabinet Near the Cooking Zone
This is the classic “tray cabinet” approach—ideal if you regularly use sheet pans and roasting trays. Place it near the oven for the most efficient workflow.
- Best for: Baking sheets, roasting pans, serving trays, pizza stones.
- Ideal cabinet width: 9"–15" (a 12" pull-out is a sweet spot).
- Recommended interior depth: 21"–24" to fit standard sheet pans.
2) Pantry or Tall Utility Cabinet for Entertaining Trays
If your trays are mostly for hosting (bar trays, charcuterie boards, decorative serving pieces), a pantry-adjacent location keeps entertaining gear consolidated.
- Best for: Large platters, decorative trays, seasonal serving pieces.
- Bonus: Pair with a shelf for napkins, candles, and serving utensils.
3) Island Storage (Great for Open-Plan Entertaining)
Kitchen islands increasingly function as entertaining hubs. Storing trays in the island makes it easy to set up snacks and drinks without crossing the kitchen.
- Best for: Everyday trays, kids’ snack trays, coffee bar trays.
- Design tip: Use a pull-out tray divider so items don’t get lost in deep cabinets.
4) Under-Cooktop or Adjacent Base Cabinets (With Heat Awareness)
Storing trays near cooking is convenient, but avoid placing delicate lacquered wood trays right next to high heat appliances if ventilation is limited.
- Best for: Metal trays, sheet pans, heat-safe serving pieces.
- Avoid: Storing oiled wood boards where they’ll dry out from heat exposure.
Top Serving Tray Storage Solutions (What Works Best and Why)
Vertical Tray Dividers (The Gold Standard)
Vertical dividers create individual slots so each tray can be removed without lifting a heavy stack. This is a timeless storage principle that still dominates high-end kitchen design for good reason.
Recommended slot spacing:
- 1.5"–2" for thin metal trays and baking sheets
- 2.5"–3" for thicker serving trays and platters
- 3.5"–4" for oversized wood trays or handled trays
Best materials:
- Powder-coated steel: Durable, slim, easy to clean; great for modern kitchens
- Hardwood (maple, birch, walnut): Warm, premium look; best for custom cabinetry
- Moisture-resistant MDF with laminate: Budget-friendly; choose high-quality edge banding
Cost range: $30–$120 for add-on dividers; $250–$800+ for a dedicated pull-out tray divider unit; $800–$2,500+ for custom cabinet integration depending on finishes and hardware.
Pull-Out Tray Organizer Cabinets (High Convenience)
Pull-outs bring trays to you—especially helpful in base cabinets where reaching into the back is uncomfortable. This solution aligns with current kitchen renovation trends favoring ergonomic storage and “everything within reach.”
- Best for: Base cabinets, islands, compact kitchens
- Hardware to look for: Full-extension slides rated 75–100 lbs, soft-close preferred
- Practical width: 9"–18" (wider if storing multiple large boards)
Cost range: $150–$500 for retrofit pull-out systems; $500–$1,500+ when integrated into new cabinetry.
Adjustable Shelf Dividers for Existing Cabinets (Fast Upgrade)
If you’re not renovating, adjustable shelf dividers can create vertical slots on an existing shelf. They’re less customized but surprisingly effective for many homeowners.
- Best for: Rentals, quick organization improvements, pantry shelving
- What to check: Divider height (aim for 8"–12"), anti-slip base, rust-resistant finish
Cost range: $20–$60 per set.
Door-Mounted Rack Systems (Use “Dead Space” Wisely)
Door-mounted organizers can hold slimmer trays, cutting boards, and platters—especially in a pantry cabinet. They’re best when the door is sturdy and hinges are high quality.
- Best for: Lightweight trays, boards, small platters
- Watch out for: Door sag if overloaded
Cost range: $40–$200 depending on size and build quality.
Open Shelf or Counter Display (When Trays Are Decorative)
Open storage is a trend that works best when curated. If your trays double as decor (artisan wood, marble, or lacquer), displaying one or two can add personality—just avoid turning it into clutter.
- Best for: 1–2 statement trays, frequently used coffee/tea trays
- Maintenance note: Open storage gathers dust and grease more quickly near cooktops
Cost range: $0–$300 depending on whether you add shelves, brackets, or a small sideboard.
Recommended Measurements for Tray Storage (Plan Like a Pro)
Good tray storage starts with measuring what you actually own. Standard tray and pan sizes vary, and handles can add unexpected width.
- Measure your largest tray (including handles): width, depth, and thickness.
- Confirm cabinet interior dimensions (not the listed cabinet size).
- Plan clearance: add at least 1/2" on each side for easy removal.
Helpful size guidelines:
- Standard half-sheet pan: about 18" x 13"
- Common serving tray depths: 14"–20"
- Minimum cabinet depth for sheet pans: 21" (24" is ideal)
- Vertical clearance: 10"–14" tall interior space works for most tray collections
Material Comparisons: What Holds Up Best in Real Kitchens
Wood Dividers and Inserts
- Pros: Looks custom, quieter, gentle on tray finishes
- Cons: Can absorb moisture; needs occasional wipe-down and careful installation
- Best for: Traditional, transitional, and warm modern kitchen design
Metal Dividers (Steel or Aluminum)
- Pros: Slim profile, durable, easy to sanitize
- Cons: Can scratch delicate trays if edges aren’t finished; may “clang” if trays shift
- Best for: Contemporary kitchens, heavy baking gear, busy households
Plastic or Coated Wire
- Pros: Affordable, easy to find, quick install
- Cons: Can warp with heat; lower-end versions stain or chip
- Best for: Budget kitchen organization upgrades and rentals
Design Approaches That Feel High-End (Even on a Budget)
- Create a “tray zone”: Store trays with cutting boards, cooling racks, and sheet pans together for a single grab-and-go area.
- Use matching bins nearby: Add a slim bin for parchment paper, foil, and silicone mats to streamline baking.
- Add soft liners: Use a thin, wipeable cabinet liner in the tray section to reduce noise and prevent scuffs.
- Keep everyday trays front and center: Store seasonal trays higher or deeper in the cabinet.
Budget-friendly upgrades (often under $100):
- Adjustable shelf dividers
- Cabinet liners and bumpers to reduce clatter
- Decluttering duplicates (keeping 2–4 core trays for most households)
Mid-range upgrades ($150–$600):
- Pull-out tray organizer retrofit
- Door-mounted rack in a pantry cabinet
- Partial cabinet reconfiguration with a carpenter
Renovation-level upgrades ($800–$2,500+):
- Custom tray base cabinet with integrated dividers
- Tall pantry cabinet with multiple tray sections
- Premium soft-close hardware and tailored inserts
Maintenance and Care Tips (So Trays and Storage Stay Looking New)
- Wipe dividers monthly: Grease and dust build up in vertical slots, especially near cooking zones.
- Protect wood trays: Keep them dry; re-oil unfinished wood trays and boards every few months (or as needed).
- Prevent scratches: Use felt pads or a thin liner where metal tray edges rest.
- Avoid moisture traps: Don’t store trays while damp—this can warp wood and encourage odors in enclosed cabinetry.
- Check hardware yearly: Tighten screws on pull-outs and door racks to prevent sagging.
Common Mistakes to Avoid
- Stacking everything flat: This creates friction, chips, and constant reshuffling—especially with heavy stoneware platters.
- Underestimating handles: Many serving trays need an extra 1"–3" in width due to handles or rims.
- Choosing dividers with poor spacing: Too tight and you’ll fight to remove trays; too wide and trays tip over.
- Overloading cabinet doors: Door-mounted racks can pull hinges out over time if overloaded or installed on weak doors.
- Placing delicate trays next to heat: Lacquer, some glues, and oiled wood can degrade faster in hot zones.
- Ignoring workflow: Storing sheet pans across the kitchen from the oven adds steps—and frustration.
FAQ: Kitchen Serving Tray Storage
What is the best way to store serving trays in a small kitchen?
Use vertical storage inside a narrow base cabinet or add a pull-out tray organizer. If cabinetry is limited, place adjustable dividers in a pantry cabinet so trays stand upright without taking extra shelf space.
How wide should a tray cabinet be?
For most homes, 9"–15" works well. A 12" cabinet with vertical dividers fits a practical mix of sheet pans, cutting boards, and serving trays without wasting space.
Are pull-out tray organizers worth it?
Yes if you’re storing trays in lower cabinets or deep island cabinets. Full-extension, soft-close pull-outs improve access and reduce scratches because you’re not dragging trays over each other.
What materials are best for tray dividers in a kitchen renovation?
Powder-coated steel is durable and easy to clean, while hardwood inserts look more custom and reduce noise. For a balance of cost and longevity, choose quality metal dividers with smooth edges and pair them with a cabinet liner.
How do I keep trays from scratching each other?
Store trays vertically with adequate spacing (typically 2"–3" for serving trays). Add felt pads or a thin, wipeable liner at contact points, and avoid forcing trays into slots that are too tight.
Where should I store serving trays for entertaining?
Near your pantry, dining area access point, or beverage/coffee station. Keeping trays close to napkins, glassware, and serving utensils supports a smoother entertaining setup.
Next Steps: Choose the Right Tray Storage for Your Kitchen
Start by editing your tray collection down to the pieces you use most, then measure your largest trays (including handles). From there, pick the storage approach that matches your kitchen layout: a vertical tray cabinet near the oven for baking, a pantry zone for entertaining, or a pull-out organizer in an island for daily convenience. Even a simple divider retrofit can make your kitchen feel more organized, more functional, and more renovation-ready.
For more kitchen renovation ideas, organization upgrades, and timeless design guidance, explore the latest inspiration on thedecormag.com.
More Articles
 Kitchen Two-Tone Cabinet Ideas - The Decor Mag
 How to Choose Kitchen Backsplash Grout Color - The Decor Mag
 Kitchen Warm Neutral Cabinet Colors - The Decor Mag
 Kitchen Quartz vs Granite Countertops - The Decor Mag
 Best Kitchen Knife Block Storage Solutions - The Decor Mag
 Kitchen Counter Materials for Your Lifestyle (2026)
 How to Choose Kitchen Appliances That Last - The Decor Mag
 How to Choose Kitchen Backsplash Height - The Decor Mag
 Best Kitchen Colander Storage Solutions - The Decor Mag
 Vintage Kitchen Decor: Ideas & Tips (2026)