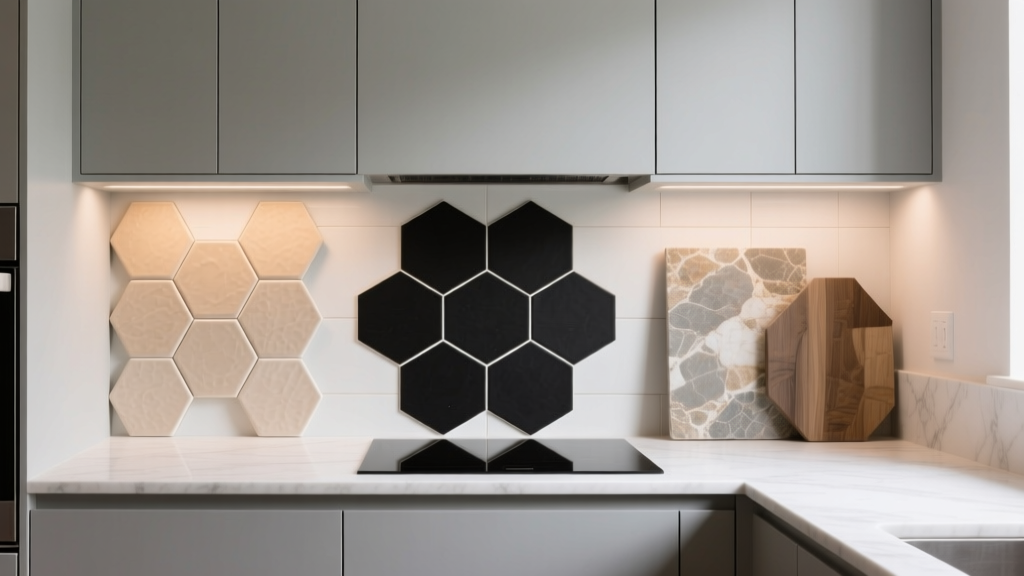
Kitchen Subway Tile Alternatives - The Decor Mag
Subway tile has earned its place as a kitchen backsplash classic: it’s affordable, widely available, and clean-lined enough to work in almost any home. The downside? It’s everywhere. If you’re planning a kitchen renovation—or simply refreshing your space—you may want a backsplash (or wall finish) that feels more personal, more current, or better aligned with how you actually cook and clean.
Today’s kitchen design trends balance warmth, texture, and low-maintenance performance. Homeowners are leaning into fewer grout lines, richer surfaces, and materials that look elevated while still handling real life: splatters, steam, heat, and daily wipe-downs. The good news: you don’t have to sacrifice practicality to move beyond subway tile.
Below are professional, real-world subway tile alternatives—complete with cost ranges, layout ideas, measurements to plan around, and the mistakes that can turn a beautiful backsplash into a headache.
Before You Choose: What Your Backsplash Needs to Do
A backsplash is both décor and a working surface. Choosing the right alternative starts with understanding your kitchen’s “stress zones,” your cleaning habits, and your renovation budget.
Key performance factors
- Heat resistance: Especially behind a range; check manufacturer ratings for panels and specialty materials.
- Stain resistance: Tomato sauce, turmeric, wine, and oils can discolor porous surfaces.
- Grout line management: More grout often means more maintenance—unless you use epoxy grout.
- Water resistance: Critical behind a sink and around coffee stations.
- Ease of repair: Can a single piece be replaced if chipped or cracked?
Practical measurements for planning
- Standard backsplash height: 18 inches from countertop to upper cabinets (adjust based on your cabinet layout).
- Behind the range: Many homeowners extend the backsplash to the hood or ceiling for a focal point.
- Outlet placement: Plan outlets early so seams, grout lines, or large-format patterns don’t land awkwardly around cover plates.
- Clearances: Use non-combustible materials behind gas ranges where required by code and manufacturer specs.
Large-Format Porcelain Slabs: The “Minimal Grout” Upgrade
If you love the clean look of subway tile but want fewer grout lines, large-format porcelain is one of the most practical modern kitchen backsplash alternatives. It mimics marble, concrete, terrazzo, limestone, and even metal—without the same maintenance demands.
Why it works
- Fewer seams: Often 1–3 slabs can cover an entire wall run.
- Durable and stain resistant: Porcelain is dense and hardwearing.
- Easy to clean: Less grout equals faster wipe-downs.
Design recommendations
- Choose a matte finish for a softer, more forgiving surface that hides smudges.
- For a high-end look, bookmatch veining behind the range as a focal point.
- Use a thin, color-matched grout at seams; keep lines tight and intentional.
Cost range
- Material: $15–$50 per sq. ft. (premium designs can be higher)
- Installed: $40–$120+ per sq. ft. (slab handling and fabrication increase labor)
Maintenance
Use a pH-neutral cleaner and a microfiber cloth. Avoid abrasive pads on polished finishes.
Quartz or Stone Full-Height Backsplash: Seamless and Timeless
One of the most cohesive kitchen renovation moves is extending your countertop material up the wall. Quartz is popular for its consistency and low maintenance; natural stone offers depth and variation that can’t be replicated.
Best for
- Homeowners who want a sleek, continuous look
- Kitchens with busy countertops (the seamless backsplash calms the visual field)
- Designs aiming for timeless functionality over pattern-heavy trends
Material comparison
- Quartz: Low porosity, stain resistant, consistent patterning; avoid placing directly behind high-heat areas without proper clearance.
- Granite: Strong and heat resistant; sealing recommended.
- Marble: Beautiful, softer and more porous; can etch with acids (lemon, vinegar).
- Quartzite: Often harder than marble and more heat tolerant; still benefits from sealing.
Cost range
- Installed: $60–$200+ per sq. ft. depending on material, thickness, and fabrication
Pro layout tip
Plan for outlet drilling and seam placement early. A poorly placed seam can break the visual flow more than grout ever would.
Zellige and Handmade-Look Tile: Warm Texture with Artisan Character
Zellige-style tiles and handmade ceramics bring a lived-in, luminous quality that standard subway tile can’t match. Their slight irregularities play beautifully with under-cabinet lighting—perfect for today’s trend toward warmer, more tactile kitchens.
Recommended looks
- 2x6, 4x4, or 5x5 tiles in soft white, sand, sage, or inky blue
- Vertical stack for modern height
- Single-wall statement behind the range with simpler finishes elsewhere
Budget considerations
- Material: $12–$40+ per sq. ft. (authentic handmade tends to be higher)
- Installed: $25–$80+ per sq. ft. (labor increases due to variation and alignment)
Maintenance advice
Use a grout color that complements variation (mid-tone grays and warm beiges are forgiving). Seal grout well; consider epoxy grout for high-splash zones. Wipe spills promptly to prevent staining in unglazed or highly textured finishes.
Statement Stone Mosaic (Used Strategically): Small Tile, Big Impact
Mosaics aren’t off the table—they just work best when used intentionally. Instead of covering every wall, try mosaics in a single feature area where you want texture and sparkle.
Where mosaics shine
- Behind the range as a “jewel box” moment
- In a coffee nook or bar area
- On a small wall between window and cabinet runs
Smart layout approach
- Frame mosaics with a clean field tile or slab for contrast.
- Choose larger mosaic pieces (1x4, 2x2) for fewer grout lines than tiny penny rounds.
Cost range
- Material: $10–$60+ per sq. ft.
- Installed: $25–$100+ per sq. ft. (small formats = more labor and grout)
Back-Painted Glass: Ultra-Clean, Light-Boosting, and Modern
Back-painted glass panels are a sleek alternative for contemporary kitchens. They reflect light, come in nearly any color, and wipe clean faster than most tiled surfaces.
Best for
- Modern or minimalist kitchens
- Homeowners who want zero grout lines
- Small kitchens needing brightness and visual expansion
Cost range
- Installed: $40–$100+ per sq. ft. depending on thickness, cutouts, and tempering
Maintenance
Use glass cleaner or mild dish soap and water. Avoid abrasive cleaners. Make sure the panel is tempered, and confirm heat requirements for installation behind a cooktop.
Stainless Steel or Metal Panels: Pro-Kitchen Practicality
Metal backsplashes—especially stainless steel—are having a moment again thanks to the popularity of professional-style ranges, mixed metals, and high-function kitchens. This is a backsplash that works as hard as you do.
Design recommendations
- Use stainless steel behind the range paired with warmer materials elsewhere (wood shelves, plaster, stone).
- Choose a brushed finish to reduce visible fingerprints.
- Consider aged brass or copper-look panels as accents if your kitchen leans traditional.
Cost range
- Material: $15–$50 per sq. ft.
- Installed: $30–$90+ per sq. ft. depending on fabrication and wall prep
Maintenance
Wipe with a soft cloth and a stainless cleaner, following the grain. Avoid harsh scrubbers that can scratch.
Waterproof Wall Panels (PVC, Acrylic, Composite): Budget-Friendly and Fast
If your renovation needs speed and a controlled budget, waterproof wall panels can be a strong alternative to tile. Many mimic marble, concrete, or even grout lines, and they install quickly with fewer trades involved.
What to look for
- Heat rating and manufacturer approval for behind-range use
- UV stability if your kitchen gets strong sunlight
- Seam system (tongue-and-groove or trim profiles) for a cleaner finish
Cost range
- Material: $8–$25 per sq. ft.
- Installed: $15–$50 per sq. ft.
Maintenance
Mild soap and water is typically enough. Avoid harsh solvents unless approved by the manufacturer.
Paint, Limewash, or Plaster Looks: Soft, Elevated, and Surprisingly Functional
If you want a backsplash alternative that feels organic and design-forward, a high-performance paint or plaster-look finish can be beautiful—especially in kitchens where you’re not dealing with constant oil splatter. This approach pairs well with open shelving, vintage accents, and warm minimalism.
Best practices
- Use a scrubbable satin or semi-gloss in work zones.
- Consider a clear, wipeable topcoat designed for kitchens.
- Use tile, slab, or metal only behind the range, and paint elsewhere for budget balance.
Cost range
- DIY paint: $50–$200 total for most kitchens
- Professional plaster/limewash: $6–$20+ per sq. ft. depending on skill level and finish system
Maintenance
Wipe gently with a damp cloth; avoid aggressive degreasers unless the finish is specifically rated for it. Touch-ups are usually easier than tile repairs.
Layouts and Design Approaches That Replace Subway Tile (Without Losing Function)
1) Full-height backsplash to the uppers (or ceiling)
- Works with slabs, quartz, stone, or large-format porcelain.
- Creates a more custom, built-in look—especially behind the hood.
2) One statement wall + simple everywhere else
- Place the “wow” material behind the range.
- Use painted drywall, panels, or a quiet slab on remaining walls to control cost.
3) Minimal grout strategy
- Choose tiles 12x24 or larger, or stacked rectangles with tight joints.
- Use epoxy grout in high-splash areas for superior stain resistance (higher labor cost, but excellent performance).
Budget Planning: Where to Spend and Where to Save
Backsplashes can swing from a few hundred dollars to several thousand depending on material and labor. Use your budget where it delivers daily value.
Spend more when:
- You’re doing a full-height focal wall behind the range.
- You want minimal grout and easy cleaning (slabs, quartz, glass).
- Your kitchen has strong natural light that will showcase texture and veining.
Save smart by:
- Using premium materials in a smaller feature zone only.
- Choosing durable mid-range porcelain instead of marble.
- Installing panels in secondary areas (coffee bar, pantry wall).
Common Mistakes to Avoid
- Ignoring heat requirements behind the range. Some panels and finishes are not rated for high heat; verify specs and local code.
- Picking grout color last. Grout can make a beautiful tile look dirty or overly busy. Test a sample board with your lighting.
- Over-texturing the entire kitchen. If your counters, cabinets, and floors already have movement, choose a calmer backsplash for balance.
- Not planning outlet and seam placement. Large-format materials need intentional layouts so cuts look clean and symmetrical.
- Skipping sealing and proper cleaners. Natural stone and some handmade tiles need sealing; harsh cleaners can dull finishes and damage grout.
FAQ: Kitchen Subway Tile Alternatives
What’s the easiest backsplash to clean?
Large-format porcelain, quartz/stone slabs, and back-painted glass are among the easiest because they minimize grout lines. For tiled options, epoxy grout dramatically improves stain resistance.
What’s the most budget-friendly alternative to subway tile?
Paint with a durable, scrubbable finish is the lowest-cost option in low-splash areas. Waterproof wall panels can be a cost-effective middle ground when you want a “tile look” with faster installation.
Are large-format tiles hard to install?
They can be. Large-format porcelain requires flatter walls, careful leveling, and experienced installation to prevent lippage (uneven edges). Budget for skilled labor and proper wall prep.
Can I use marble as a backsplash if I cook a lot?
Yes, but expect patina. Marble can etch from acidic foods and may stain if not sealed and wiped promptly. If you want a similar look with less upkeep, consider marble-look porcelain.
Should the backsplash match the countertop?
Not always. Matching creates a seamless, high-end look, but contrast can be equally timeless. A reliable approach: keep either the countertop or the backsplash visually “quiet,” and let the other be the statement.
How high should I take my backsplash?
Standard height is about 18 inches to the upper cabinets. For a more custom kitchen design, extend the backsplash to the underside of the hood, or run it full-height to the ceiling on a focal wall.
Next Steps: Choose a Backsplash That Fits Your Real Life
Start by mapping your kitchen’s splash and heat zones, then decide whether you want fewer grout lines, more texture, or a cleaner modern surface. Order samples, view them under your actual kitchen lighting (day and night), and finalize grout, trim, and outlet placement before installation begins. If you’re renovating, coordinate the backsplash selection with your countertops, cabinet finish, hardware, and under-cabinet lighting for a cohesive result.
For more kitchen renovation ideas, space-smart organization tips, and design-forward inspiration, explore the latest on thedecormag.com.
More Articles
 Kitchen Integrated Appliance Paneling - The Decor Mag
 Meal Prep Kitchen Design: Functional Ideas (2026)
 How to Design a Kitchen with a Breakfast Bar - The Decor Mag
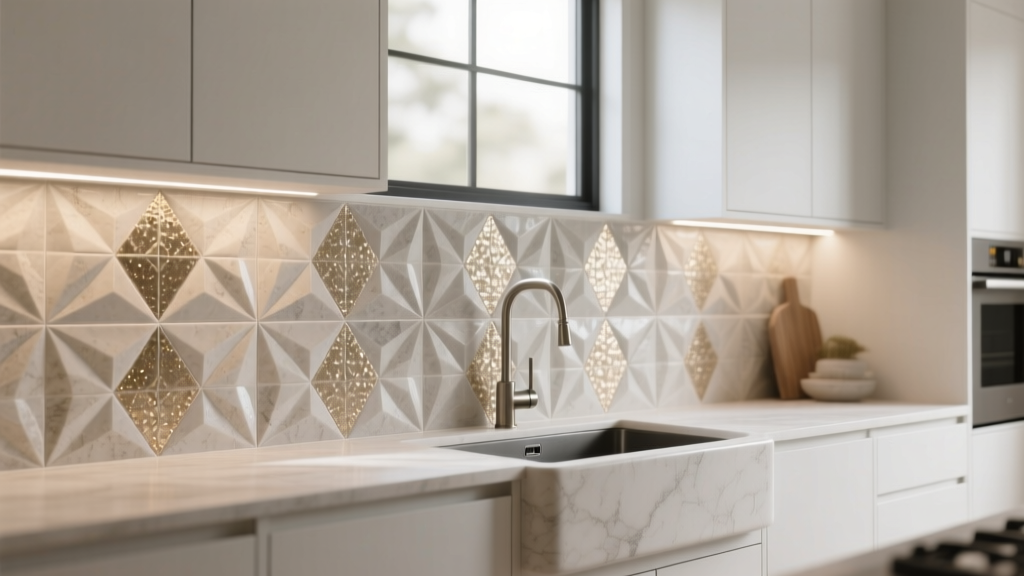 Kitchen Textured Backsplash Tile Trends - The Decor Mag
 Kitchen Fluted Wood Range Hood Cover - The Decor Mag
 Kitchen Stainless Steel Appliance Guide - The Decor Mag
 Best Kitchen Specialty Cooking Oil Storage - The Decor Mag
 Best Kitchen Dutch Oven Storage Ideas - The Decor Mag
 10 Sustainable Kitchen Swaps for 2026
 Baking Station Ideas for Kitchens (2026)