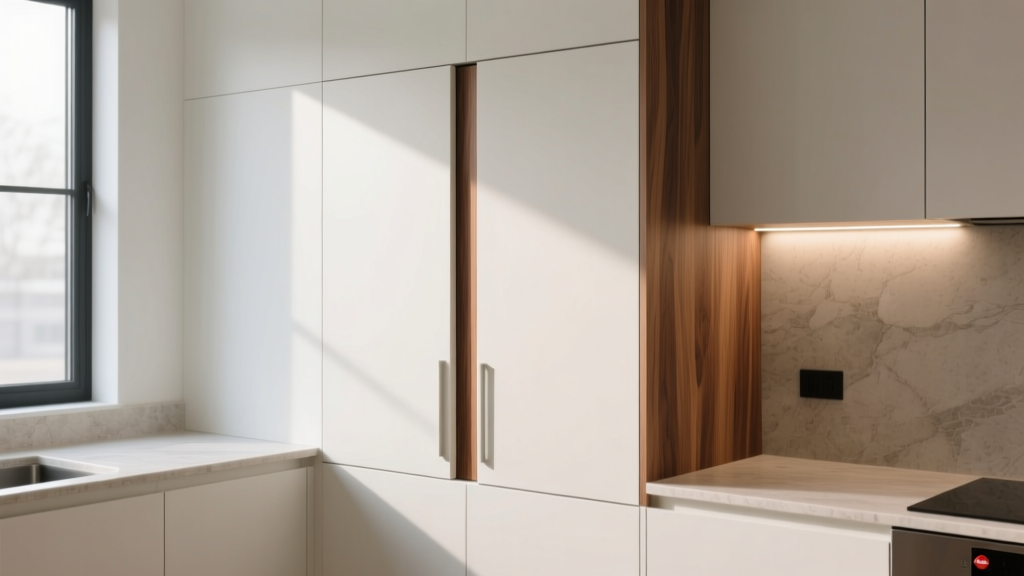
Kitchen Cabinet Fillers for Gaps (2026)
A beautiful kitchen renovation can be derailed by something surprisingly small: the gaps. That sliver between a cabinet run and the wall, the awkward space beside a range, or the uneven opening next to a fridge can make even premium cabinetry look unfinished. Kitchen cabinet fillers solve these everyday design problems by creating clean lines, protecting doors and drawers, and helping appliances fit safely and comfortably.
Fillers also play a major role in functionality. They prevent cabinet doors from banging into walls, provide clearance for drawer pulls, reduce dust traps, and can even become slim storage or a design feature. If you’re updating your kitchen design—whether you’re installing stock cabinets, semi-custom, or going fully custom—choosing the right cabinet fillers is one of the easiest ways to make the space feel intentional, organized, and built to last.
This guide covers how to measure, where fillers belong, what materials work best, budget expectations, and the most common mistakes homeowners make. You’ll also find practical recommendations and today’s design approaches that balance trend-forward style with timeless function.
What Are Kitchen Cabinet Fillers (and Why They Matter)?
Kitchen cabinet fillers are narrow strips of material—typically matching the cabinet finish—installed to close gaps between cabinets and adjacent surfaces. They’re commonly used where walls are out of plumb, where appliances need breathing room, and where doors need swing clearance.
Typical places fillers are used
- Between a cabinet and a wall (especially at the end of a run)
- Between a cabinet and an appliance (ranges, dishwashers, refrigerators)
- At inside corners where two cabinet runs meet
- Beside pantries to allow door clearance and align with trim
- Next to tall cabinets where ceiling or wall irregularities create gaps
What fillers help you avoid
- Doors that can’t open fully or hit the wall
- Drawers that scrape pulls against adjacent surfaces
- Gaps that collect grease, crumbs, and dust
- Appliances forced into tight spaces (a common issue with refrigerators)
- Uneven reveals and “builder-grade” visual breaks in your cabinetry
Measure First: The Key to Choosing the Right Filler Size
Fillers look simple, but choosing the wrong width is one of the most common kitchen renovation headaches. Measure early—ideally before ordering cabinets—and confirm again after demo, because walls often aren’t straight.
Tools you’ll want on hand
- Tape measure
- Level (4 ft is ideal)
- Straight edge or long ruler
- Painter’s tape and pencil for marking
Practical measurement tips (that save real money)
- Check the wall for plumb and bows: Place a level vertically and note how far the wall leans. A wall that’s out by even 1/4 inch can change your filler plan.
- Measure at multiple points: Take measurements at the top, middle, and bottom for base cabinets; and at both ends for uppers. Use the largest gap as your baseline.
- Plan for door and handle clearance: Knobs and pulls add projection. A handle can require extra space to avoid hitting a wall when a door opens past 90 degrees.
- Include scribe allowance: If your filler will be scribed to match an uneven wall, add at least 1/4 inch—often 3/8 inch—to your filler width.
Common filler widths and what they’re used for
- 1/2 inch to 3/4 inch: Micro-gaps; best for minor wall irregularities, not for clearance needs
- 1 inch to 3 inches: Typical cabinet-to-wall fillers for base or upper runs
- 3 inches to 6 inches: Larger gaps, appliance clearance, end-of-run alignment, or design symmetry
- 6 inches to 12 inches+: Often better handled as a pull-out, open shelf, or reworked layout rather than a simple filler
Where You Actually Need Fillers: Layout Scenarios and Best Practices
1) Cabinet run to wall (end-of-run fillers)
The most classic filler location is the end of a cabinet run meeting a wall. Without it, doors and drawers can bind or look cramped.
- Recommended filler: 1 1/2 inch to 3 inch in many kitchens, sized for door swing and wall irregularities
- Pro tip: If the wall is significantly out of plumb, choose a wider filler so you can scribe it cleanly.
2) Inside corners (L-shaped kitchens)
In an L-shaped layout, corner clearance is essential. Two cabinet runs meeting tightly can cause handle collisions and unusable corner storage.
- Recommended approach: Use corner filler(s) or a purpose-built corner cabinet (lazy Susan, blind corner, or corner drawers).
- Typical filler range: 1 inch to 3 inches depending on door style and hardware projection
3) Refrigerator gaps (the most misunderstood one)
Refrigerators need side and top clearance for airflow, door swing, and easy removal for service. Pushing a fridge too tight can shorten its lifespan and cause vibration noise.
- Typical side clearance needs: often 1/2 inch to 1 inch each side, but always check the manufacturer spec
- Door swing clearance: may require extra filler on the hinge side to prevent hitting walls or adjacent cabinetry
- Design trend: “Built-in look” panels are popular, but still require correct ventilation strategy—don’t fake a built-in without the specs.
4) Range and dishwasher clearances
Ranges and dishwashers should fit precisely to avoid gaps that trap grease and crumbs. That said, a slightly wider opening may be needed for older homes where floors and walls aren’t square.
- Good practice: Keep openings true to appliance requirements; use narrow fillers sparingly and only when needed to correct irregularities.
- Maintenance tip: If a filler sits next to a range, use a finish that’s easy to wipe and consider adding a heat-resistant end panel if the range is tight.
5) Pantry and tall cabinet door swing
Tall doors need more clearance than most homeowners expect, especially with modern oversized pulls.
- Recommended filler: often 2 inches to 3 inches between a tall pantry and the wall, depending on trim and hardware
- Timeless principle: prioritize ergonomics—doors should open comfortably without gouging walls or stressing hinges.
Choosing the Right Filler Material: Performance, Finish, and Longevity
Your filler should match cabinet color and sheen as closely as possible, but it also needs to handle real kitchen wear: moisture, cleaning chemicals, and occasional knocks from vacuums and chairs.
Material comparisons
- Solid wood (painted or stained): Best for high-end kitchens and stain-grade cabinetry. Can be scribed cleanly. More stable than you’d think, but may move slightly with humidity. Great for timeless design.
- Plywood with matching veneer: Strong and stable. Works well for stain finishes when properly veneered. Often used when a wider filler is needed.
- MDF (paint-grade): Excellent for smooth painted finishes and crisp profiles. Less ideal near heavy water exposure unless sealed well on all sides.
- Thermofoil/laminate-matched filler strips: Common with budget-friendly cabinet lines. Easy to clean, but edges can chip if poorly finished. Best when ordered from the same cabinet manufacturer for a close match.
Finish and edge details to look for
- Color match: Order fillers from the cabinet brand whenever possible. For custom paint, confirm the paint code and sheen.
- Edge banding quality: Thick, durable edge banding holds up better than thin tape edges.
- Sealed surfaces: Especially near sinks and dishwashers—ask whether the filler is sealed on all sides.
Design Approaches: Make Fillers Disappear (or Make Them Work Harder)
Current kitchen design trends lean clean and tailored—think minimalist Shaker, slim hardware, and integrated storage. Fillers should support that look by keeping spacing consistent and lines intentional.
Option A: Standard flush filler (the “invisible” choice)
A flush filler aligns with the cabinet face frame or door plane. It’s the most common approach and works across virtually all cabinet styles.
- Best for: Shaker kitchens, transitional design, modern slab doors
- Visual goal: consistent reveals, straight runs, no awkward shadows
Option B: Extended stile or wide filler for symmetry
Instead of a tiny strip at one end, a wider filler can balance a run or align with window trim, hood width, or island proportions.
- Best for: kitchens where visual centering matters (range wall, sink wall)
- Tip: If you have a 3–5 inch gap, consider whether it improves the design to make it intentionally wider for symmetry rather than “barely there.”
Option C: Convert a wider filler into functional storage
If your gap is 6 inches or wider, a filler can often become a narrow pull-out for spices, oils, trays, or cleaning tools—one of the smartest organization upgrades in a kitchen renovation.
- Popular product approach: 6-inch or 9-inch base pull-out next to the range for spices and cooking oils
- Best for: small kitchens where every inch matters
- Trend-meets-function: hidden organization that keeps counters clear
Product and Layout Recommendations Homeowners Can Use
Smart filler choices by situation
- Wall end near a doorway: 2–3 inch scribe filler to protect the cabinet edge from traffic
- Range side gap: keep it tight and clean; consider a wider end panel if heat and grease exposure is high
- Refrigerator hinge-side wall: add enough filler for door swing; many layouts benefit from 1 1/2–3 inches or more depending on model
- Inside corner with pulls: verify hardware projection; if using chunky pulls, plan for more filler to prevent collisions
Small but high-impact upgrades
- End panels + fillers: Pairing a finished end panel with the right filler makes a stock kitchen look custom.
- Matching toe-kick return: If you add base fillers, finish the toe-kick cleanly so the run looks continuous.
- Light rail alignment: For upper cabinets, align fillers so under-cabinet lighting and light rails look seamless.
Cost Ranges and Budget Considerations
Cabinet fillers are relatively affordable compared to other parts of a kitchen remodel, but costs can add up with multiple locations, specialty finishes, and additional labor for scribing and finishing.
Typical price ranges (materials only)
- Stock filler strips: $10–$40 each (often 3–4 inches wide, 30–96 inches long depending on cabinet line)
- Manufacturer-matched finished fillers: $30–$120 each depending on finish (painted, stained, specialty)
- Custom wide fillers / applied panels: $80–$250+ depending on material and finish
- Narrow pull-out units (6–9 inch): $150–$600+ for the cabinet; $50–$200+ for organizers (varies widely by quality)
Labor and installation considerations
- Scribing to uneven walls: expect extra time; this is where pros earn their keep
- Painting on site: can reduce match accuracy if not color-managed carefully; factory finishes tend to be more durable
- Hardware clearance planning: mistakes here can cause rework—budget a small contingency for adjustments
Where to spend vs. save
- Spend: visible end-of-run fillers, stain-grade matches, areas near high traffic or appliances
- Save: hidden fillers behind a refrigerator panel or inside less visible corners (as long as function is correct)
Installation and Maintenance Tips for Long-Lasting Results
Installation best practices
- Always pre-finish cut edges: Seal raw wood or MDF edges to prevent swelling and staining.
- Use a scribe strip when needed: A slightly wider filler allows you to trace the wall profile for a tight fit.
- Fasten securely: Fillers are usually attached to the cabinet box/frame, not just the drywall.
- Keep reveals consistent: Align the filler’s front edge with neighboring cabinet faces for a crisp, built-in look.
Maintenance advice by finish
- Painted fillers: Clean with a damp microfiber cloth and mild soap; avoid abrasive pads that dull sheen.
- Stained wood fillers: Use wood-safe cleaners; wipe spills quickly to prevent discoloration near sinks.
- Laminate/thermofoil: Non-abrasive cleaners only; avoid high heat exposure at edges.
Common Mistakes to Avoid
- Ordering cabinets without planning fillers: Even a perfect cabinet list can fail if the run doesn’t account for walls that aren’t square.
- Using fillers to “fix” a bad layout: If you need a 10–12 inch filler, revisit the cabinet sizes or add functional storage instead.
- Forgetting appliance specs: Refrigerator ventilation and door swing are frequent trouble spots.
- Not considering hardware projection: Oversized pulls can collide with walls and adjacent doors without adequate filler space.
- Skipping edge sealing: Unsealed edges near sinks and dishwashers can swell and peel over time.
- Misaligned toe-kicks and panels: A great filler can still look wrong if the base trim stops short or doesn’t return cleanly.
FAQ: Kitchen Cabinet Fillers for Gaps
How wide should a cabinet filler be next to a wall?
Most kitchens need 1 1/2 to 3 inches next to a wall, but the right width depends on door style, handle projection, and how out-of-plumb the wall is. If you plan to scribe the filler, add at least 1/4 inch extra width for trimming.
Do I need fillers for upper cabinets too?
Often, yes. Upper cabinet fillers help with alignment, crown molding runs, and keeping doors from hitting adjacent walls. They’re especially useful at the end of a wall cabinet run or near a tall pantry.
Can I use caulk instead of a filler strip?
Caulk works only for tiny gaps (think hairline to a few millimeters) and won’t solve clearance or alignment issues. For anything that affects door swing, appliance fit, or visual symmetry, use a proper filler.
What’s the difference between a filler and an end panel?
A filler closes a gap and provides clearance. An end panel finishes the exposed side of a cabinet so it looks like furniture. Many high-end, timeless kitchen designs use both: a panel for the side, plus a filler to handle wall irregularities and spacing.
When should I turn a filler into a pull-out?
If the gap is 6 inches or wider and it’s in a useful location (next to
More Articles
 How to Design a Kitchen That Feels Collected - The Decor Mag
 Kitchen Textured Backsplash Tile Trends - The Decor Mag
 Chef Kitchen Design: Transform Your Space (2026)
 Kitchen Cabinet Interior Finish: Best Choices (2026)
 Kitchen Plaster Range Hood Organic Look - The Decor Mag
 Kitchen Soapstone Countertop Guide - The Decor Mag
 Kitchen Countertop Overhang Rules (2026)
 Best Kitchen Prep Bowl Collection Display - The Decor Mag
 Family Dining Tables: Durability Meets Design
 Best Kitchen Wrap Storage Solutions - The Decor Mag