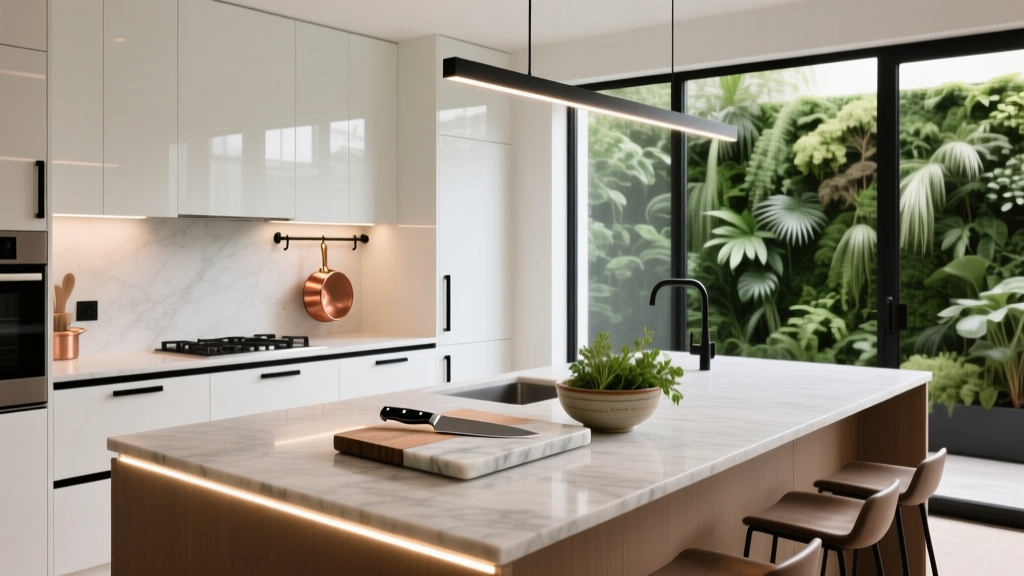
Chef Kitchen Design: Transform Your Space (2026)
A “chef-like” kitchen isn’t about copying a restaurant. It’s about building a space that supports real cooking: clear prep zones, powerful ventilation, durable materials, smart storage, and lighting that makes every task easier. Whether you cook nightly or love hosting, the right kitchen design turns daily routines into something smoother—and a lot more enjoyable.
Homeowners often renovate for looks first, then discover the space still feels cramped, messy, or inefficient. A chef space solves that by prioritizing workflow and performance without sacrificing style. The best part: you don’t need a commercial range or a full gut remodel to get there. Strategic upgrades—layout tweaks, storage planning, better surfaces, and a few pro-inspired features—can deliver that “everything has a place” feeling.
This guide breaks down practical, renovation-ready steps to create a kitchen that performs like a chef’s workspace, with measurements, material comparisons, budget ranges, and the common mistakes that derail even the prettiest kitchen remodels.
Start with the “Chef Workflow”: Zones, Not Just the Triangle
The classic kitchen work triangle (sink–stove–fridge) still matters, but today’s best kitchen renovation plans use work zones—because real cooking involves multiple tasks at once.
The 5 essential kitchen zones
- Prep zone: counter space near sink and fridge, with knives, boards, bowls, and mixing tools within arm’s reach.
- Cooking zone: range/cooktop, ovens, spices, oils, utensils, and ventilation.
- Cleaning zone: sink, dishwasher, trash/recycling/compost, dish storage.
- Storage zone: pantry, dry goods, small appliances, everyday dishware.
- Serving/hosting zone: island seating, beverage station, plate staging area.
Chef-space measurements that make a real difference
- Walkway clearance: 42 inches minimum for one cook; 48 inches if two people cook together (common in “chef-style” kitchens).
- Island clearance: 42–48 inches from island to surrounding counters; avoid less than 40 inches if you’ll open appliances opposite.
- Landing zones: aim for 15–18 inches of counter next to the refrigerator and 12–15 inches next to the cooktop/range for safe set-down space.
- Prep counter length: target 36 inches minimum, with 48+ inches ideal if you frequently chop and assemble meals.
- Counter heights: standard is 36 inches; consider a 38-inch prep height for taller cooks (especially helpful for chopping), if custom cabinetry is in scope.
Trend + timeless principle: Current kitchen design trends favor open layouts and social islands, but functionality wins when zones stay intact. Keep prep and cooking paths clear, even in an open-concept plan.
Choose a Layout That Supports Real Cooking
Great chef kitchens reduce steps and prevent bottlenecks. Your best layout depends on footprint, plumbing locations, and whether you want multiple cooks working at the same time.
Best-performing layouts for chef-like functionality
- Galley kitchen: One of the most efficient layouts. Keep aisles at 42–48 inches. Add tall pantry storage at one end for a streamlined “workshop” feel.
- L-shape + island: Popular for renovations. Ensure island clearance is generous and the island doesn’t interrupt the prep-to-cook route.
- U-shape: Excellent for zones and landing areas. Watch corner cabinet planning so storage stays usable.
- One-wall + island: Works well in smaller homes. Invest in tall storage, strong ventilation, and clever organization to mimic pro efficiency.
Smart renovation approach: keep plumbing, upgrade performance
Moving plumbing and gas lines can add significant cost. If your layout is “mostly right,” spend budget on chef-space upgrades like ventilation, storage hardware, lighting, and durable surfaces.
Budget reality check (typical ranges):
- Light refresh: $2,500–$10,000 (lighting, hardware, organizational upgrades, maybe a new sink/faucet)
- Mid-range kitchen renovation: $25,000–$60,000 (semi-custom cabinets, new counters, appliances, flooring, lighting)
- Major remodel: $70,000–$150,000+ (layout changes, custom cabinetry, premium appliances, upgraded electrical/plumbing)
Surfaces and Materials: Built for Heat, Knives, and Daily Use
A chef space feels confident: you can cook hard without worrying about stains, chips, or fussy maintenance. Choose materials that match how you cook.
Countertops: performance comparison
- Quartz (engineered stone): Highly stain-resistant, low maintenance, consistent patterns. Great for busy kitchens. Cost: $60–$120/sq ft installed. Watch: can be sensitive to very high heat—use trivets.
- Quartzite (natural stone): Excellent heat resistance and durability, more variation. Cost: $80–$200/sq ft installed. Maintenance: seal periodically; check porosity.
- Granite: Durable, heat-friendly, classic. Cost: $50–$120/sq ft installed. Maintenance: periodic sealing depending on stone.
- Butcher block: Warm and chef-approved for prep, especially as an accent section. Cost: $40–$100/sq ft installed. Maintenance: oil regularly; avoid standing water.
- Stainless steel: The most “pro kitchen” look and feel; heat-proof and hygienic. Cost: $100–$250/sq ft installed (varies widely). Watch: shows scratches/fingerprints; choose brushed finishes.
Backsplash and wall finishes
- Porcelain tile: Durable and easy to clean; a timeless option. Larger-format tiles reduce grout lines.
- Slab backsplash (matching counter): A current trend that looks seamless and wipes clean quickly. Higher cost but very low visual clutter.
- Stainless behind the range: A chef-space favorite for easy wipe-down.
Flooring that can handle spills
- Porcelain tile: Extremely durable, water-resistant, great for high traffic. Cost: $8–$25/sq ft installed.
- Luxury vinyl plank (LVP): Comfortable, budget-friendly, water-resistant. Cost: $4–$12/sq ft installed.
- Engineered hardwood: Warmer look; better moisture tolerance than solid wood. Cost: $10–$20/sq ft installed.
Maintenance tip: Choose darker grout or a stain-resistant grout sealer for tile backsplashes. In real cooking kitchens, bright white grout near the cooktop can discolor over time.
Appliances That Create a Chef-Like Experience (Without Overbuying)
Chef-space upgrades are about the right tools, not the most expensive brands. Prioritize cooking performance, ventilation, and refrigeration ergonomics.
Range vs. cooktop + wall oven
- Pro-style range: Visually impactful and convenient; often higher BTU burners. Cost: $2,500–$15,000+.
- Cooktop + wall oven(s): Flexible, accessible, and great for baking/hosting. Cost: $2,000–$10,000+ combined depending on brands and features.
Ventilation: the most overlooked “chef” feature
If you want a kitchen that feels like a real cooking space, don’t skimp on the range hood.
- Hood width: at least as wide as your cooktop; ideally 3 inches wider on each side for better capture.
- CFM guidance: Many 30-inch ranges do well with 400–600 CFM; heavy sautéing, wok cooking, or high-BTU ranges may benefit from 900+ CFM (check local code and make-up air requirements).
- Ducting: Use smooth, rigid ducting when possible; minimize bends for stronger airflow and less noise.
Cost range: $600–$3,500 for many quality hoods, plus installation and ductwork.
Dishwasher and refrigeration upgrades that feel “pro”
- Quiet dishwasher (40–45 dBA): makes open-concept kitchens more livable.
- French-door fridge with wide shelves: better for sheet pans and meal prep containers.
- Optional upgrade: a beverage fridge or drawer refrigerator for hosting and keeping the main fridge organized.
Storage and Organization: Where Chef Kitchens Really Win
A chef-like kitchen is calm because tools are accessible, clutter is hidden, and everything has a designated home.
Must-have cabinet features (high impact, moderate cost)
- Deep drawer bases: use for pots, pans, and lids—easier than lower cabinets.
- Pull-out trash/recycling: place near prep zone. Consider a triple-bin (trash/recycling/compost) if space allows.
- Roll-out shelves: for lower cabinets to eliminate “lost” items in the back.
- Tray dividers: vertical storage for sheet pans and cutting boards.
- Dedicated spice storage: a narrow pull-out near the cooktop prevents countertop clutter.
Cost guide: Cabinet organizers typically run $50–$300 per insert (trash pull-outs and heavy-duty pan drawers can be higher). These add up, but they’re often more valuable day-to-day than premium finishes.
Pantry planning that supports meal prep
- Pantry depth: 12 inches deep keeps items visible and prevents overbuying; deeper pantries should use roll-outs.
- Clear containers + labels: a current trend that’s also practical. Choose stackable, airtight containers for flour, rice, pasta, and snacks.
- Appliance garage or lift shelf: hide toaster and blender while keeping them accessible.
Knife storage, safely
- Drawer knife insert: clean look, safer than a countertop block.
- Magnetic wall strip: very chef-forward, but place away from high-traffic bumps and keep children in mind.
Lighting: The Fastest Way to Make a Kitchen Feel Professional
Great lighting makes prep easier, improves safety, and elevates the entire kitchen design.
Layer your lighting (the chef-space formula)
- Ambient lighting: recessed or ceiling fixtures for overall brightness.
- Task lighting: under-cabinet LED strips to remove shadows on countertops.
- Accent lighting: in glass cabinets or toe-kick areas for a high-end look.
Specs to look for:
- Color temperature: 2700K–3000K for warm, inviting; 3000K–3500K for a cleaner, modern feel that still flatters finishes.
- CRI: 90+ makes food and surfaces look more accurate.
- Dimmers: essential in open kitchens for transitioning from cooking to dining.
Cost range: Under-cabinet LED systems often cost $200–$1,200+ depending on size and whether they’re hardwired.
Chef Details That Add Function (and Look Great Doing It)
Small design approaches can make a kitchen renovation feel intentional and elevated.
- Faucet with pull-down sprayer: choose a solid brass valve and a finish that resists water spots (brushed nickel and stainless are forgiving). Cost: $150–$600+.
- Single-bowl workstation sink: fits sheet pans and large pots; accessories like colanders and cutting boards streamline prep. Cost: $300–$1,200+.
- Pot filler (optional): convenient, but only if you genuinely fill large pots often. Cost: $200–$800+ plus plumbing.
- Heat-resistant landing area: a small section of stone or stainless near the oven/range for hot pans.
- Open shelving (use sparingly): trend-forward, but best limited to frequently used items; too much becomes visual clutter.
Budget Strategy: Spend Where a Chef Will Feel It
If you’re prioritizing a chef-like kitchen on a realistic budget, focus on performance upgrades first.
High-ROI chef upgrades (best daily impact)
- Ventilation upgrade (better capture, less lingering odor)
- Storage hardware (deep drawers, pull-outs, trash station)
- Task lighting (under-cabinet LEDs + dimmers)
- Durable countertops (quartz/quartzite/granite)
- Workstation sink + quality faucet
Where to save without sacrificing function
- Choose semi-custom cabinets with smart interiors over fully custom doors.
- Use a tile backsplash instead of full slabs, and allocate savings to the hood.
- Mix finishes (for example, simple cabinet hardware) and spend on one statement element like lighting or a standout range.
Common Mistakes That Prevent a Kitchen From Feeling Like a Chef Space
- Undersized ventilation: a beautiful range with a weak hood leads to odors, grease film, and discomfort.
- Not enough landing space: tight counters around the fridge or range create clutter and unsafe set-down zones.
- Choosing style over cleanability: high-contrast grout, porous counters without sealing, and too many open shelves add maintenance.
- Ignoring workflow: placing the trash far from prep, storing pots away from the cooktop, or forcing cross-traffic through cooking areas.
- Over-islanding: an oversized island can choke clearances and turn the kitchen into an obstacle course.
- Insufficient outlets: a chef space needs power where you prep; plan outlets on islands and key counter runs (per code and with a qualified electrician).
FAQ: Chef-Like Kitchen Design
What’s the minimum kitchen size to make it feel like a chef space?
You can create a chef-like kitchen in a small footprint by prioritizing workflow and storage. A galley kitchen with a 42–48 inch aisle, strong ventilation, and deep drawer storage often feels more “pro” than a larger but poorly organized layout.
Is a pro-style range worth it for most homeowners?
It depends on how you cook. If you regularly sear, sauté, and use multiple burners at high heat, you’ll appreciate it. Many homeowners get a bigger chef impact by upgrading the hood ventilation, cookware storage, and prep lighting first.
Which countertop is most chef-friendly?
Quartz is the easiest for most households because it’s low maintenance and stain-resistant. If you want maximum heat resistance and a natural look, quartzite is a strong choice (with periodic sealing). For a true professional vibe, stainless steel is excellent but shows wear more visibly.
How many inches should be between the island and cabinets?
Plan 42 inches minimum, and 48 inches if two people often cook together or if appliances open into that aisle.
What are the best current kitchen design trends that still feel timeless?
Slab backsplashes (less grout to clean), mixed materials (stone + wood accents), warmer metal finishes, and concealed storage (appliance garages, integrated panels) are trending now and also support long-term functionality.
How do I keep a chef-style kitchen from looking too industrial?
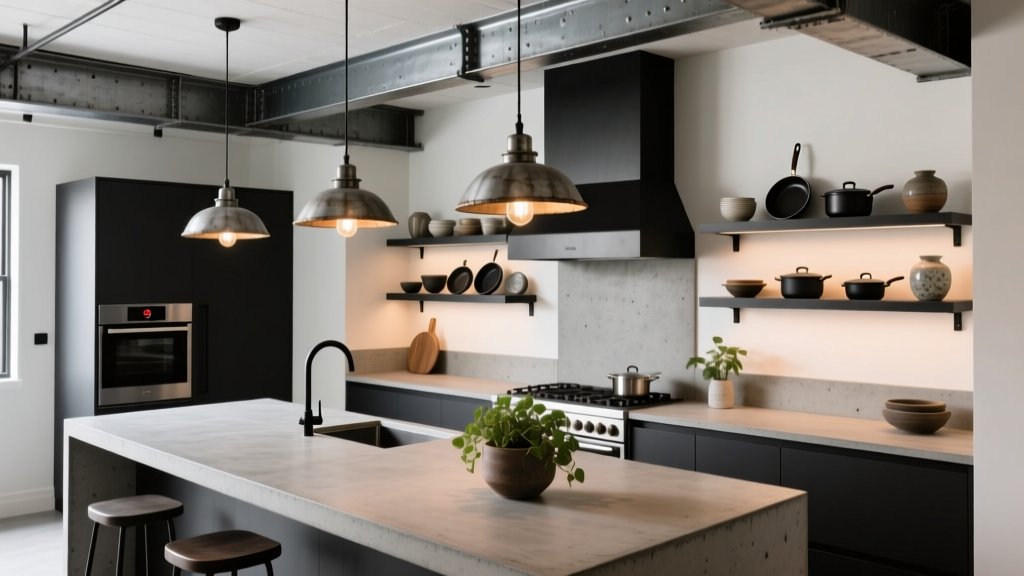
Balance performance features with warm elements: wood stools, softer paint tones, textured tile, and layered lighting. You can also choose a quieter, more refined hood design while keeping CFM and ducting performance high.
Actionable Next Steps for Your Chef-Like Kitchen
To make your kitchen feel like a chef space, start with a quick assessment and a prioritized plan:
- Map your zones (prep, cook, clean, store, serve) and identify the biggest bottleneck.
- Measure clearances (aim for 42–48 inches in walkways and around the island).
- Upgrade ventilation if you cook frequently—this is the fastest “pro kitchen” transformation.
- Rework storage with deep drawers, pull-outs, and a dedicated trash station near prep.
- Add task lighting under cabinets to make prep easier and the kitchen brighter.
If you’re ready for more kitchen renovation inspiration, layout ideas, and organization strategies, explore more guides and trend-forward design features on thedecormag.com.
More Articles
 Kitchen Arched Doorway to Kitchen Design - The Decor Mag
 Best Kitchen Trash and Recycling Drawer - The Decor Mag
 Kitchen Natural Stone Backsplash Guide - The Decor Mag
 The Ultimate Sustainable Kitchen Guide: Practical, Proven, and Planet-Positive Actions
 Open Concept Kitchen Renovation: Pre-Demolition Checklist
 Kitchen Pantry Organization: Pro Tips (2026)
 How to Choose Kitchen Backsplash Grout Color - The Decor Mag
 Kitchen Curved Island Design Trends - The Decor Mag
 Industrial Kitchen Design Inspiration - The Decor Mag
 Kitchen Cabinet Fillers for Gaps (2026)