Kitchen Butcher Block Countertop Care - The Decor Mag
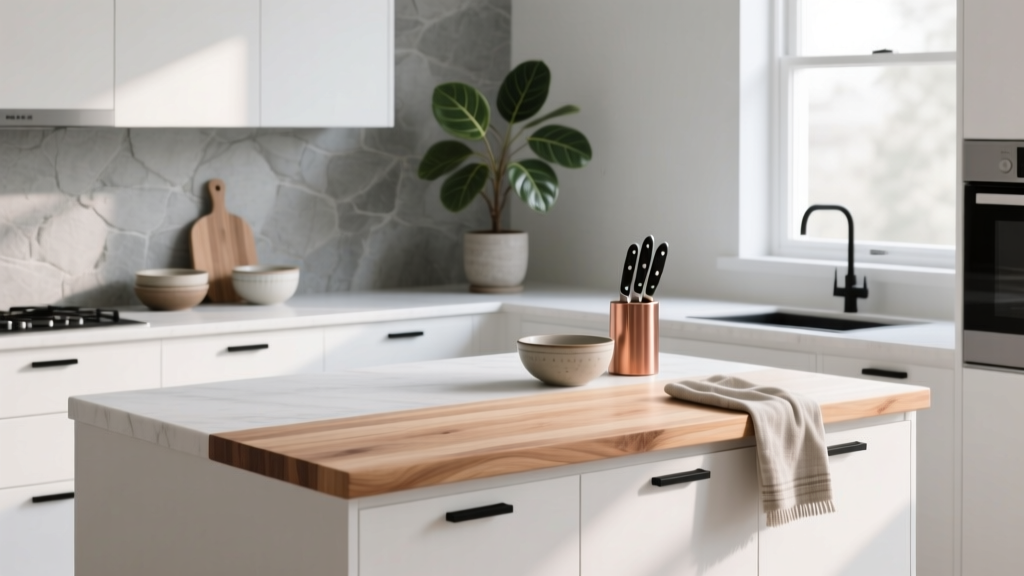
Butcher block countertops have a way of making a kitchen feel instantly warmer and more lived-in. They’re a favorite in renovation plans that lean toward modern farmhouse, Scandinavian minimalism, Japandi calm, and even contemporary spaces that need a natural counterpoint to sleek cabinetry. Beyond style, butcher block offers real functionality: it’s comfortable to work on, quieter than stone, and forgiving on dishes.
That said, wood is a living material. It expands and contracts with seasonal humidity, it can stain, and it can scorch. The good news is that butcher block is also one of the most repairable countertop materials—often a light sanding and re-oiling brings it right back. With the right finish choice, routine maintenance, and smart kitchen design decisions, you can keep your butcher block looking beautiful for years.
This guide covers butcher block countertop care from the renovation stage to daily habits, including recommended finishes, product ideas, cost ranges, common mistakes to avoid, and practical kitchen organization tips that protect your investment.
Why Butcher Block Countertops Are Worth Caring For
In kitchen design, butcher block sits at the intersection of beauty and utility. It’s also one of the few countertop materials you can restore without calling a specialist.
- Repairable: Small burns, knife marks, and stains can often be sanded out.
- Design-flexible: Works with painted cabinets, natural wood cabinetry, mixed materials (like quartz + butcher block), and open shelving trends.
- Comfort-forward: A slightly softer work surface than stone; great for baking stations.
- Budget-friendly upgrades: A butcher block island top can elevate a kitchen renovation without the cost of full-stone coverage.
Choose the Right Butcher Block: Wood Species, Construction, and Thickness
Best Wood Species for Kitchens (and How They Compare)
Wood choice affects durability, appearance, and maintenance frequency. Here are common options homeowners consider during kitchen renovations:
- Hard Maple: Tight grain, durable, classic light tone. Great for high-use prep areas. Often considered the benchmark for butcher block.
- Walnut: Rich, dark color; hides stains well but shows scratches if finished with film finishes. Popular in modern and mid-century kitchens.
- White Oak: Strong and stable with a prominent grain; pairs well with trending warm neutrals and natural textures.
- Beech: Fine, consistent grain; slightly more movement than maple depending on environment.
- Acacia (often budget-friendly): Dramatic grain variation; hardness varies by product quality and sourcing—inspect carefully.
Edge Grain vs. End Grain vs. Face Grain
Construction impacts both performance and price:
- Edge grain: Long strips turned on edge. A strong, stable choice for most kitchens; good balance of cost and durability.
- End grain: “Checkerboard” look with wood fibers oriented vertically. Best for heavy chopping and professional-style prep, but pricier and thicker.
- Face grain: Wide boards laid flat. Often the most affordable, but typically more prone to showing wear.
Recommended Thicknesses and Overhangs
- Standard thickness: 1.5" is a common sweet spot for kitchens (durable, substantial, and widely available).
- Statement thickness: 2" to 3" creates a high-end look, especially for islands and waterfall-style edges (more complex to execute with wood).
- Typical overhang: 1" to 1.5" beyond cabinet faces. For seating, plan 12" to 15" overhang for knees, and confirm support brackets.
Finish Choices: The Biggest Decision for Care and Longevity
Your finish determines how you clean, how often you maintain, and whether the surface is safe for direct food prep. There are two main approaches: penetrating oil finishes and film-forming finishes.
Option 1: Oil (Penetrating) Finish for a Natural, Repairable Surface
Best for: Homeowners who want a natural look, easy spot repairs, and the option to do light cutting (with a cutting board still recommended).
- Food-grade mineral oil: Simple and affordable; requires more frequent reapplication.
- Hardwax oils (often plant-based blends): More durable than straight mineral oil and offers better water resistance while still looking natural.
Care profile: Regular oiling is part of ownership—simple, but ongoing.
Option 2: Sealed (Film) Finish for Higher Water Resistance
Best for: Homeowners who want a more “wipe-and-go” surface, especially around sinks.
- Water-based polyurethane: Clear, durable, and lower odor; can look slightly more “coated.”
- Oil-based polyurethane: Warm tone and strong protection; longer cure time and stronger odor.
- Conversion varnish/pro-grade finishes: Typically shop-applied; very durable but harder to repair.
Care profile: Less frequent maintenance day-to-day, but repairs are more involved (often sanding and refinishing a larger area to blend).
Which Finish Is Right for Your Kitchen Layout?
- Butcher block on an island or baking station: Oil finish is a practical, popular choice—easy to refresh after parties and heavy prep.
- Butcher block around a sink: Consider a film finish or use wood as a secondary surface elsewhere. If you love the look at the sink, commit to meticulous wipe-down habits and frequent maintenance.
- Mixed-material countertops trend: Pair durable quartz near the sink and range with butcher block on the island to reduce water/heat stress while keeping the warmth of wood.
Daily Cleaning and Weekly Habits That Keep Wood Looking New
Daily Cleaning (2 Minutes)
- Wipe crumbs and spills quickly using a soft cloth.
- Use mild soap + warm water for sticky messes.
- Dry immediately—don’t let water sit, especially near seams and sink cutouts.
Skip these: steam mops, abrasive scrub pads, bleach, ammonia-heavy sprays, and vinegar used frequently (occasional diluted use is usually fine, but routine acid exposure can dull certain finishes).
Weekly Refresh (Especially for Oil-Finished Tops)
- Check for dry-looking areas (they appear lighter or feel rough).
- Spot-oil high-use zones like the prep area and near the coffee station.
- Do a quick inspection around sink edges and seams.
Oiling Schedule and Step-by-Step Maintenance (Oil-Finished Butcher Block)
A consistent schedule is the secret to butcher block longevity. Plan more frequent oiling early on, then taper off.
Recommended Oiling Schedule
- New installation: Oil every 3–4 days for the first 2 weeks (or follow manufacturer guidance).
- Months 1–3: Oil weekly.
- After 3 months: Oil every 3–6 weeks depending on climate and use.
- Dry climates/winter heating: Expect to oil more often.
How to Oil Butcher Block (Simple Method)
- Clean and dry the countertop thoroughly.
- Apply oil with a lint-free cloth, working with the grain. Aim for a thin, even coat.
- Let it soak for 20–30 minutes (longer for very dry areas).
- Wipe off excess to avoid a sticky surface.
- Allow to cure overnight before heavy use (especially with hardwax oils).
Product recommendations (types to look for):
- USP-grade mineral oil (food-safe, widely available)
- Beeswax + mineral oil blend for extra water resistance (great for edges and end grain)
- Hardwax oil formulated for countertops if you want longer-lasting protection with a natural look
Protecting Butcher Block from Water, Heat, and Stains
Water: The #1 Threat (Especially Near Sinks)
- Use a drying mat and keep it washable. Better yet, choose a mat with airflow channels to avoid trapping moisture.
- Seal cutouts and edges (sink cutouts, dishwasher edges, and seams) thoroughly during installation.
- Wipe the sink rim area daily—a small habit that prevents dark water marks.
Design tip: If your renovation allows, consider placing butcher block on an island while choosing quartz or granite around the sink run. This layout protects the wood while keeping the kitchen warm and inviting.
Heat: Always Use Trivets
- Keep a trivet within 12" of the range and near the oven landing zone.
- Use a dedicated “hot pan station” (a stone trivet or stainless insert) if your kitchen layout funnels traffic through one countertop corner.
Stains and Odors: Address Quickly
- For food stains: Make a paste of baking soda + water; gently rub with the grain, wipe, dry, then re-oil.
- For lingering odors (on oil-finished tops): Rub with coarse salt and half a lemon, wipe clean, dry, then re-oil.
Sanding and Spot Repair: The Advantage of Real Wood
One reason butcher block remains a timeless, functional choice is that it can be renewed. For homeowners who love a kitchen that evolves, this is a major win.
Quick Fixes for Scratches and Water Marks
- Lightly sand the affected area with 180–220 grit sandpaper, following the grain.
- Feather the edges so the repair blends into the surrounding surface.
- Remove dust with a dry microfiber cloth (avoid wet tack cloths on bare wood).
- Reapply oil (or the original finish type) to match sheen.
When to sand the whole top: If the wear pattern is uneven (common around prep zones) or you’re changing the finish. Full resurfacing is usually a weekend project.
Kitchen Design and Organization Tips That Reduce Wear
Butcher block care isn’t just about products—it’s also about how your kitchen is set up. Smart kitchen organization reduces daily stress on the surface.
- Create a dedicated prep zone: Keep knives, boards, and compost bin in a 24"–36" stretch so spills and chopping stay contained.
- Add a pull-out trash/compost cabinet under the prep area to prevent drips across the counter.
- Use a cutting board system: One large board (at least 18" x 24") protects the wood and speeds cleanup.
- Plan landing zones: Leave 15"–18" of clear counter near the fridge and oven to avoid hot-pan placement directly on wood.
- Upgrade the sink setup: A sink grid, roll-up rack, and fitted colander reduce standing water on nearby counters.
Cost Ranges and Budget Considerations
Butcher block is often chosen for its approachable price point compared to stone, but costs vary by wood type, thickness, and installation complexity.
Typical Cost Ranges
- Material (stock or prefab): $25–$60 per square foot (often acacia, birch, beech, thinner tops)
- Mid-range hardwood and thicker builds: $60–$120 per square foot (common for maple, oak, walnut in 1.5" thickness)
- Premium/custom end grain or specialty installs: $120–$200+ per square foot
- Installation: $300–$1,200+ depending on number of seams, sink cutouts, and finish work
Budget-Smart Approaches
- Use butcher block selectively: Island top or coffee bar + quartz on perimeter counters is a popular renovation strategy.
- Choose edge grain for value: It offers excellent durability without the cost of end grain.
- Plan fewer seams: Seams are both a cost driver and a moisture risk area.
Common Mistakes to Avoid
- Installing butcher block tight to walls without expansion space: Wood needs room to move. Your installer should allow a small gap (often covered by backsplash or trim) so seasonal swelling doesn’t cause buckling.
- Using butcher block as a heat landing zone: One hot pan can permanently scorch the finish and wood fibers.
- Letting water sit near sink cutouts: This is where black marks and swelling begin.
- Mixing finishes without a plan: Applying oil over a polyurethane-coated top (or vice versa) can cause adhesion issues and uneven sheen.
- Over-oiling: Excess oil left on the surface turns sticky and attracts dust. Thin coats, wiped dry, work best.
- Skipping underside sealing on new installs: Ideally, all sides should be sealed to slow moisture exchange and reduce cupping.
FAQ: Kitchen Butcher Block Countertop Care
How often should I oil butcher block countertops?
For new countertops, expect frequent oiling early on (every few days to weekly). After the first few months, most kitchens do well with oiling every 3–6 weeks. If the surface looks dry or feels rough, oil sooner.
Can I put butcher block next to a sink?
Yes, but it requires stricter habits: wipe water daily, keep seams sealed, and maintain the finish. Many homeowners choose a mixed countertop layout—stone at the sink, butcher block on the island—for easier long-term care.
Is butcher block sanitary for food prep?
When properly maintained and cleaned, wood can be a safe prep surface. Use a cutting board for raw proteins, clean spills quickly, and keep the surface well-oiled or properly sealed. Avoid leaving standing moisture that can invite bacteria growth.
What’s better for butcher block: mineral oil or polyurethane?
Mineral oil (and hardwax oils) keeps a natural feel and is easy to repair, but needs regular reapplication. Polyurethane offers stronger water resistance with less routine maintenance, but repairs are harder and the surface is more “coated.” Your kitchen workflow and placement (near sink vs. island) should guide the choice.
How do I remove a black water stain from butcher block?
Light sanding is often the most reliable fix. Sand with the grain using 180–220 grit until the discoloration fades, remove dust, then re-oil or reapply your finish. If stains persist, you may need deeper sanding or a full refinish, especially near sink edges.
Can I cut directly on butcher block countertops?
You can, but it’s not the best way to keep the surface looking new. Direct cutting leaves knife marks and increases maintenance. A large cutting board (around 18" x 24") protects both the wood and your knives.
Next Steps: Keep Your Butcher Block Beautiful for the Long Haul
Start by identifying your current finish—oil or sealed—then match your care routine to it. Set up the kitchen with protection in mind: a trivet near the range, a drying setup by the sink, and a dedicated prep zone with a large cutting board. If your countertops are new, commit to the first 90 days of maintenance; that early consistency pays off with better stain resistance and a richer patina.
For more kitchen renovation ideas, countertop comparisons, and organization upgrades that make everyday cooking easier, explore the latest inspiration on thedecormag.com.
More Articles
 Kitchen Waterfall Island Design Ideas - The Decor Mag
 Best Kitchen Pantry Door Ideas - The Decor Mag
 Best Essentials Inspiration: Building a Thoughtful, Functional, and Joyful Kitchen
 Minimalist Alternatives to Essential Kitchen Tools: Smart Substitutions That Reduce Clutter Without Compromising Performance
 Kitchen Leathered Quartzite Countertops - The Decor Mag
 Kitchen Statement Stone Slab Island - The Decor Mag
 Family Dining Tables: Durability Meets Design
 Kitchen Terrazzo Floor Tile Guide - The Decor Mag
 Best Kitchen Table Linen Storage - The Decor Mag
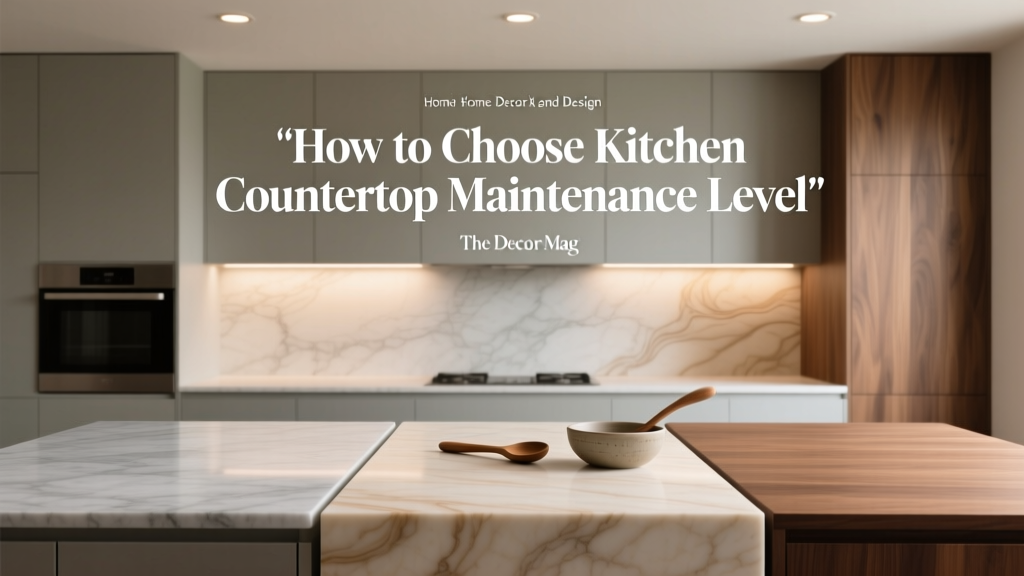 Kitchen Countertop Maintenance: Choose Your Level