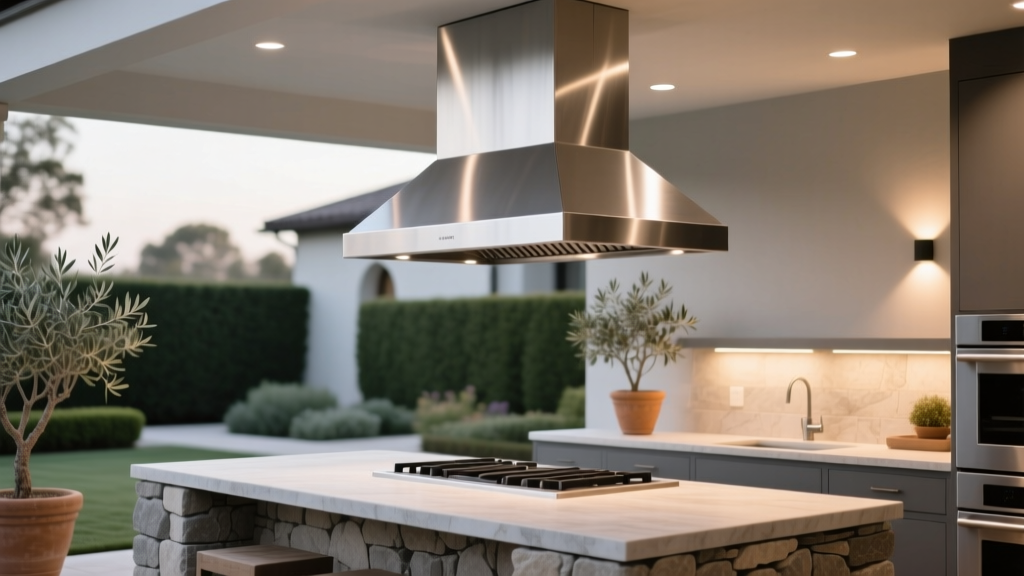
Outdoor Kitchen Vent Hood Sizing - The Decor Mag
An outdoor kitchen is one of the fastest ways to make a patio feel like a true destination—more dinners outside, more relaxed weekends, and a backyard that works as hard as your indoor space. But there’s one detail that quietly determines whether your outdoor living area feels luxurious or frustrating: the vent hood.
When an outdoor kitchen vent hood is sized correctly, smoke and grease are captured before they drift across your seating area, cling to cushions, or trigger a chorus of watery eyes. When it’s undersized (or placed wrong), you’ll find yourself constantly rearranging furniture, wiping down surfaces, and avoiding high-heat cooking—even if you invested in a premium grill.
This guide breaks down outdoor kitchen vent hood sizing in a practical, design-forward way. You’ll get clear sizing rules, real-world recommendations for materials and layouts, climate considerations for year-round patio living, and the common mistakes that derail outdoor kitchen plans.
Why Outdoor Kitchen Vent Hood Sizing Matters
Comfort: Keep the patio usable while you cook
Outdoor kitchens are often paired with lounge seating, dining sets, fire features, and garden beds. Without proper capture, smoke can migrate into:
- Dining and conversation areas (making the whole patio less inviting)
- Soft goods like outdoor rugs and cushions (grease odor lingers)
- Nearby doors and windows (smoke sneaks indoors)
Cleanliness: Protect finishes, cabinetry, and countertops
Grease aerosol is real—especially with high-BTU grills, griddles, and power burners. Over time, an undersized hood can leave a sticky film on:
- Stainless steel doors and drawer fronts
- Natural stone and concrete countertops
- Pergola beams or patio ceilings
- Lighting and ceiling fans
Safety and performance: Better airflow, less backdraft
Proper sizing supports steady airflow and helps prevent smoke from rolling out the front of the hood. It also reduces the chance of oily buildup in filters and ducting—an important maintenance and safety factor for year-round outdoor living.
Start Here: The Three Factors That Determine Hood Size
1) Cooking equipment width and depth
At a minimum, your outdoor vent hood should be wider than the cooking surface. For most outdoor kitchen designs, the sweet spot is:
- Width: hood should be 6 inches wider than the grill/griddle (3 inches extra on each side). For heavy smoke setups, aim for 12 inches wider.
- Depth: choose a deeper canopy if you do high-heat searing, use a griddle, or frequently open-lid grill. Depth improves “capture area.”
Example: For a 36-inch built-in grill, target a 42-inch hood (or 48-inch if you cook steaks often, use a power burner nearby, or host frequently).
2) Heat output (BTUs) and cooking style
BTUs matter more outdoors than most homeowners expect. Higher BTUs create stronger thermal plumes that can roll and drift with wind. A compact hood over a high-output grill is a classic recipe for smoke in the face.
- Light duty: typical 3-burner grill, moderate use
- Medium duty: 4–5 burner grill, regular entertaining
- Heavy duty: ceramic cooker, griddle, high-BTU grill, power burner, frequent searing
3) Your cover and enclosure: open-air vs. roofed patio
The more “room-like” the outdoor kitchen is (covered patio, pergola with a roof, screened porch), the more your hood behaves like an indoor system. In a wide-open setup, wind can disrupt capture—so you may need extra hood width, depth, or airflow.
Outdoor Vent Hood Sizing Rules of Thumb (Homeowner-Friendly)
Hood width
- Minimum: hood = grill width
- Recommended: hood = grill width + 6 inches
- Best for smoky cooking: hood = grill width + 12 inches
Hood depth
Depth is your secret weapon for smoke capture on a breezy patio. Look for:
- 24-inch depth: good baseline for many grills
- 27–30-inch depth: better for griddles, frequent searing, or windy locations
Mounting height (typical range)
Always confirm with your hood manufacturer, but most outdoor installations land in this zone:
- 30–36 inches above the cooking surface (common)
- Higher mounting often needs more CFM and a deeper canopy
CFM (airflow) targets
CFM recommendations vary by brand and whether your patio is roofed or fully open. Use these practical ranges as a starting point:
- 600–900 CFM: light to medium grilling under a covered patio
- 900–1200 CFM: larger grills, frequent entertaining, moderate wind exposure
- 1200–1500+ CFM: heavy smoke cooking (griddle + grill, high BTU, open-air exposure)
Design reality: More CFM isn’t automatically better. Excessive airflow can create turbulence and pull smoke past the hood. The goal is balanced capture: generous canopy + appropriate airflow + smart placement.
Layout and Design Approaches That Improve Venting
Place the grill where wind works for you
Outdoor kitchen layouts should consider prevailing winds, not just the “best view.” If smoke is constantly pushed out of the hood zone, even a strong blower can struggle.
- Best practice: position the cooking wall so winds blow from behind the cook toward the hood, not across the front.
- Avoid: placing the grill at a corner where wind funnels through like a tunnel.
Use a back wall or side panels as a wind break
Adding structure can dramatically improve hood performance and overall patio comfort.
- Half-walls: stone veneer or stucco pony walls protect seating and stabilize airflow.
- Side panels: pergola side screens, slatted wood walls, or tempered glass panels reduce cross-breezes.
- Green wind break: tall planters with dense evergreens create softer protection.
Choose a hood style that matches your architecture
- Stainless steel canopy hoods: clean, modern, easiest to wipe down
- Custom stucco/stone hood surrounds: high-end look; plan for access panels and heat clearance
- Insert liners: ideal for custom builds; select a liner sized correctly for your canopy
Materials That Hold Up Outdoors (And Look Great)
Vent hood materials
- 316 marine-grade stainless steel: best for coastal or humid climates (salt air resistance)
- 304 stainless steel: solid choice for most inland backyards
- Powder-coated metals: stylish, but ensure the coating is rated for heat and exterior UV exposure
Ducting and termination
- Rigid metal ducting: better airflow and easier cleaning than flexible duct
- Exterior-rated cap: choose a quality roof/wall cap with a damper to reduce pests and wind-driven backdraft
- Keep runs short: fewer elbows and shorter duct lengths help maintain performance
Countertops and surrounding finishes (smoke-friendly picks)
- Sintered stone: extremely durable, stain-resistant, great for full sun patios
- Concrete (sealed properly): modern look; plan for periodic resealing
- Granite: reliable and heat-tolerant; choose a finish that hides smudges
Plant Suggestions That Support an Outdoor Kitchen (Without Becoming a Mess)
Plants can help with wind buffering, soften hardscape, and create privacy for patio living—just avoid species that drop fruit, needles, or sticky sap over your grill zone.
Great choices for wind breaks and structure
- Clumping bamboo (non-invasive varieties) for fast screening in mild climates
- Podocarpus (warm climates) for a clean, hedge-like look
- Boxwood (cooler climates) for classic structure near outdoor kitchens
- Wax myrtle (coastal-friendly) for a resilient, airy screen
Herbs that thrive near a cooking space
- Rosemary: drought-tolerant, fragrant, great in raised planters
- Thyme: low, tidy, thrives in sunny spots
- Sage: silvery foliage looks sharp against stone and stainless
Placement tip: Keep herbs a few feet away from high-heat appliances so they don’t get scorched, and avoid planting directly under the hood discharge path.
Climate and Year-Round Outdoor Living Considerations
Coastal and high-humidity climates
- Choose 316 stainless when possible.
- Rinse exterior stainless periodically with fresh water and wipe dry.
- Use exterior-rated fasteners and avoid mixed metals that can cause corrosion.
Cold and freeze-thaw regions
- Confirm your vent hood is rated for low temps and outdoor use.
- Seal penetrations carefully to prevent moisture intrusion in the roof/ceiling.
- Plan a winter routine: clean filters, cover the hood, and check the cap for ice blockage.
Hot, sunny climates
- Prioritize shade: a covered patio, pergola with a solid roof, or a well-placed shade sail (clear heat distances).
- Choose UV-stable finishes for surrounding cabinetry and wall panels.
- Consider a slightly deeper hood to compensate for buoyant heat and breezes.
Budget Ranges: What to Expect
- $300–$900: basic outdoor-rated hoods (often limited size/CFM; best for light grilling)
- $900–$2,500: mid-range stainless hoods with stronger blowers, better lighting, baffle filters
- $2,500–$6,000+: premium outdoor hoods, marine-grade options, higher CFM, quieter operation, pro styling
- Installation add-ons: ducting, roof/wall penetration, electrical, and framing can add $500–$3,000+ depending on complexity
Value tip: If your outdoor kitchen includes a 36-inch+ grill, a griddle, or a power burner, a stronger hood is usually cheaper than redoing smoke-stained finishes later.
Common Mistakes to Avoid
- Choosing a hood that matches the grill width exactly: it looks tidy, but capture suffers. Add 6–12 inches when possible.
- Ignoring depth: shallow hoods struggle outdoors, especially in windy yards.
- Mounting too high: the higher the hood, the more smoke escapes. Stay within manufacturer guidance.
- Long duct runs with multiple elbows: this reduces airflow and increases noise.
- Skipping make-up air planning in semi-enclosed spaces: screened porches and covered patios can behave like indoor rooms; consult a pro if airflow feels “stalled.”
- Placing seating downwind: even great venting won’t fix a layout that funnels smoke straight into conversation areas.
- Buying indoor-only products: outdoor exposure demands outdoor-rated components, wiring, and finishes.
Practical Sizing Scenarios (Quick Reference)
Scenario A: 30-inch grill on a covered patio
- Hood width: 36 inches
- Depth: 24–27 inches
- CFM: 600–900
Scenario B: 36-inch grill + frequent searing, open-air island
- Hood width: 48 inches if space allows
- Depth: 27–30 inches
- CFM: 900–1200+ (depending on brand and ducting)
Scenario C: Grill + griddle + power burner under a pavilion
- Hood width: size to cover the full cooking line, often 48–60 inches
- Depth: 27–30 inches
- CFM: 1200–1500+ and professional duct planning
Maintenance Tips for a Cleaner, Better-Performing Hood
- Clean baffle filters regularly: monthly if you grill often; more during peak summer entertaining.
- Wipe stainless after big cookouts: warm soapy water, then dry; use stainless cleaner occasionally.
- Inspect the duct cap seasonally: remove nests, debris, or snow/ice buildup.
- Check lighting and wiring: use outdoor-rated bulbs and fixtures; replace seals as needed.
FAQ: Outdoor Kitchen Vent Hood Sizing
How much bigger should my outdoor vent hood be than the grill?
Aim for 6 inches wider than the grill for most outdoor kitchens. If you do a lot of high-heat cooking or your patio is windy, 12 inches wider delivers noticeably better capture.
Do I really need a vent hood for an outdoor kitchen?
If your grill sits under a roof, pergola with a solid top, pavilion, or near walls/ceilings, a hood is strongly recommended to protect finishes and keep the patio comfortable. For fully open-air setups, a hood is still helpful when the kitchen is close to seating or doors.
What CFM is best for an outdoor kitchen vent hood?
Many homeowners land between 900 and 1200 CFM for a typical built-in grill. Heavy-duty setups or open, windy locations often benefit from 1200–1500+ CFM, paired with a wide, deep hood and efficient ducting.
Is a deeper hood better than a stronger blower?
Often, yes. A deeper canopy improves capture and reduces smoke escaping into the patio. The best results come from the combination: good canopy size + appropriate CFM + smart placement.
What stainless steel grade should I choose for coastal backyards?
Choose 316 marine-grade stainless steel when possible. It resists corrosion far better than 304 in salty air and high humidity, helping your outdoor kitchen look sharp year-round.
Can I vent an outdoor hood out the back or side?
Sometimes, depending on the model and your layout. Keep duct runs short with minimal elbows, use rigid metal ducting, and confirm the manufacturer’s approved venting directions and clearances before framing.
Next Steps: Build a Patio Kitchen That Feels Effortless
Start by measuring your grill width, deciding how open or enclosed your outdoor kitchen zone will be, and choosing a hood that’s wider (and ideally deeper) than your cooking surface. Then fine-tune the layout—place seating upwind, add a wind break with walls or tall planters, and select durable outdoor materials like 316 stainless, sintered stone, and sealed concrete for a clean, low-maintenance finish through every season.
If you’re designing from scratch, bring your hood specs into the plan early—before the pergola, ceiling, or duct route is locked in. That one decision can make your entire outdoor living space feel more comfortable, more usable, and more “resort at home” every weekend of the year.
For more outdoor kitchen ideas, patio layouts, landscaping inspiration, and year-round backyard upgrades, explore the latest guides at thedecormag.com.
More Articles
 How to Create a Keyhole Garden - The Decor Mag
 Outdoor Pergola Beam Spacing Guide - The Decor Mag
 How to Create a Bird Friendly Garden - The Decor Mag
 Best Outdoor Dining Table Materials - The Decor Mag
 Practical and Aging-Resilient Outdoor Living: Designing Spaces That Serve Today and Endure Tomorrow
 How to Design a Fern Garden - The Decor Mag
 Outdoor Pizza Oven Installation Guide - The Decor Mag
 Outdoor Living Style Buying Guide: Matching Aesthetics, Function, and Climate for Lasting Impact
 How to Create a Medicinal Herb Garden - The Decor Mag
 How to Design a Cottage Garden - The Decor Mag